

Not what you're looking for? Return to the ReadyNAS Not Accessible FAQ.
This document discusses steps to resolve the problem where your ReadyNAS is not accessible after one of the following actions:
- The ReadyNAS has moved physical location to another LAN.
- The network switch or router where the ReadyNAS is installed has changed thus the ReadyNAS is now installed on a LAN with a different IP subnet.
- There is an IP conflict between the IP address of your ReadyNAS and another network device
Whether it is due to a physical move, or the replacement of a network device it is possible your ReadyNAS may be assigned an IP address which is not matching the new IP subnet leading to the ReadyNAS appearing offline. This can occur when there is a static IP address set on the ReadyNAS Network Interface Card (NIC) and it does not match the subnet on the new LAN. Another reason for this behaviour is the ReadyNAS is set to receive an IP address from DHCP, however there is no DHCP server setup in the network. Follow the below steps to regain access to the ReadyNAS.
Note in this document the term new network relates to:
- a new physical network/location
- a new network device which led to a change in IP subnet, for example a router or network switch has been replaced.
1. If there is a DHCP server running in the new network and your ReadyNAS has a second NIC, swap the Ethernet cable from the current connected NIC to the second NIC. The second NIC may still use the default settings of DHCP client and obtain an IP address in the correct subnet from the DHCP server. This will help the issue where the ReadyNAS has a static IP address set in the old networks IP subnet.
If using the second NIC has not resolved the issue proceed to Step 2.
2. If your model ReadyNAS has an LCD panel you can check the IP address there.
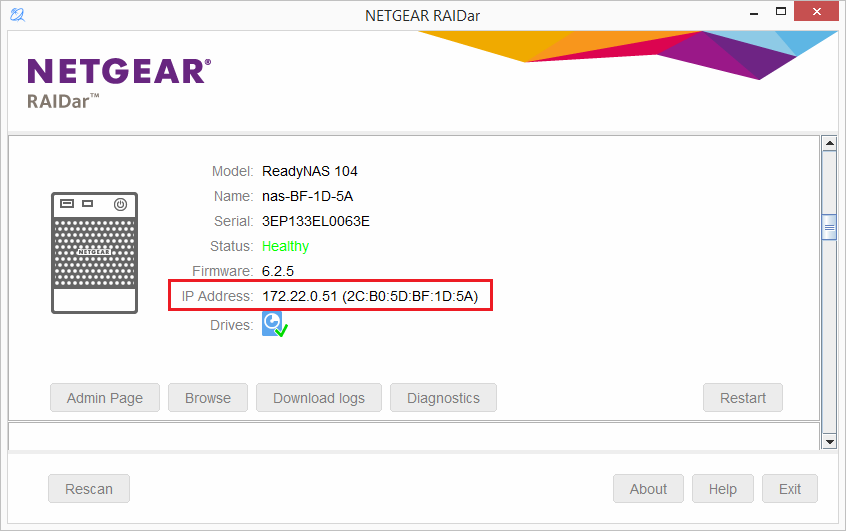
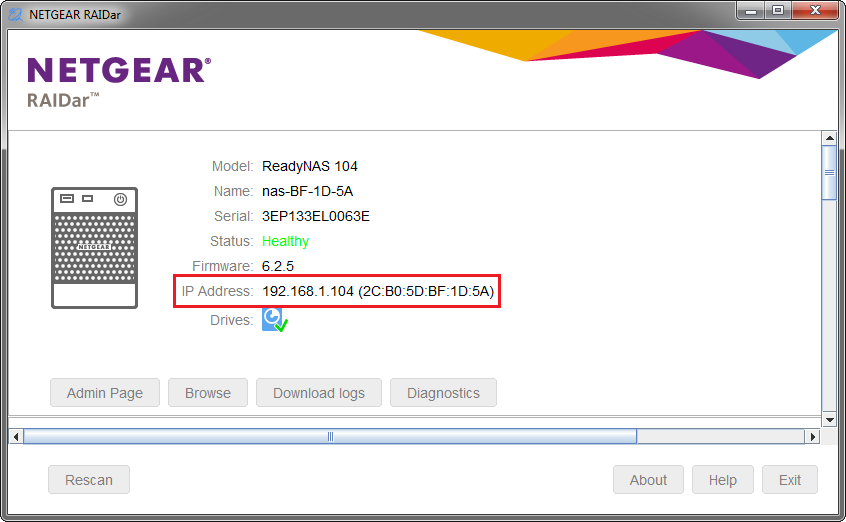
Find the IP address of your ReadyNAS by downloading and running RAIDar.
If your ReadyNAS is not found by RAIDar please proceed to Step 8 and perform an OS re-install.
See the IP address of the ReadyNAS in the RAIDar utility
3. Make a note of the existing IP address range that is used on the LAN. This can be done from a Windows PC which is currently working on the LAN.
Open a command prompt, Click Start > type CMD.
In CMD type ipconfig and hit enter.
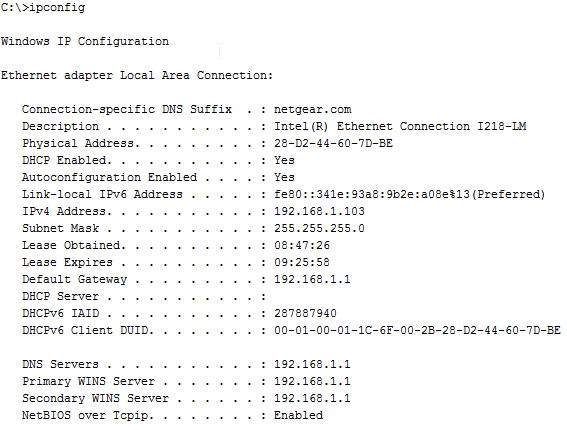
In this example the existing network subnet is 192.168.1.0/24, a host IP address in the range of 192.168.1.2 through to 192.168.1.254 will allow a host access to the network.
The network subnet in your network can be different, the values used here are just for example and will not work in every network.
4. Take an Ethernet cable and connect it directly from the Network Interface Card (NIC) of your PC into a Ethernet port on your ReadyNAS.
Run RAIDar to find the IP address assigned to the ReadyNAS.
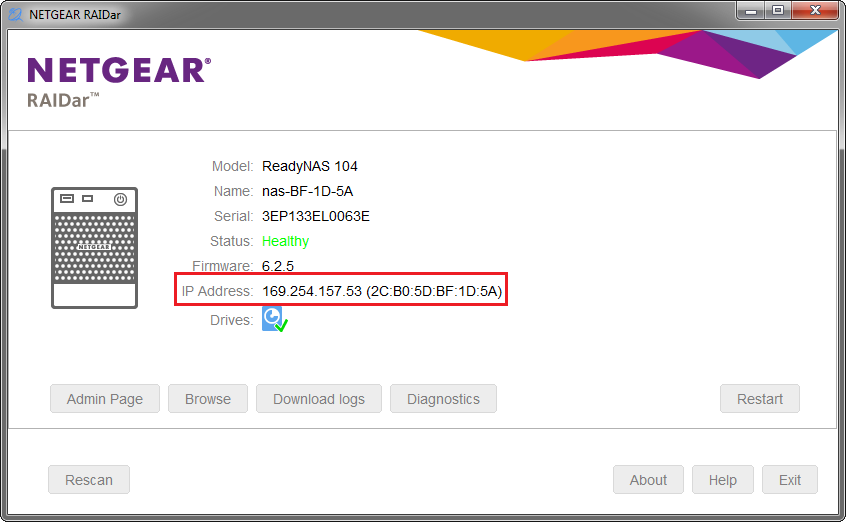
5. Change the IP address on the PC to match the IP subnet currently assigned to the ReadyNAS.
In Windows open Conrol Panel > Network and Sharing Center. Click Change adapter settings.
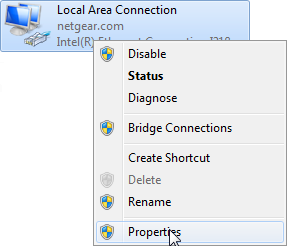
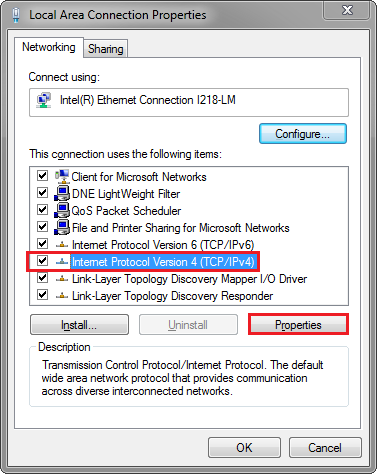
Right click on the connected NIC and click Properties.
Select Internet Protocol Version 4 (TCP/IPv4) > click Properties.
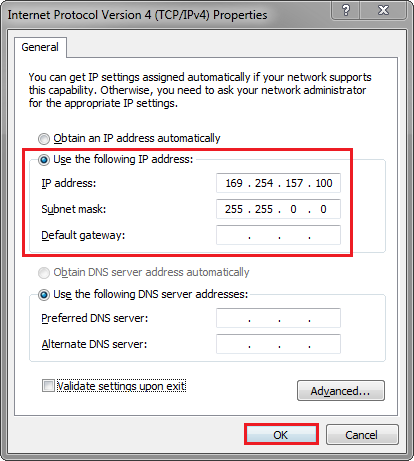
Select Use the following IP address > Enter an IP address in the range of 169.254.0.0 to 169.254.255.255 > click Ok twice.
Now in your browser enter the URL https://ReadyNAS_IP_address/admin - where ReadyNAS_IP_address is the IP Address seen in RAIDar
You are prompted to login to the Admin page. The default login credentials;
user: admin
password: password
6. Change the IP address on the ReadyNAS to match the existing LAN subnet.
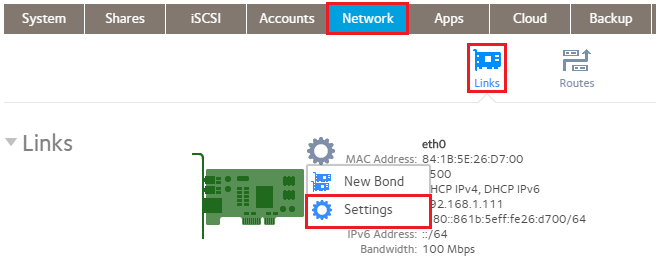
Go to Network > Links. Click on the gear icon beside the connected NIC and then click Settings
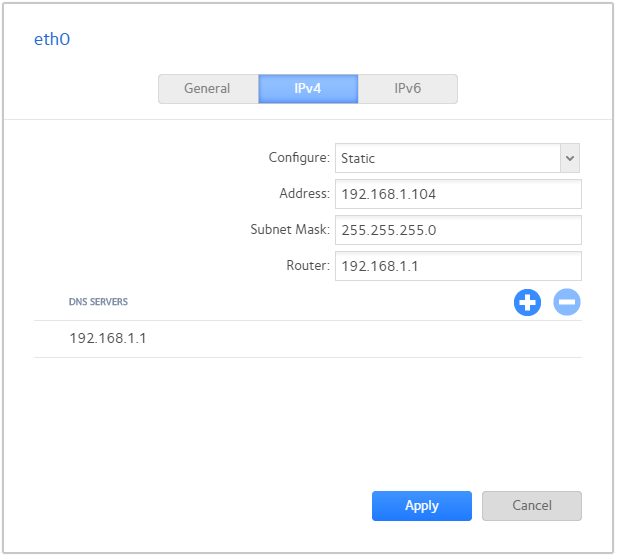
Go to the IPv4 tab.
Change the Configue drop down menu to Static.
Enter an Address, Subnet Mask and Router to match the existing network (seen in Step 1).
Note: You must ensure you do not use an IP address that is already in use on a device in your network.
Click the plus icon beside DNS SERVERS (DNS is required for the ReadyNAS to access Internet Services such as ReadyCLOUD and ReadyNAS Replicate).
Enter the IP address of the DNS server and click Add. You can find your DNS server address from the output in Step 1.
Click Apply.
Access to the Admin page is lost until the ReadyNAS is re-connected into the LAN, run RAIDar to find the ReadyNAS and confirm the new IP address is assigned.
7. Disconnect the PC NIC from the ReadyNAS Ethernet port.
Connect both the PC and ReadyNAS into the LAN.
The ReadyNAS is now accessible on the IP address assigned in Step 6.
In order for your PC to work on the LAN please repeat Step 5, however set the IP address accordingly to match the existing LAN subnet in use.
8. OS re-install:
If after all of the above steps you still cannot access the ReadyNAS or if at the beginning of this process it is not found in RAIDar proceed to perform an OS re-install.
Before performing an OS re-install it is important to know the administrator password and network settings will be reset to their default settings.
The default settings for the admin account;
username: admin
password: password
The default network settings are set to DHCP client, the ReadyNAS will look to a DHCP server to obtain an IP address. Use the RAIDar
The data volume is not affected by performing an OS re-install.
The steps to perform an OS re-install are dependant on the model of your ReadyNAS. OS re-install is initiated from the Boot Menu, please follow the steps to perform an OS re-install from the Boot Menu: ReadyNAS - Accessing the Boot Menu