

ReadyDATA storage systems and ReadyDATA software are end-of-life.
Before enabling jumbo frames, we recommend that you read the article Guidance on the use of jumbo frames for more information on how jumbo frames work and if it is suitable for your deployment.
On a ReadyDATA system, you must first set jumbo frames on the physical interface (ethX) and then set jumbo frames on the virtual interface (vnicX).
To enable jumbo frames on a ReadyDATA system:
- On the ReadyDATA GUI, select the Network tab.
- Click the gear icon next to the interface, to set jumbo frames on the physical interface.
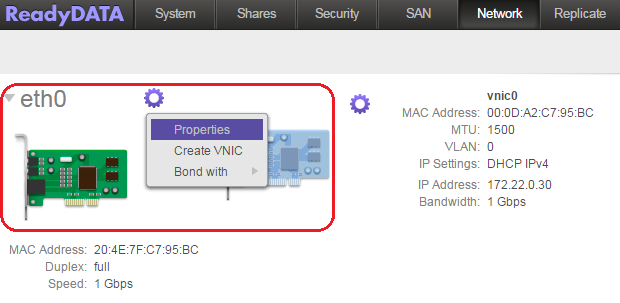
- Click the Properties item. The example is changing the interface eth0.
The settings window for that interface displays.
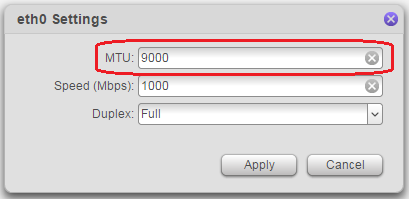
- Enter the required MTU value.
- Press the Apply button.
- Click the gear icon next to the vnic.
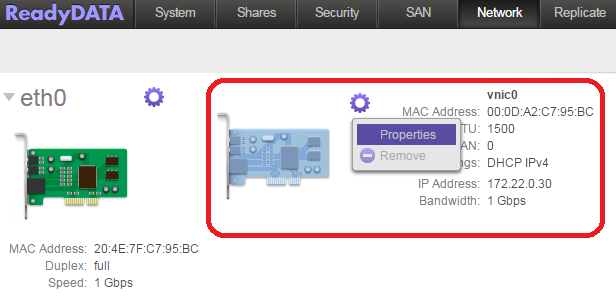
- Click the Properties item. The example is changing the virtual interface vnic0.
The settings windows for that vnic appears.
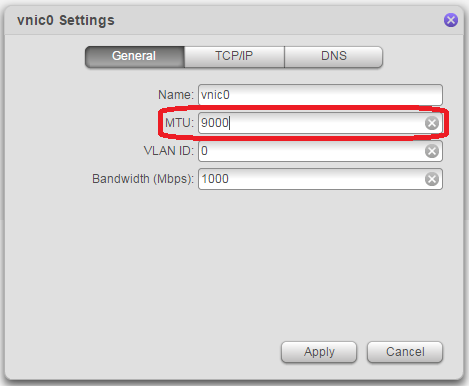
- Increase the MTU to the required value
Typically, the vnic MTU must be set to the same value as the physical interface MTU. - Press the Apply button.
Note: The MTU specified here (9000 in this example) does not include the frame header. Therefore, when configuring jumbo frames on a connected NETGEAR switch, the switch port MTU must be set to a slightly higher value (since this value does include the header).
For fully managed switches, see How do I configure jumbo frames on a fully managed switch using the main user interface or CLI commands?
For Smart Switches, see How do I configure jumbo frames on a Smart Switch?