

The following figure and procedure show how you can use the CLI on a NETGEAR fully managed switch to configure a DHCP L3 relay.
For information about configuring a DHCP server and DHCP pools afterwards, see How do I configure a DHCP server using CLI commands on my fully managed switch? or How do I configure a DHCP server using the device UI on my fully managed switch?
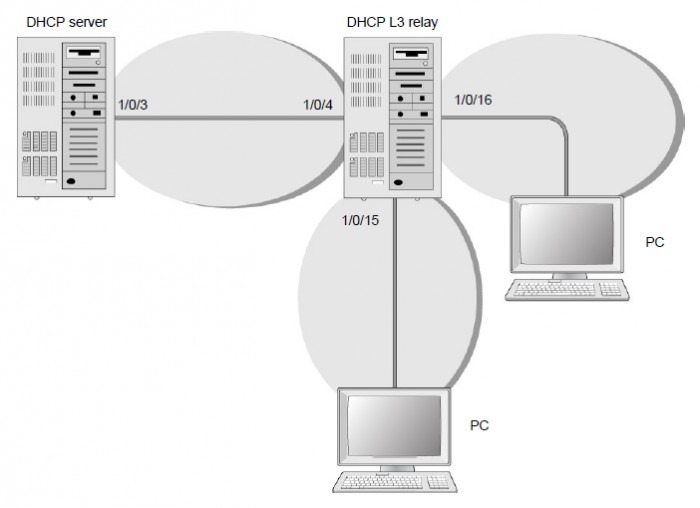
To use the CLI to configure a DHCP L3 relay:
- Enable routing on the switch.
(Netgear Switch) #config

	(Netgear Switch) (Config)#ip routing

	(Netgear Switch) (Config)#
- Create a routing interface and enable RIP on the interface.
(Netgear Switch) (Config)#

	(Netgear Switch) (Config)#interface 1/0/4

	(Netgear Switch) (Interface 1/0/4)#routing

	(Netgear Switch) (Interface 1/0/4)#ip address 10.100.1.2 255.255.255.0

	(Netgear Switch) (Interface 1/0/4)#ip rip

	(Netgear Switch) (Interface 1/0/4)#exit
- Create a routing interface that connects to the client.
(Netgear Switch) (Config)#

	(Netgear Switch) (Config)#interface 1/0/16

	(Netgear Switch) (Interface 1/0/16)#routing

	(Netgear Switch) (Interface 1/0/16)#ip address 10.200.2.1 255.255.255.0

	(Netgear Switch) (Interface 1/0/16)#exit
- Configure the DHCP server IP address and enable the DHCP L3 relay.
(Netgear Switch) (Config)#ip helper-address 10.100.1.1 dhcp

	(Netgear Switch) (Config)#ip helper enable
- Redistribute 10.200.1.0/24 and 10.200.2.0/24 to the RIP such that RIP advertises this route to the DHCP server.
(Netgear Switch) (Config)#

	(Netgear Switch) (Config)#router rip

	(Netgear Switch) (Config-router)#redistribute connected

	(Netgear Switch) (Config-router)#exit
For information about using the device UI, see How do I configure a DHCP L3 relay using the device UI on my fully managed switch?
Last Updated:07/07/2025
|
Article ID: 21989