

This document discusses troubleshooting steps when your ReadyNAS is failing to boot up. Some of these troubleshooting steps are dependant on whether your ReadyNAS is new and if the disks inside the ReadyNAS have been used in the past or not. Data loss can occur if these steps are not followed correctly.
Not what you're looking for? Return to the ReadyNAS Not Accessible FAQ.
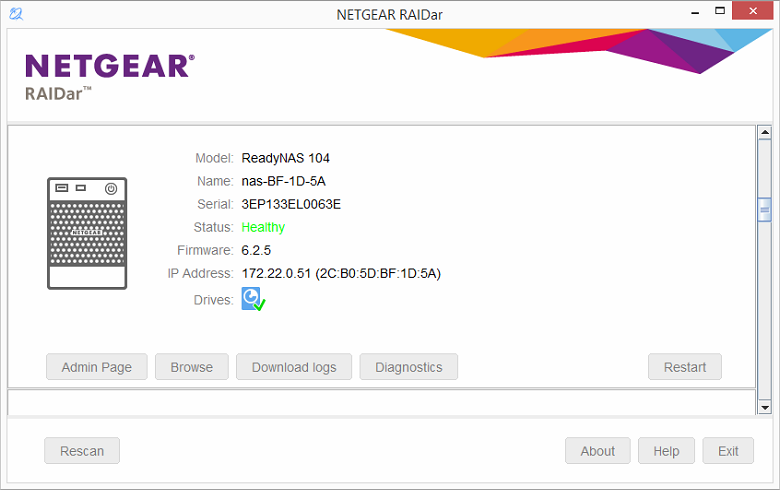
To check the Status of the ReadyNAS download, install and run RAIDar
My new ReadyNAS will not boot:
If you have purchased a new ReadyNAS and it does not boot up, check the status of the ReadyNAS using RAIDar.
Example error messages you may see are ERR Used Disks, Corrupt root, Could not mount Root RAID.
These messages will also be seen on the LCD panel should your Model readyNAS have one.
ERR Used Disks:
If you see the error message ERR Used Disks then the ReadyNAS detects existing partitions on these disks and will not use these disks. It is most likely these disks have been used elsewhere in a PC or even another NAS and the ReadyNAS is taking a preventative measure in not deleting the data on these disks.
If you are not concerned with the data or partitions on these disks and wish to continue to wipe the disks and use them in the ReadyNAS proceed to perform a Factory default from the Boot Menu
Corrupt root, Could not mount Root RAID:
If you receive either of these error messages it can be due to a corrupt OS installation on the root partition or if you have inserted disks into your ReadyNAS from a different ReadyNAS model.
If you are not concerned with the data or partitions on these disks and wish to continue to wipe the disks and use them in the ReadyNAS proceed to perform a Factory default from the Boot Menu
If you have moved disks from an older ReadyNAS model and wish to access the data on those disks then this is not always possible without Technical Support intervention. Please proceed to contact Technical Support for further instructions
Disk Test:
If your new ReadyNAS is not booting it could be due to a failing or failed disk. The ReadyNAS has an inbuilt Disk Test function to check all inserted disks inside the ReadyNAS. It can take 4 or more hours and any problems are reported in RAIDar.
The Disk Test is initiated from the Boot Menu
If RAIDar displays that a disk has failed you should:
1. Power down the ReadyNAS
2. Remove the failed disk
3. Try to boot the ReadyNAS again.
If you suspect a disk is failing or failed - due to the disk LED not lighting - but it is not reported in RAIDar you could test the disk individually using the disk vendor tools.
1. Power down the NAS
2. Remove the suspect disk
3. Check the serial label for the Make and model
4. Go to the Vendor website and download their disk test tools
5. Follow the disk vendor instructions for testing the disk.
My previously working ReadyNAS is no longer booting:
If your ReadyNAS was previously working OK but it no longer boots then the steps to proceed are different. As you most likely have data stored within the ReadyNAS it is important not to take an action which may erase your data.
ERR Used Disks:
If you see ERR Used Disks error message on a ReadyNAS which was preiously working, and you have not removed or changed the disks then please proceed to contact Technical Support for further instructions.
Corrupt root, Could not mount Root RAID:
It is possible the root OS partition has found an error and is preventing the ReadyNAS from booting. Perform an OS re-install.
Before performing an OS re-install it is important to know the administrator password and network settings will be reset to their default settings.
The default settings for the admin account;
username: admin
password: password
The default network settings are set to DHCP client, the ReadyNAS will look to a DHCP server to obtain an IP address. If you can no longer access your ReadyNAS by IP address after the OS re-install use the RAIDar
The data volume is not affected by performing an OS re-install.
The steps to perform an OS re-install are dependant on the model of your ReadyNAS. Please follow the OS re-install steps carefully for your model: Boot Menu
After performing an OS re-install use RAIDar to find the ReadyNAS. If the ReadyNAS is still failing to boot please proceed to contact Technical Support for further instructions.
Disk Test:
A failed or failing disk can prevent the ReadyNAS from booting up as the ReadyNAS will attempt to protect the data volume from becoming damaged. If you suspect a disk is failing or you have previously been alerted that a disk was failed or failing you can perform a Disk Test to check each disk inside the ReadyNAS
The ReadyNAS has an inbuilt Disk Test function to check all inserted disks inside the ReadyNAS. It can take 4 or more hours and any problems are reported in RAIDar.
The Disk Test is initiated from the Boot Menu
Important before proceeding: If more than one disk is reporting failed or failing please contact Technical Support for further instructions. The data volumes running on ReadyNAS use RAID technology and this is dependant on all disks working. Depending on the RAID type in use on your ReadyNAS removing more than one disk can lead to data loss.
If RAIDar displays that one disk has failed you should:
1. Power down the ReadyNAS
2. Remove the failed disk
3. Try to boot the ReadyNAS again.
Should your ReadyNAS is still failing to boot please contact Technical Support.