

To configure the Active Directory settings:
1. Select System > Settings > Security.
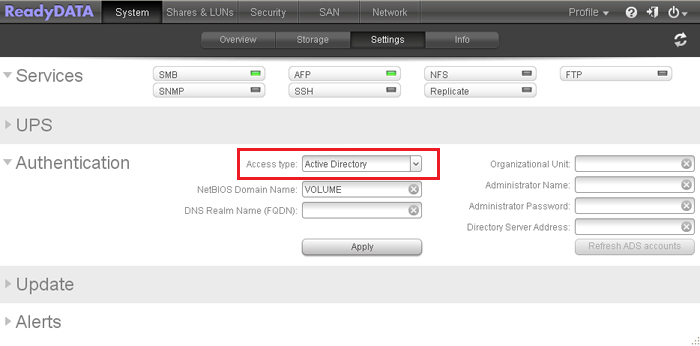
2. From the Access type drop-down list, select Active Directory.
The name of the Workgroup Name field changes to NetBIOS Domain Name, and all fields become available. The following figure shows only the upper part of the Settings screen with the Active Directory settings:
3. Configure the settings as explained in the following table:
|
Item |
Description |
|
NetBIOS Domain Name |
Enter the name of the NetBIOS domain, for example, company. Normally, the NetBIOS domain name is identical to the prefix of the DNS realm name.
|
|
DNS Realm Name |
Enter the DNS realm name, which is normally the DNS domain name or the Active Directory domain name, for example, company.community.com. In this example, company is the prefix, and community is the suffix of the name. |
|
Included trusted domains |
Select this check box to enable the ReadyDATA to automatically include the users of domains that have a trust relationship with the primary domain.
|
|
Organizational Unit |
Specify the location of the computer account of the ReadyDATA in the Active Directory. By default, the computer account for the ReadyDATA is placed in the users organizational unit (OU), but you can use the Organizational Unit field to specify another OU.
|
|
Administrator Name |
Enter the name of the administrator of the Active Directory. |
|
Administrator Password |
Enter the password of the administrator of the Active Directory. |
|
Server address |
Enter the IP address of the Active Directory server. |
4. Click Apply.
To refresh the user accounts from the Active Directory server, click Refresh ADS accounts.