

The router web interface provides a classic way to set up your NETGEAR router with most WiFi or Ethernet-enabled devices that have a web browser.
If you have a smartphone, we recommend using the Nighthawk app to install your NETGEAR router. If you are installing an Orbi WiFi System, we recommend using the Orbi app. For more information, see the following articles:
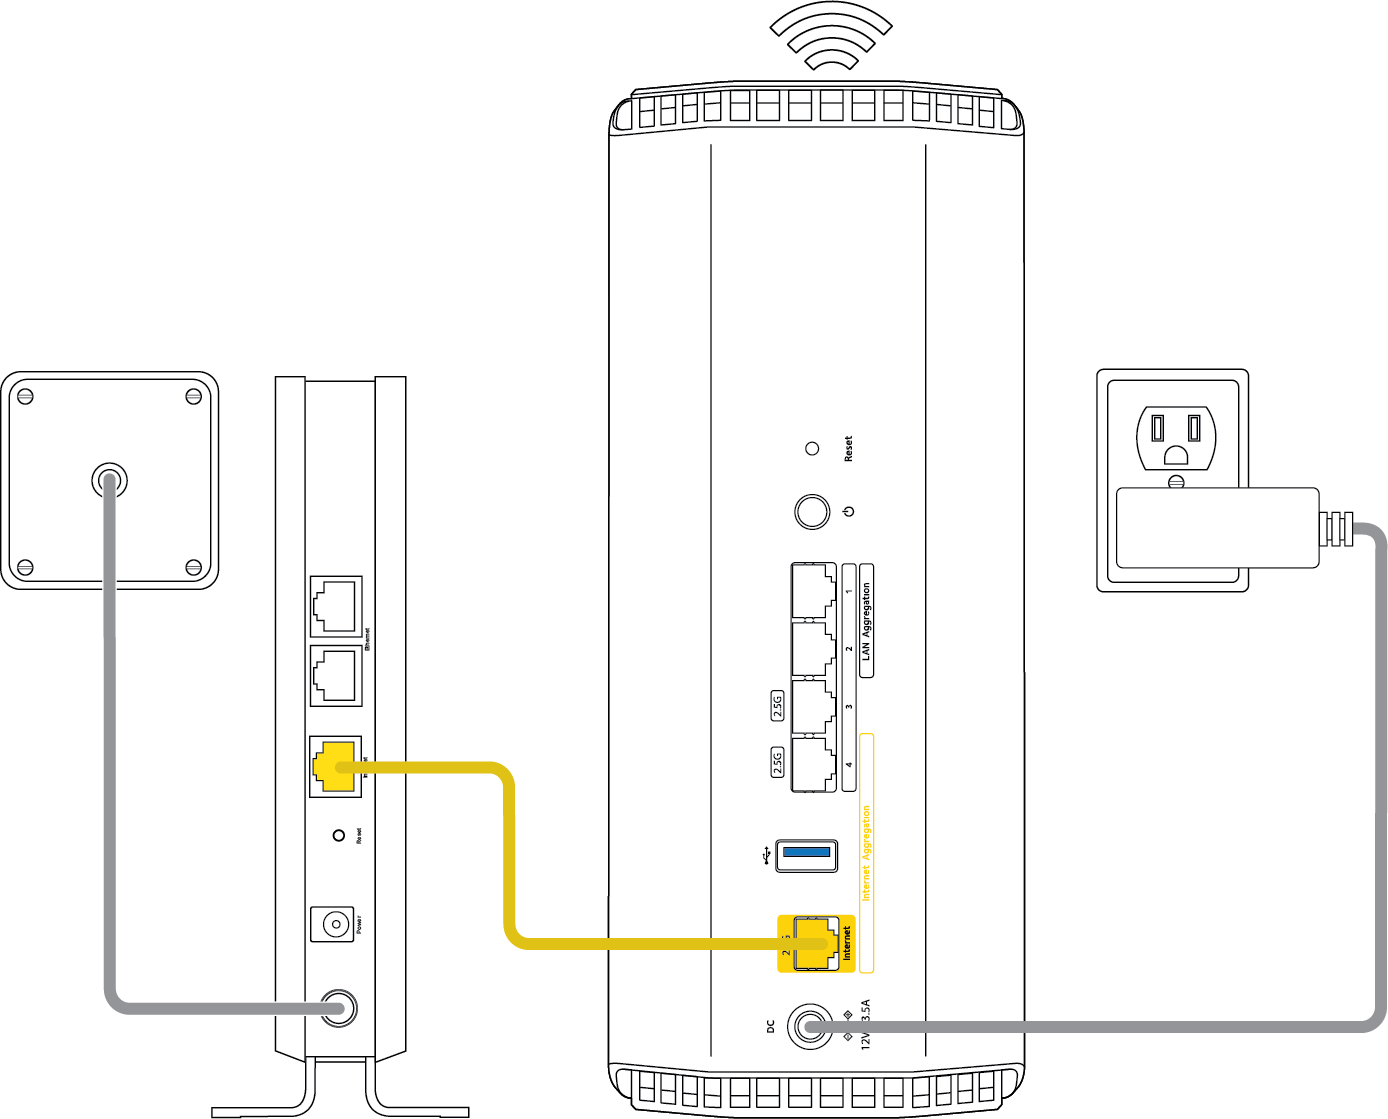
To install your NETGEAR router from the web interface:
- Connect the Internet port on your router to your modem or incoming Ethernet line.
If external antennas were provided with your router, attach them now. - Connect the power adapter to your router and plug it in.
If your router has a power button, press and power it on. - Look on the router QR code label for your default WiFi network name (SSID) and network key (password).
This information is also printed on a permanent label on the back or bottom of your router. - From your setup device, open your WiFi network connection manager and enter the SSID and password shown on the router QR code label.
Your setup device connects to your router's WiFi network.
Note: Instead of connecting via WiFi, you can also connect an Ethernet cable to a setup device like a laptop or desktop computer using one of the router's LAN ports. - Open a web browser and enter routerlogin.net.
The page that displays recommends that you use the Nighthawk app. However, the current procedure describes how you can use the router web interface. - Scroll down and click the If you don’t have a compatible smartphone, click here link.
A welcome page displays. - Follow the onscreen instructions.
The router detects your Internet settings. - Follow the onscreen instructions to complete the installation process.
Your router is set up.
For more information:
- How do I recover my NETGEAR admin password using the password recovery feature?
- I’m having trouble accessing my NETGEAR router; what do I do?
- How do I change the admin password on my NETGEAR router?
Last Updated:04/14/2026
|
Article ID: 22697