

The Nighthawk app is the easiest way to set up your NETGEAR router. You can also use the Nighthawk app to view the devices on your network, run speed tests, and manage your WiFi settings. To see if your product supports the Nighthawk app, see Which products support the NETGEAR Nighthawk app?.
If you prefer to install your router using a computer, or if your product is not supported, you can also set up your router from the web interface. For more information, see Installing your NETGEAR router from the web interface.
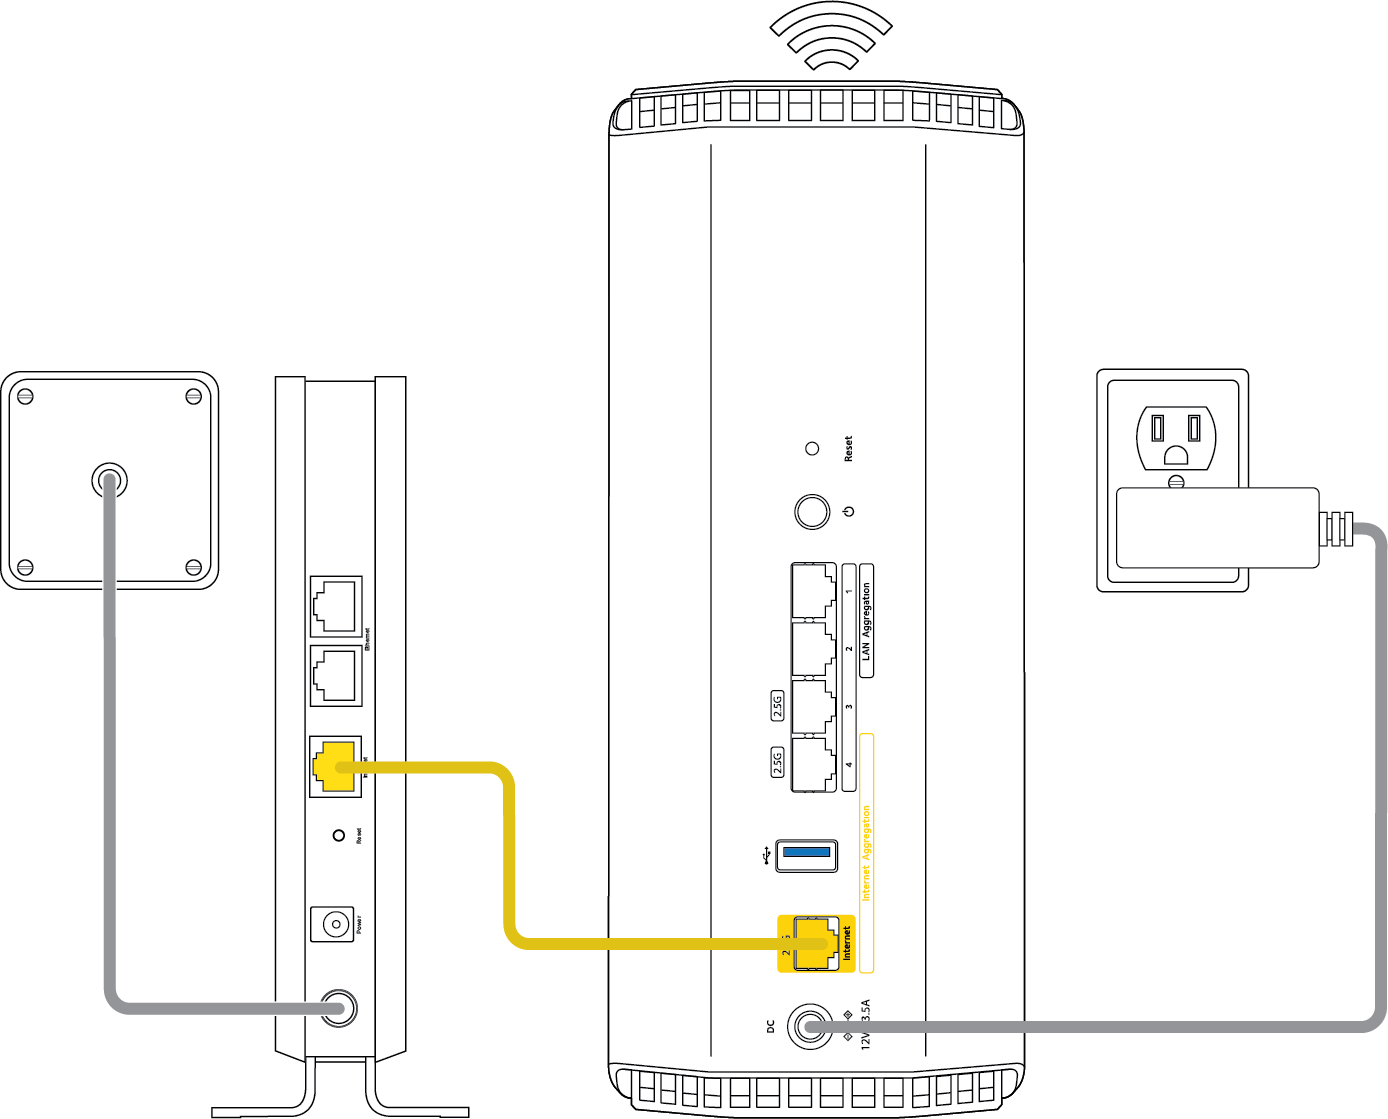
To set up and install your router using the NETGEAR Nighthawk app:
- Download the Nighthawk app.
- Connect the Internet port on your router to your modem or incoming Ethernet line.
If external antennas were provided with your router, attach them now. - Connect the power adapter to your router and plug it in.
If your router has a power button, press and power it on. - Look on the router QR code label for your default WiFi network name (SSID) and network key (password). You'll need to scan this in the Nighthawk app.
This information is also printed on a permanent label on the back or bottom of your router. - Launch the NETGEAR Nighthawk app on your mobile device.
- Follow the instructions in the Nighthawk app to install your router and connect to the Internet.
Note: If you encounter any errors while attempting to connect to your router, see the following articles for troubleshooting information:
- How do I turn off mobile data on my smartphone if I get an error during installation?
- I’m getting an Internet not connected error when I try to install my NETGEAR router using the Nighthawk app; what do I do?
- I’m getting a router not found error when I try to install my NETGEAR router using the Nighthawk app; what do I do?
- How do I power cycle my home network?
For a visual guide to installing your router, see the following video:
For more information:
- I’m having trouble installing my NETGEAR router; what do I do?
- How do I update my Nighthawk router’s firmware using the Nighthawk app?
- How do I change my WiFi network name and password using the Nighthawk app?
Last Updated:04/14/2026
|
Article ID: 119