

This article explains how to configure Windows Server Backup to back up to an iSCSI LUN on a ReadyNAS OS 6 system.
Not what you're looking for? Return to the ReadyNAS Backup FAQ
This article applies to the following Windows Server operating systems:
- Windows Server 2012 R2
- Windows Server 2012
- Windows Server 2008 R2
- Windows Server 2008
Preparing the ReadyNAS
- Create a LUN group
- Configure the LUN group security
- Create a LUN.
- Our recommendations are to:
- Create a Thick LUN
- Do not enable Bit Rot Protection.
- Disable snapshots.
- Disable sync writes.
- If only using this ReadyNAS to backup Windows Server, the size of the LUN can be as large as you'd like, but try not to exceed 85% of the total volume space. Failure to acknowledge this recommendation could cause fragmentation or other unintentional complications that could be unrecoverable.
- Our recommendations are to:
- Connect to the LUN
Setup Windows Server Backup
- On the Windows Server, go to Administrative Tools and open Windows Server Backup.
- In the Actions menu, click on Backup Schedule. This opens the Backup Schedule Wizard. Press Next:

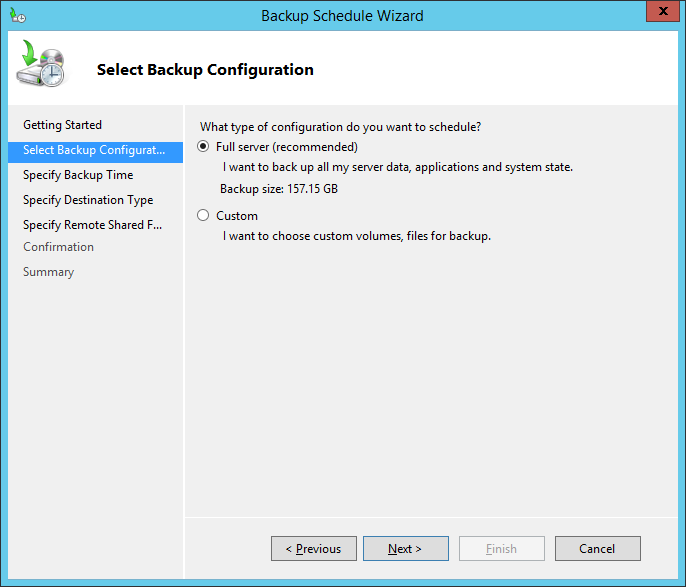
- Select Full server (recommended) or Custom depending on your requirements and press Next:
- Specify the backup time and schedule as needed and press Next:

- Select Backup to a hard disk that is dedicated for backups and press Next:

- Click Show All Available Disks:

- The iSCSI LUN on the ReadyNAS will be listed. Select it and press OK.

- Click Next:

- Confirm that you want to format and use the disk by clicking Yes:

- At the confirmation screen, review the configuration and press Finish:

- The iSCSI LUN will be formatted and prepared to accept backups:

The backup is now successfully configured.

Last Updated:07/08/2025
|
Article ID: 28432