

The following procedure uses the Microsoft iSCSI Software Initiator, which is freely available online and is integrated in Windows 7.
Note: If you use an operating system other than Windows, the steps are different, but the basic tasks remain the same.
To set up initiator access:
1. Open the iSCSI initiator and click the Configuration tab.
2. Copy the default name from the Initiator Name field.

3. Create an iSCSi initiator on the ReadyNAS.
a. On the ReadyNAS local admin page, select iSCSI.
The iSCSI screen displays.
b. Click the Properties button to the right of the LUN group.
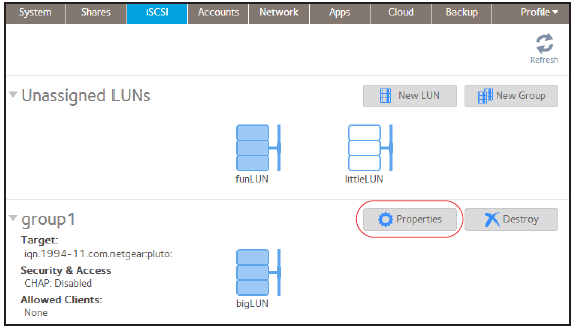
A pop-up screen displays.
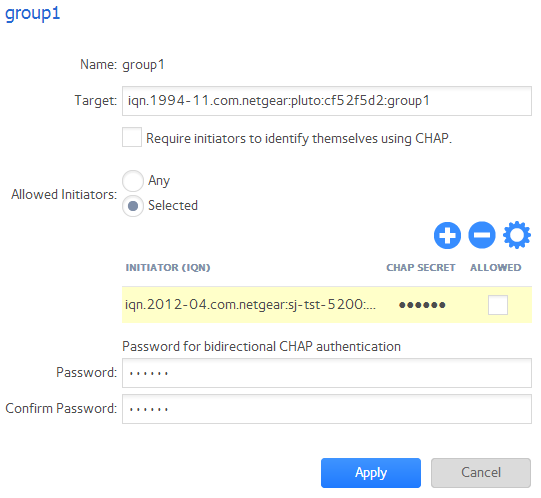
c. Select the Selected radio button next to Allowed Initiators.
d. Click the + icon ( ) to the right of the list of initiators.
The Create Initiator pop-up screen displays.
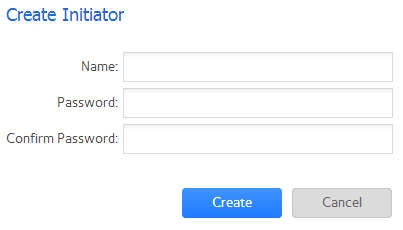
e. Paste the default iSCSI initiator name in the Name field.
The default iSCSI initiator name is the name that you copied in Step 2.
f. (Optional) Enter a CHAP password that is between 12 and 16 characters long and confirm the CHAP password.
g. Click the Create button.
The IQN is added to the table on the LUN group properties pop-up screen.
4. Configure the LUN group settings.
Note: If you are connecting to a LUN group using a Windows device, make sure that you leave the Password for bidirectional CHAP authentication fields blank.
a. In the Allowed column of the initiator table, select the check box next to the initiator that you created in Step 3.
The initiator is allowed to access the LUN group.
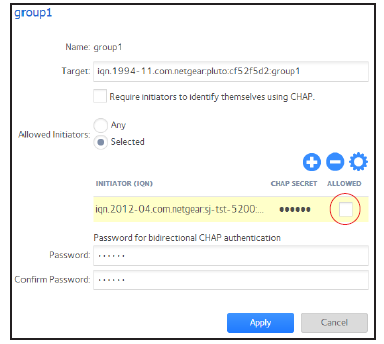
b. (Optional) Select the Require initiators to identify themselves using CHAP check box.
Selecting this check box allows only authenticated initiators to access LUNs in the LUN group. To gain access, initiators must provide the CHAP password that you created in Step 3.
c. Click the Apply button.
The new LUN group properties take effect immediately.
5. On the iSCSI Initiator Properties screen, click the Targets tab.
6. In the Target field, enter the IP address of the ReadyNAS.

7. Click the Quick Connect button.
8. Authenticate the connection.
If you selected the Require initiators to identify themselves using CHAP check box in Step 4, you must provide the CHAP password.
a. In the pop-up screen that displays, click the Advanced button.

The Advanced Settings screen displays.

b. Select the Enable CHAP log on check box.
c. In the Target secret field, enter the CHAP password that you created in Step 3.
d. Click the OK button on the Advanced Settings screen.
e. Click the OK button on the Connect To Target screen.
The initiator connects to the LUN group on the ReadyNAS.
The initiator has access to the LUN group, but you cannot view the LUNs in the LUN group using Windows Explorer until you initialize and format the LUNs.
For information about initializing and formatting LUNs, see the How do I initialize and format LUNs on my ReadyNAS OS 6 storage system? support article.