

You may setup SSL VPN in 4 easy steps. This is how to configure manually. If your firewall comes with SSL VPN Wizard, click here.
- Create a Portal
- Create the Domain
- Add users to the Domain
- Create a route in SSL VPN client
Creating A Portal
- Open web browser and point the URL to your firewall.
- Navigate to VPN > SSL VPN.
- Click "Portal Layouts"
- Click "Add"
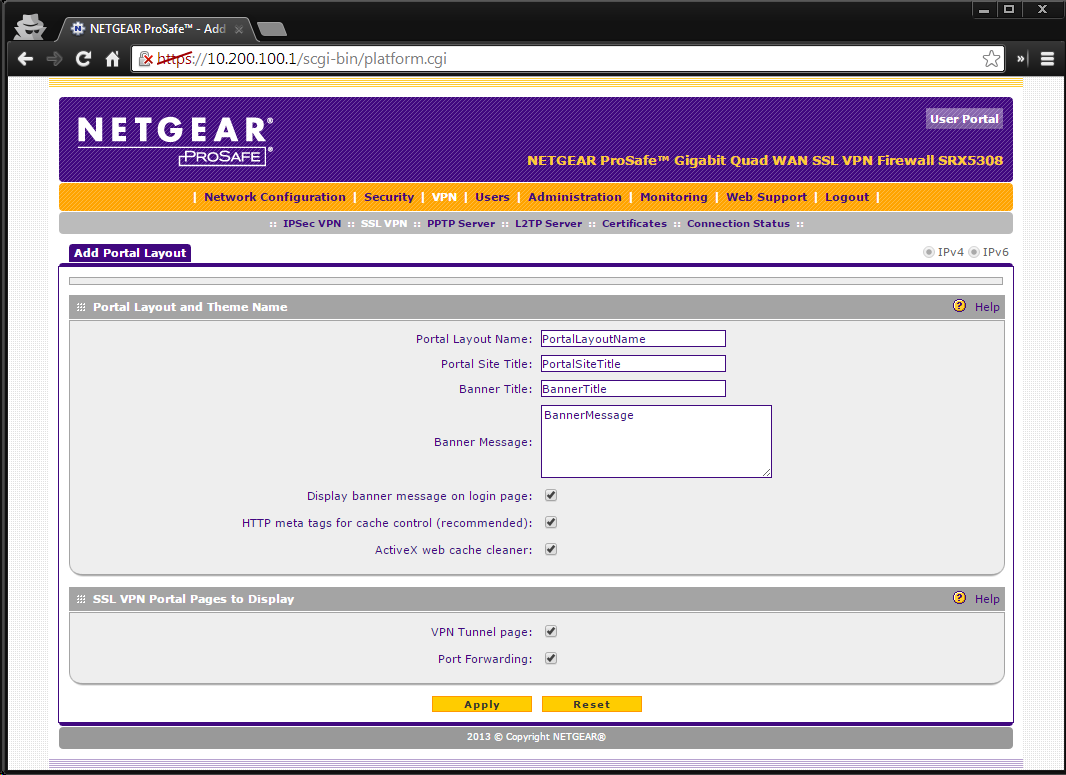
- Fill out the following:
- Portal Layout and Theme Name: The Portal Layout Name should have a descriptive name for the portal that is being configured. It will be used as part of the path for the SSL portal URL. Only alphanumeric characters, hyphens ('-'), and underscore ('_') characters are allowed for this field.
- The Portal Site Title is the web browser window title for the portal.
- The Banner Title is the banner title to display to users before logging into the portal, along with the message text in Banner Message.
- To show the banner title and banner message, enable the Display banner message on login page checkbox.
- The HTTP meta tags for cache control (recommended) checkbox is a security feature that should be enabled to ensure client's browsers do not cache SSL VPN portal pages and other web content. The HTTP meta tags cache control directives prevent out-of-date web pages and data from being stored on the client's web browser cache.
- Enable the ActiveX web cache cleaner checkbox to load an ActiveX cache control whenever users login to this SSL VPN portal.
- SSL VPN Portal Pages to Display.
- Select the SSL VPN Portal pages that users can access in this portal by enabling one or more of the following pages:
- VPN Tunnel
- Port Forwarding
- Any pages that are not selected will not be visible from the SSL VPN portal navigation menu; however users can still access the hidden pages unless SSL VPN access policies are created to prevent access to these pages.
Create the Domain
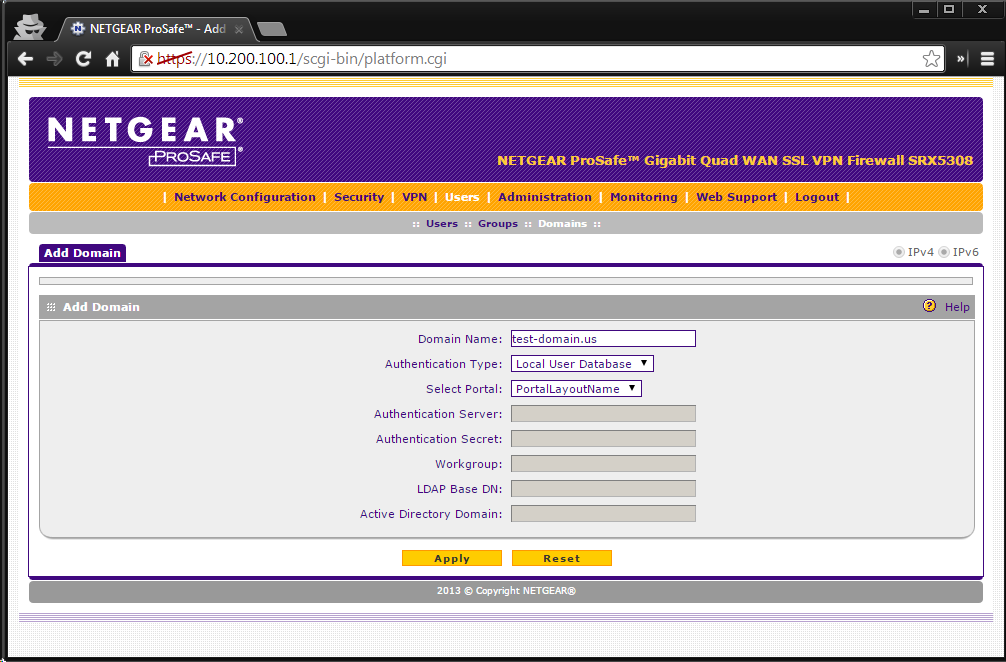
- Click on Users > Domains
- Click Add
- Choose a domain name for the connection.
- This walkthrough sets up users on the firewall and not through a third party authentication mechanism.
- Select the portal you just created in the previous step.
- Click Apply to save the domain
Add Users to the Domain
- Click on Users > Users
- Click Add...
- Select a user name for authentication
- Select SSL VPN User type (defaults here)
- Select group should be the domain you created in previous step
- Select a password and confirm it
- Optionally, change the idle timeout
- Click Apply to save

Setup a Route for SSL VPN client
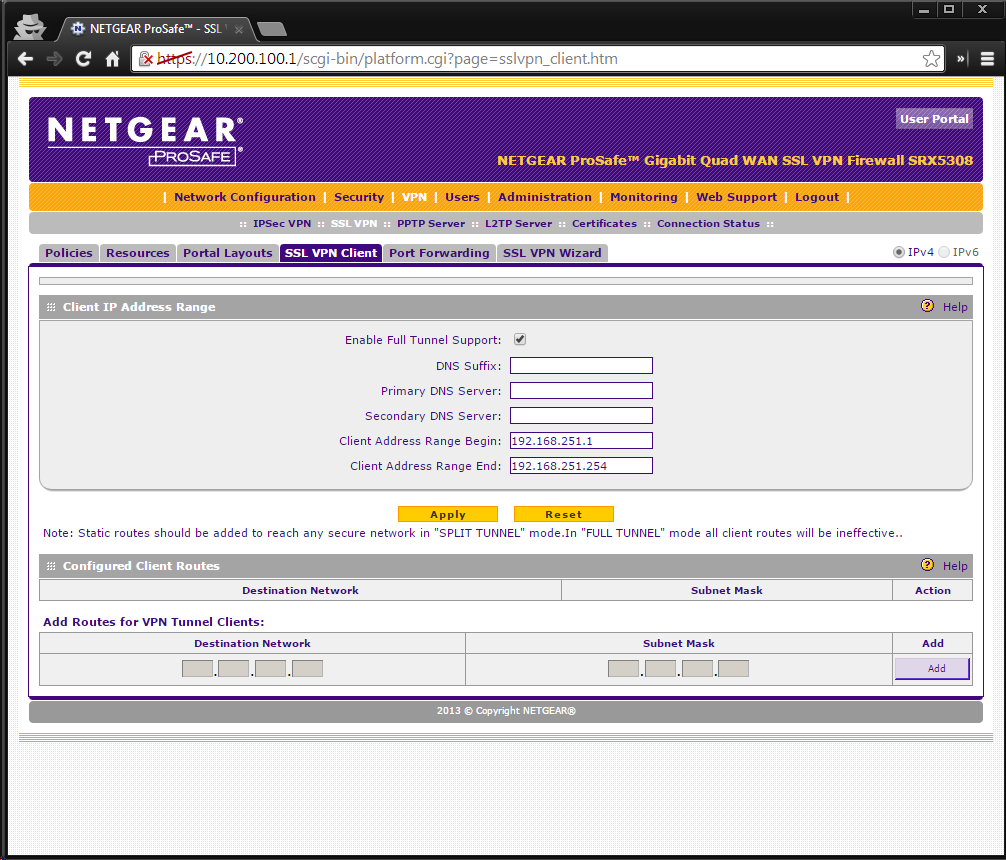
- Navigate to VPN > SSL VPN > SSL VPN Client
- Specify if you want Full Tunnel Support (will force all traffic through SSL VPN).
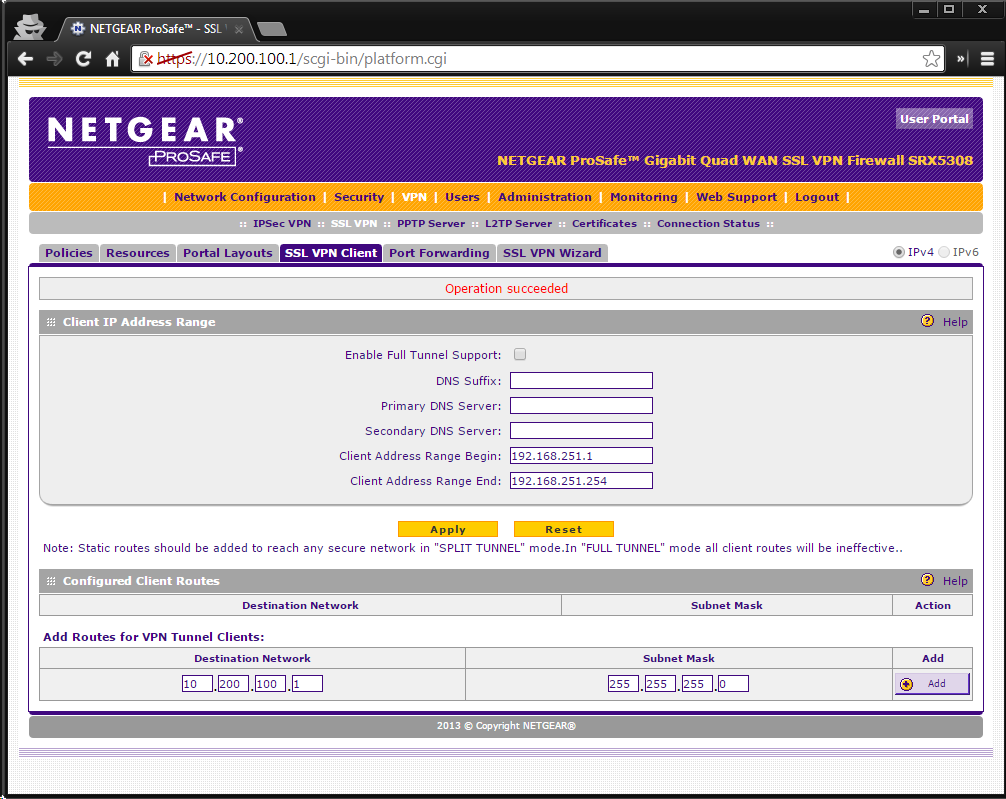
- If you want to run split tunnel, you'll need to configure the destination address and subnet mask at the bottom of the page
- Specify the DNS suffix to add to the end of the client
- Add any applicable DNS servers for SSL VPN Clients to use when connecting
- Specify the IP range you'd like to assign to your SSL VPN Clients. This must be unique and not duplicates in another config
- Click Apply when ready
Full Tunnel Support
Split Tunnel Support
Now you may provide end users of the SSL VPN the Portal Layout path for accessing the Web GUI.

Last Updated:10/17/2025
|
Article ID: 26758