

If you want to add more than two access points with evaluation licenses make sure you install the licenses before attempting discovery. For more information about adding licenses, see WC7600 Adding Licenses.
For the easiest discovery process, make sure the WC7600 is in the same layer 2 subnet as the access points that you want to add. This setup is used in the following procedure.
To discover access points:
- Select Configuration > System > IP/VLAN.
- Configure the IP details to match your network.

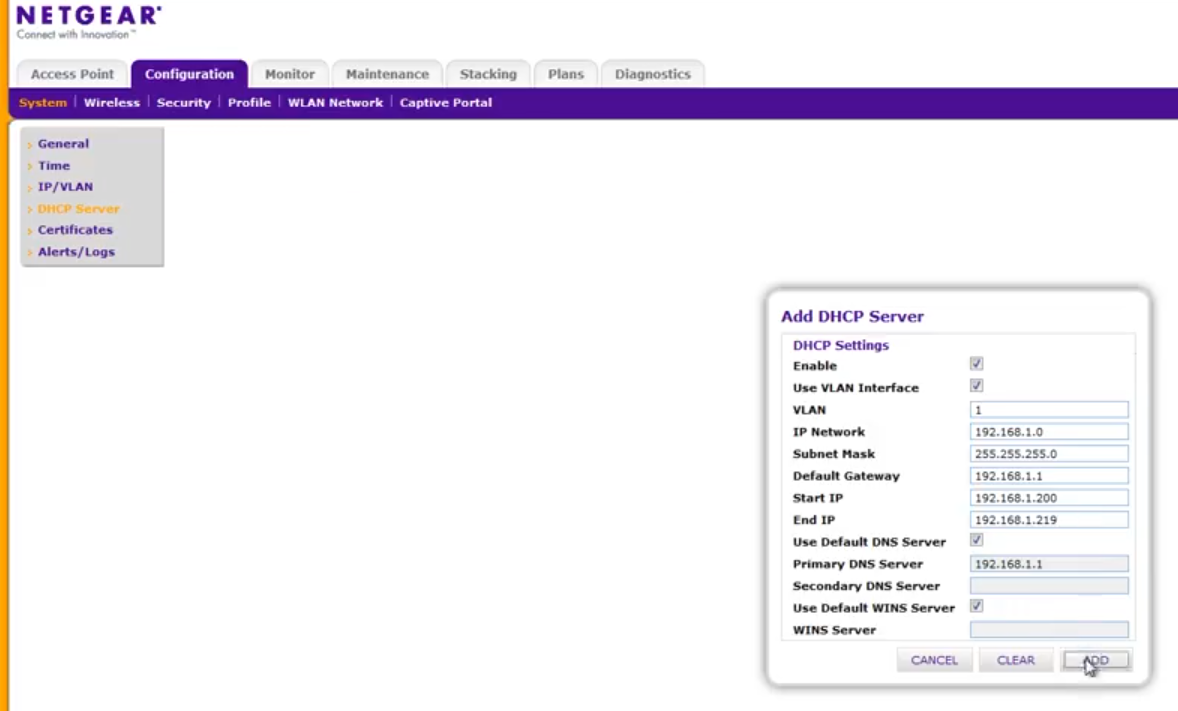
- Select Configuration > System > DHCP Server.
- Click the ADD button.
- Configure the DHCP settings for your server.
If you have a NETGEAR managed switch, follow these instructions here. If you have a Windows DHCP server, follow the instructions here.
Your DHCP server must support option 43 to announce the controller IP address to the access points. You can use the built-in DHCP server on the controller if your DHCP server does not support option 43. - Click the ADD button.
- Select Access Point > Discovery > Discovery Wizard.
- Select the first option and press the Next button.
A list of the access points on the network displays within a few seconds.
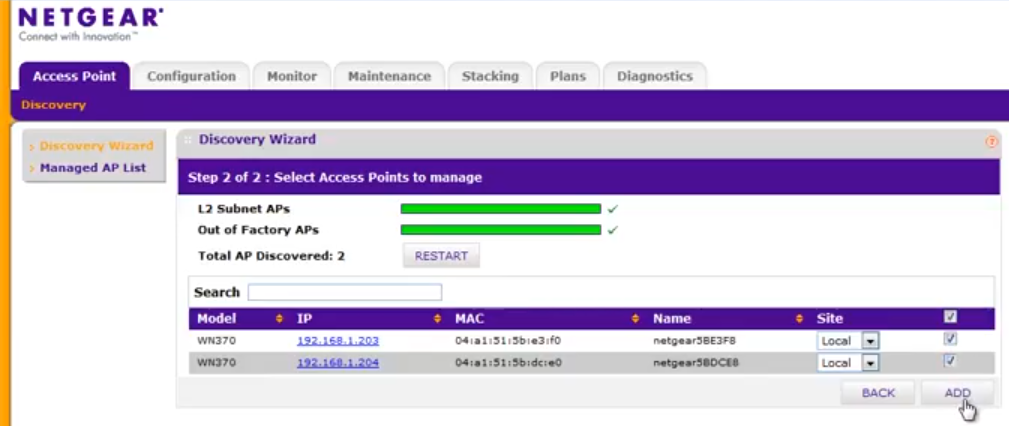
- Select the access points that you want to add to your network and press the Add button.
- Wait for the access points to be added.
Tthe status shows Connected when done. Depending on the access point, this might take a few minutes.
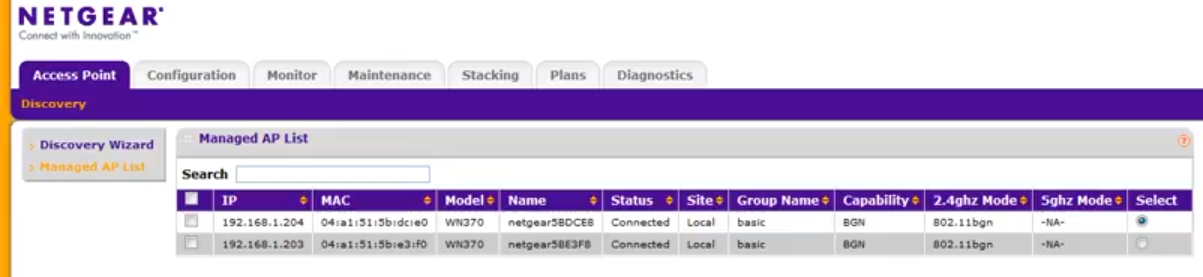
The access points are connected and ready for configuration.
For more information on wireless configuration, see WC7600 Creating a Wireless Security Profile.
Last Updated:07/07/2025
|
Article ID: 25071