

For information about 802.1X, see the “What is 802.1X?" article.
The following procedure describes how to configure the smart switch so that 802.1X-based authentication is required on ports g1–g8.
These ports are available to visitors and must be authenticated before granting access to the network. An external RADIUS server performs the authentication. When a visitor is successfully authenticated, traffic is automatically assigned to the guest VLAN. This example assumes that a VLAN exists with a VLAN ID of 150 and VLAN name of Guest.
To configure 802.1X-based authentication on ports g1–g8:
- Open a web browser.
- In the browser address field, type the IP address of the smart switch.
The default IP address is 192.168.0.239 and the default subnet mask is 255.255.255.0.
You are prompted to enter your password.
- Type the password in the Password field.
The default password is password. Passwords are case-sensitive.
- Click the Login button.
After the system authenticates you, the System Information screen displays.
- Select Security > Port Authentication > Advanced > Port Authentication.
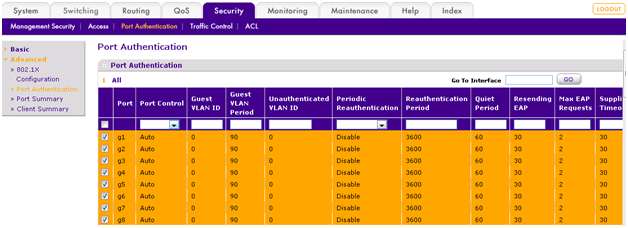
However, on our new Switch interfaces, it will look like this:

- On the Port Authentication screen, select ports g1 through g8.
- Configure the following policy attributes for port g1 through g8:
- From the Port Control menu, select Auto.
The selection from the Port Control for all other ports for which authentication is not required must be Authorized. When the selection is Authorized, the port is placed unconditionally in a force-authorized state and does not require any authentication. When the selection is Unauthorized, the authenticator port access entity (PAE) unconditionally sets the controlled port to unauthorized and blocks access to any connected device.
- In the Guest VLAN ID field, enter 150, which is the ID for the guest VLAN.
- Click the Apply button.
The settings are saved.
- Select Security > Port Authentication > Advanced > 802.1X Configuration.

However, on our new Switch interfaces, it will look like this:

- Next to Port Based Authentication State, select the Enable radio button.
NOTE: This procedure uses the default values for the 801.1X configuration settings, but you can configure several additional settings. For example, you might select the EAPOL Flood Mode radio button to allow EAPoL frames to be forwarded when 802.1X is disabled on the device.
- Click the Apply button.
The settings are saved.
- Select Security >Management Security>RADIUS>Server Configuration.
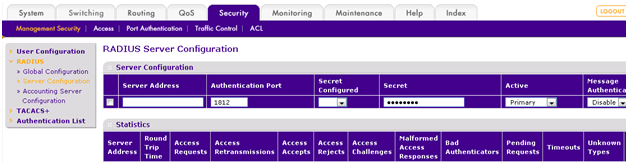
However, on our new Switch interfaces, it will look like this:
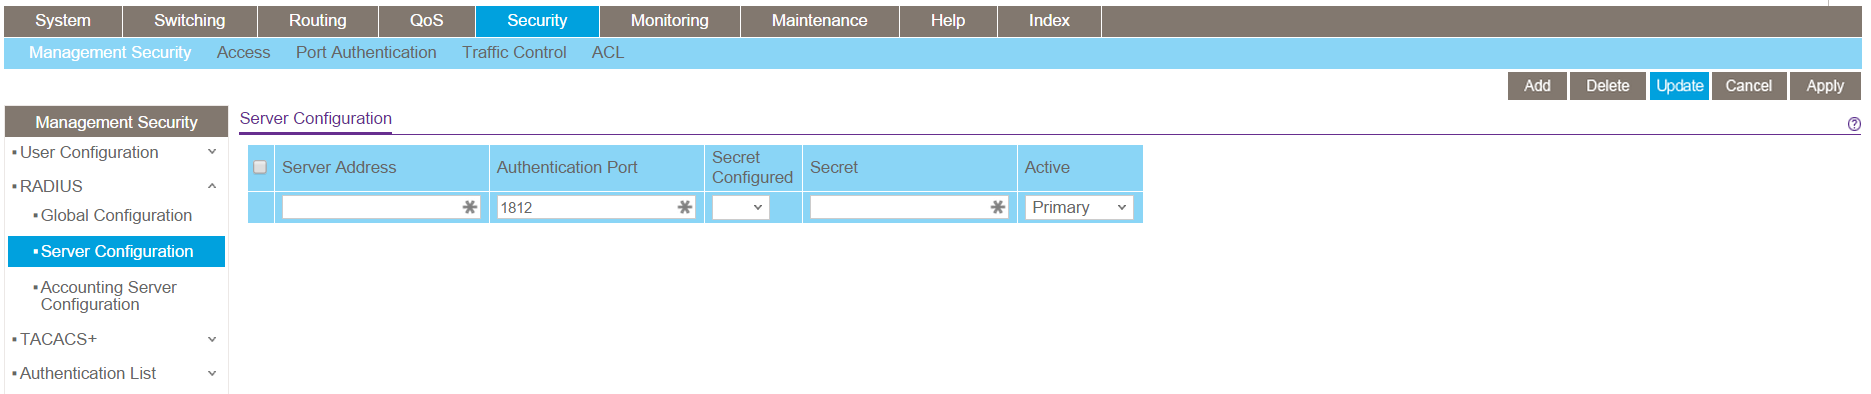
- Configure a RADIUS server with the following settings:
- Server Address. 192.168.10.23.
- Secret Configured. Yes.
- Secret. secret123.
- Active. Primary.
- Click the Add button.
- Select Security > Management Security >Authentication List>HTTP Authentication List.
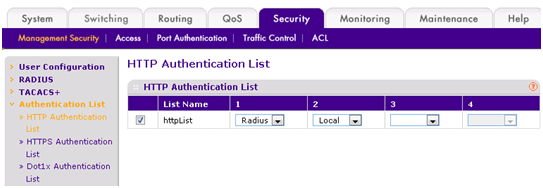
However, on our new Switch interfaces, it will look like this:

- From the menu in the 1 column, select Radius.
- Click the Apply button.
The RADIUS server is now designated as the first authentication method.
802.1X-based port security is now enabled on the switch. Hosts that connect to portsg1–g8 are now prompted to provide credentials for 802.1X-based authentication. The switch passes the credentials to the RADIUS server.