

Objective: To create a PPTP VPN tunnel from Windows client to the NETGEAR firewall.
Background: Point-to-Point Tunneling Protocol (PPTP) builds on the functionality of the Point-to-Point protocol (PPP) . It provides remote access that can be tunneled though the Internet, to a destination site or computer. PPTP encapsulates PPP packets using generic routing encapsulation (GRE) protocol, which gives PPTP the flexibility of handling protocols other than IP.
Equipment: There is an SRX5308router used, in this example (192.168.1.0/24 ), and a remote PPTP client.
NOTE: This document assumes that your ProSAFE/ProSECURE router is either receiving a public IP address on the WAN interface, or that the gateway device(s) have the correct port forwarding or DMZ configured, so that TCPport1723 is open for the ProSAFE/ProSECURE routers. These gateway devices must also allow VPN pass-through.
The values used in this scenario are for this example only; certain values will depend on the setup of your network.
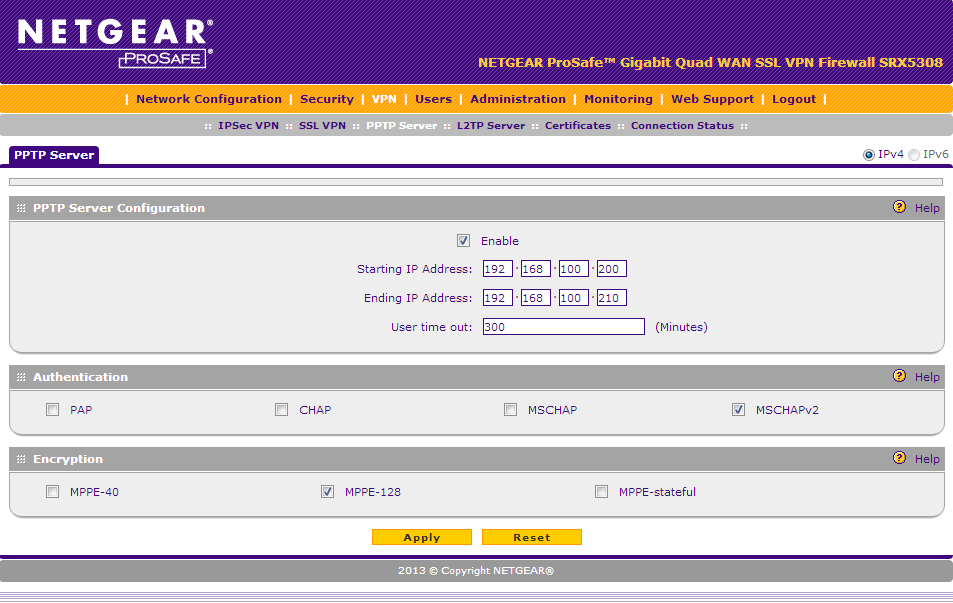
Setup SRX5308 as PPTP Server
- Click VPN
- Click PPTP Server
- Select Enable, and enter Starting to Ending IP range.
- Select an authentication method: MSCHAPv2 in this example.
- Select and Encryption type: MPPE-128 in this example.
Note: IP range must be different to existing VLAN range in use.
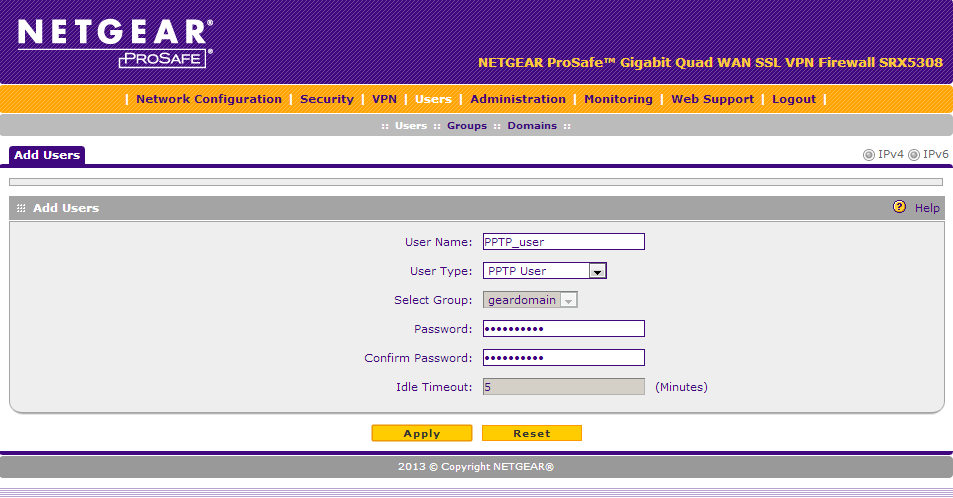
Create PPTP users
- Click Users.
- Click Add.
- Choose PPTP user.
- Enter username and password accordingly.
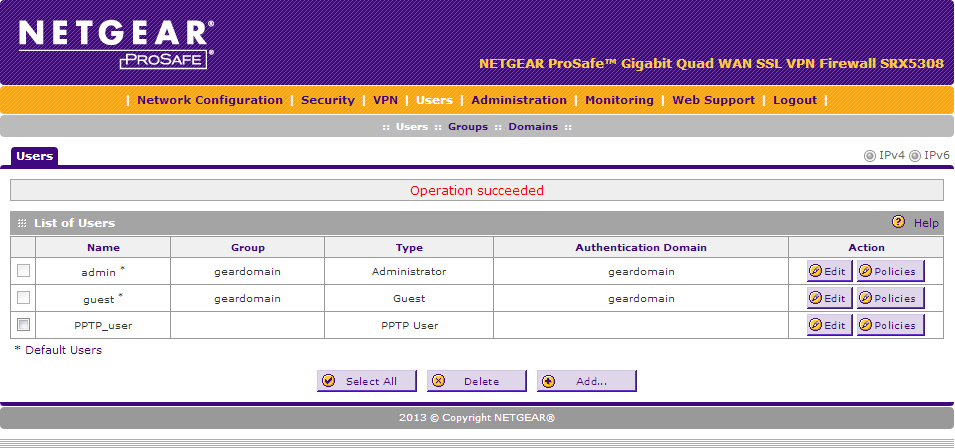
Once the account is created it will show in the list of Users in section Users >> Users.
Create PPTP VPN on Windows client (using Windows 7 for this example)
- Click Start – Control Panel – Network and Sharing Center.
- Click Set up a new connection or network
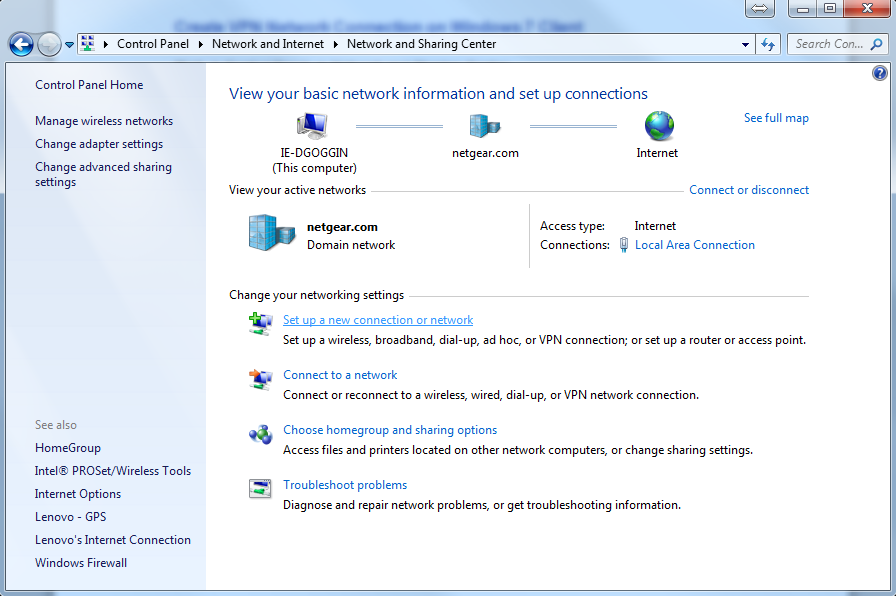
- Next, Click Connect to a workplace.

- Next, Click Use my Internet connection (VPN).
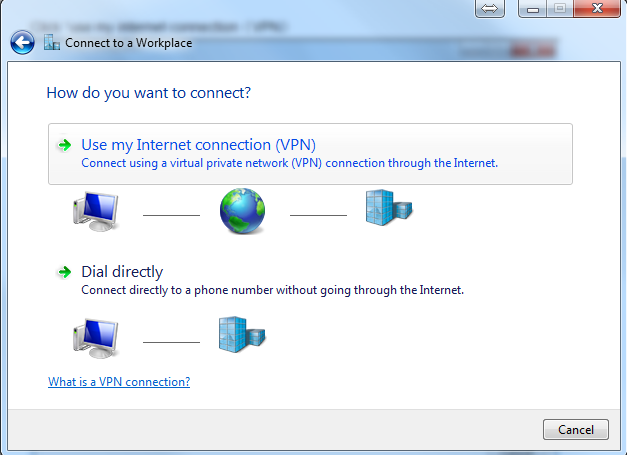
- Enter the WAN IP address or Internet name for the SRX5308.
- Name the new Connection.
- Select “Don’t connect now; just set it up so I can connect later”

- Enter the Username and Password, created in Step Create PPTP User.
- Click Create.
- Click Close.
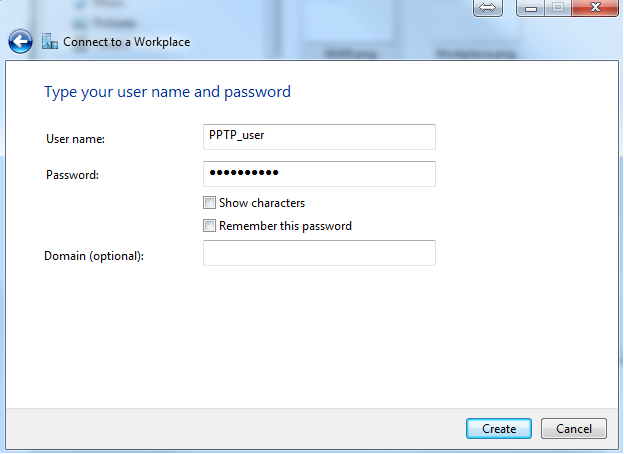
Now we need to edit the PPTP connection to match the Authentication type of the SRX5308.
- Go to Network and Sharing Center.
- Click Change adapter settings.
- Right click on the newly created PPTP connection and select Properties.
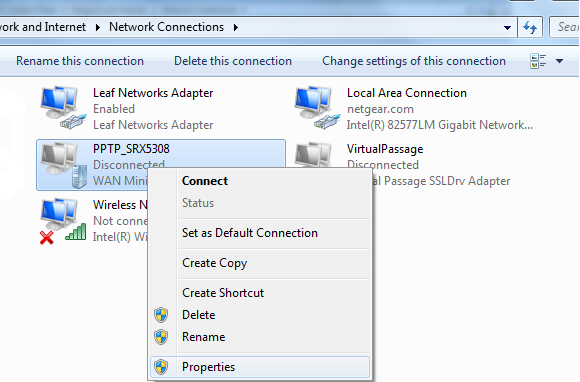
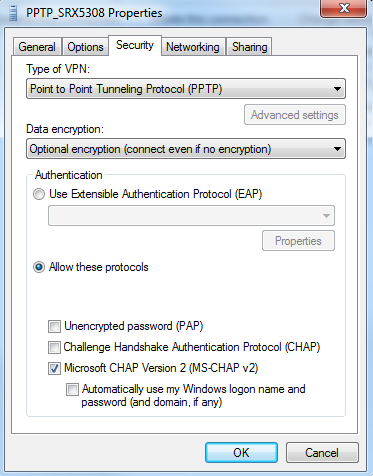
In the VPN connection properties page
- Go to Security.
- Set Type of VPN to: Point to Point Tunnelling Protocol (PPTP).
- Select Microsoft CHAP Version 2 (MS-CHAP v2).
- Click OK.
Connect the PPTP VPN
- Go to Network and Sharing Center.
- Right click on the newly create PPTP connection.
- Click Connect.
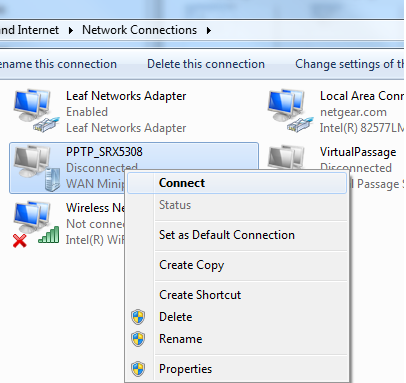
- At the prompt enter username and password and click Connect.
- Optionally can select to Save the username and password.

Confirm the PPTP VPN is established
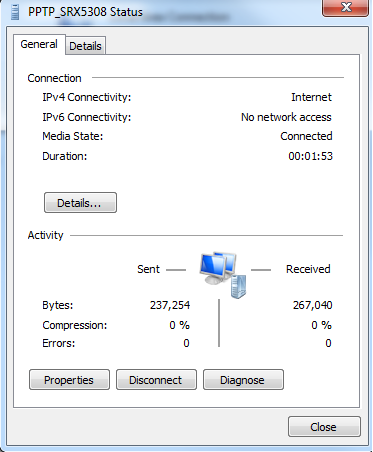
- Right click on the PPTP VPN connection in Network Connection.
- Select Status.
- We can see the connection is established.
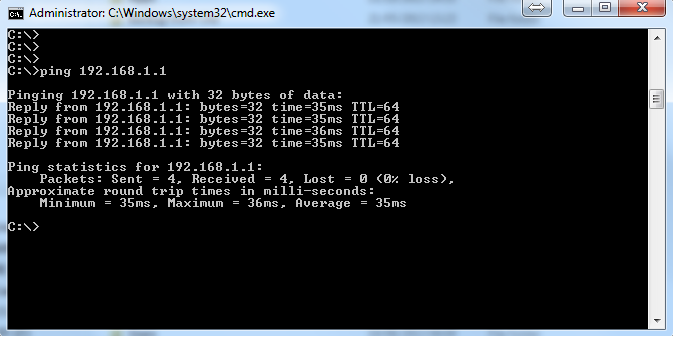
Also, we can ping the IP address of the SRX5308.
Further links:
https://support.netgear.com/product/SRX5308#wrapper
Ref: DG-JM-VPN9 Doc # 24288 Rev 1.1 December 2013.