

To attach a write or read boost disk to an existing volume:
1. Select System > Storage.
The Storage screen displays (see the figure in Step 3).
2. To the left of the graphical enclosure, click the volume that you want to expand.
3. In the enclosure, click the disk or disks that you want to configure as write or read disks for the volume.
You can select disks with a black color coding only. The selected disk or disks are highlighted, and to the left of the enclosure, the Attach log and Attach cache buttons display:
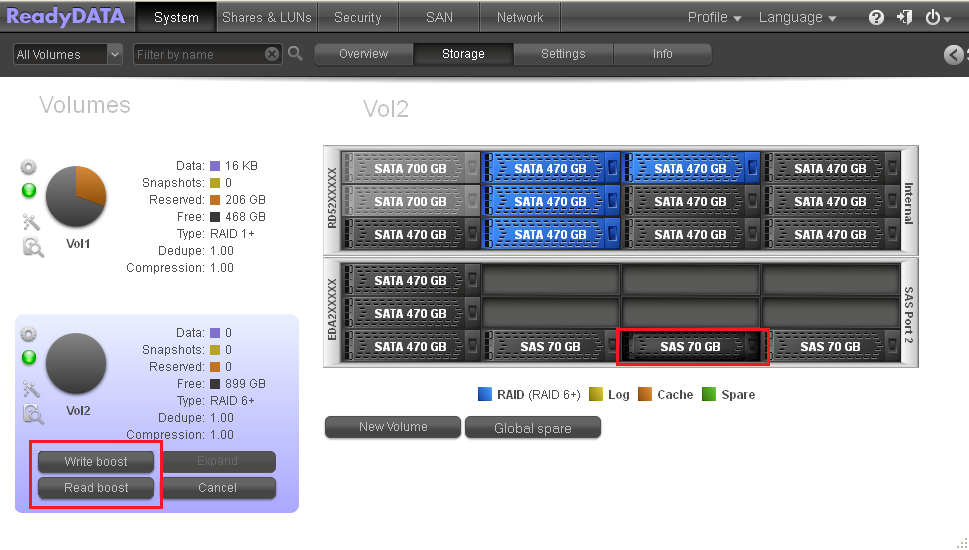
Note: The previous figure shows SAS disks that are used as write boost and read boost disks. However, you would normally use SSDs for such purposes.
4. Perform one of the following actions:
- Click Write boost. The selected disk or disks are assigned to the volume for write operations. The color of the selected log disks in the enclosure turns yellow:
(You would normally use an SSD as a write boost disk.)
- Click Read boost. The selected disk or disks are assigned to the volume for read operations. The color of the selected cache disks in the enclosure turns orange:
(You would normally use an SSD as a read boost disk.)
Updated information about the volume displays to the left of the enclosure.