

To configure a bonded channel:
1. Select Network.
The Network screen displays:
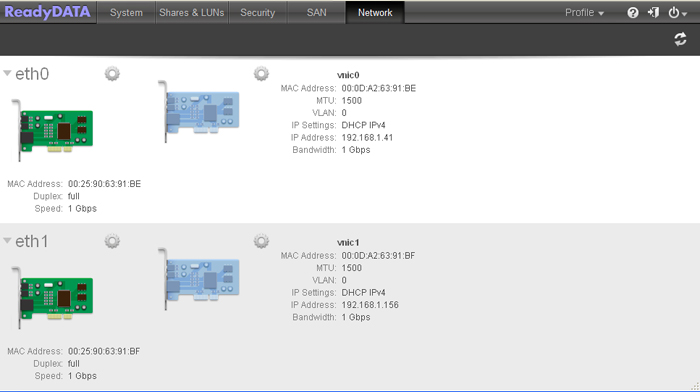
2. Click the gear icon to the right of an Ethernet interface.
A pop-up menu displays (see the figure in Step 3).
3. Select Bond with.
A second pop-up screen displays the Ethernet interfaces and, if already configured, the aggregated interfaces (bonded channels):

4. Select the name of the interface that you want to be member of the bonded channel.
The New Bonded Adaptor pop-up screen displays:

5. Configure the settings as explained in the following table:
|
Item |
Description |
|
LACP Mode |
Select the LACP mode from the drop-down list:
Note: Both the ReadyDATA and the device with which the channel link is established need to support the same mode. |
|
LACP Timer |
If the LACP mode is set to Active, select a value for the LACP timer from the drop-down list:
|
|
Hash Type |
Select one or more check boxes to specify the hash types to be used:
|
6. Select Create.
The new bonded channel displays as an aggregation interface (aggrX, in which X is a number in sequential and ascending order) on the Network screen.
7. To configure the new aggregation interface further, click the gear icon to the right of the aggregation interface.
A pop-up menu displays:

8. Select Properties.
The aggregation settings pop-up screen displays:

9. Configure the general settings as explained in the following table:
|
Item |
Description |
|
Name |
Use the default name or enter a custom name. The default name is aggrX, in which X is a number in sequential and ascending order. |
|
MTU |
Enter the MTU in bytes. The default setting is 1500 bytes. |
|
LACP Mode |
You configured these settings when you set up the aggregation interface. For information about these settings, see the table in Step 5. (You can make changes on the aggregation settings pop-up screen.) |
|
LACP Timer |
|
|
Hash Type |
10. Click Apply.
11. Configure the switch or router to which the ReadyDATA is attached for channel bonding.