

In order to create a new volume, you must be in Flex-RAID. You can turn off X-RAID to enable Flex-RAID at any time.
- Select System > Volumes.
- From the enclosure graphic, select the disks that you want to include in the new volume.
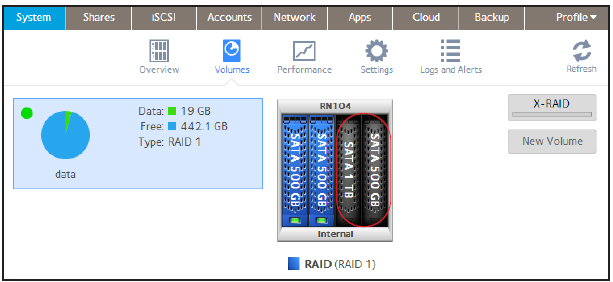
Available disks are colored black. Active disks are colored blue. Higher tiered disks are colored yellow. Global spares are colored green. Unused disks are colored grey. Previously formatted disks are colored red. . - Click the New Volume button at the right of the screen.
The New Volume pop-up screen displays.
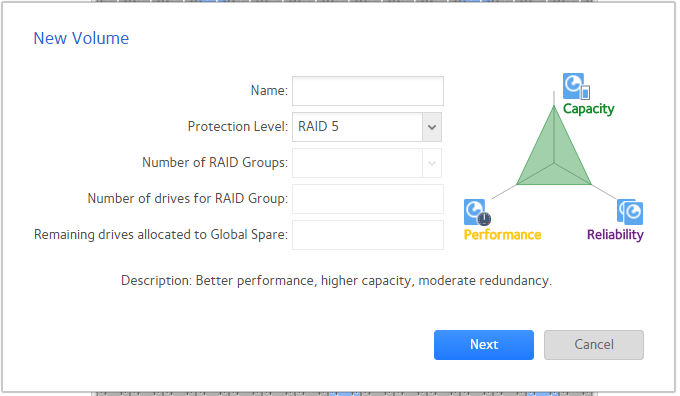
- Configure the following settings:
- Name. Enter a name for the volume. The volume must not have the same name as a folder in the root folder system. The volume names home, apps, and job_ are reserved and cannot be used.
- Protection Level. Select an appropriate RAID level for your current selection of drives.
- Number of RAID Groups: If the selected number of disks and the ProtectioN level allow for RAID groups, you can manipulate this value here. It is not recommended to have more than four (4) RAID groups.
- Number of drives for RAID Group: This value changes when the number of RAID groups is entered based on your selected drives.
- Remaining drives allocated to Global Spare: If you selected an odd number of drives for the RAID group, remaining drives will be considered global spares and kick in when other drives fail.
- Click the Next button.
Another New Volume pop-up screen displays.
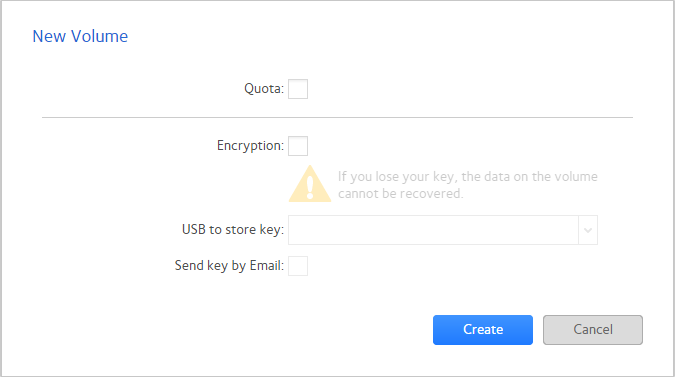
- Configure the following settings:
- Quota: enable global quota on the volume. This is a prerequisite to enabling share-based quota. This is also used to calculate snapshot space in the Admin Page.
- Encryption. Select this check box to enable encryption on the volume. A key will be generated. If you lose your key, the data on the volume will be irrecoverable.
- USB to store key. If you enabled encryption, select a USB storage device from the drop-down list to store the generated key.
- Send key by Email. If you enabled encryption, select this check box to have the generated key sent to a email address associated with the admin account.
- Click the Create button.
- The new volume is created and appears in the list of volumes at the left of the screen.
Last Updated:07/07/2025
|
Article ID: 23131