

ReadyNAS devices running firmwares 4.1.5, 4.2.13, 5.3.1, or 6.0.0 and above, are capable of acting as a destination for OS X Time Machine backups.
Upon initial creation of your Time Machine backup a “sparse image” (OS X 10.4 and below), or “sparse bundle” (OS X 10.5 and above) is created on the ReadyNAS for storage of your backup set.
Should you need to remove the sparse image/bundle you can do so via one of the following procedures.
1. Removal via Time Machine AFP share (All firmwares)
(a) Under the Finder menu select Go > Connect to Server
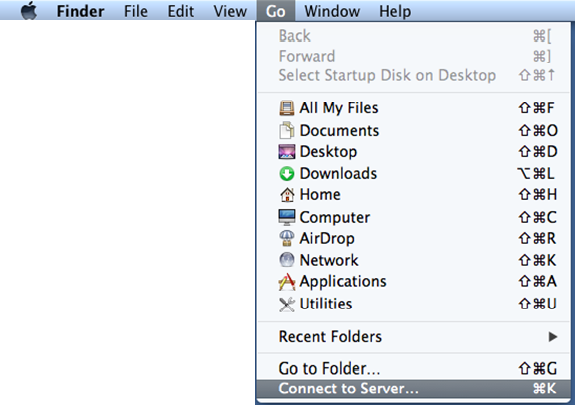
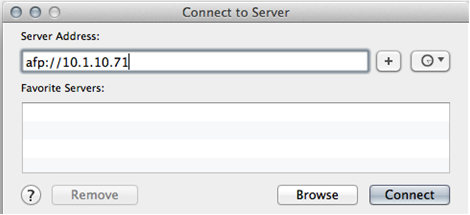
(b) In the Connect to Server enter the following URI, replacing [ReadyNAS] with the IP address or hostname of your ReadyNAS.
afp://[ReadyNAS]
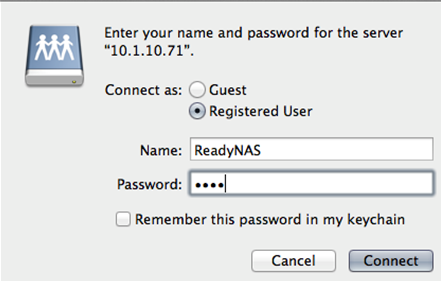
(c) When prompted for a username and password enter the following credentials:
Connect as: Registered User
Name: ReadyNAS
Password: (previously defined through Time Machine setup in Frontview)
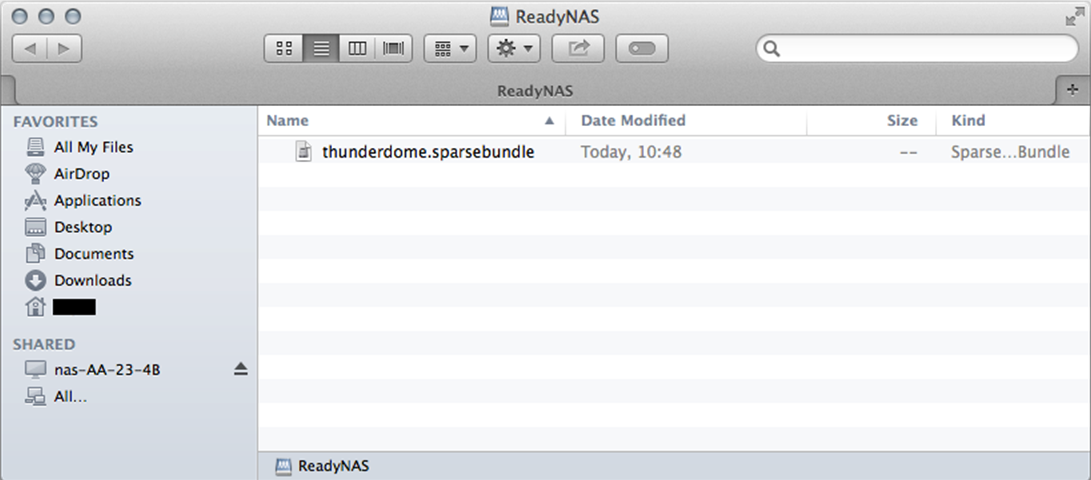
(d) Select the appropriate sparse bundle and delete it via Finder:
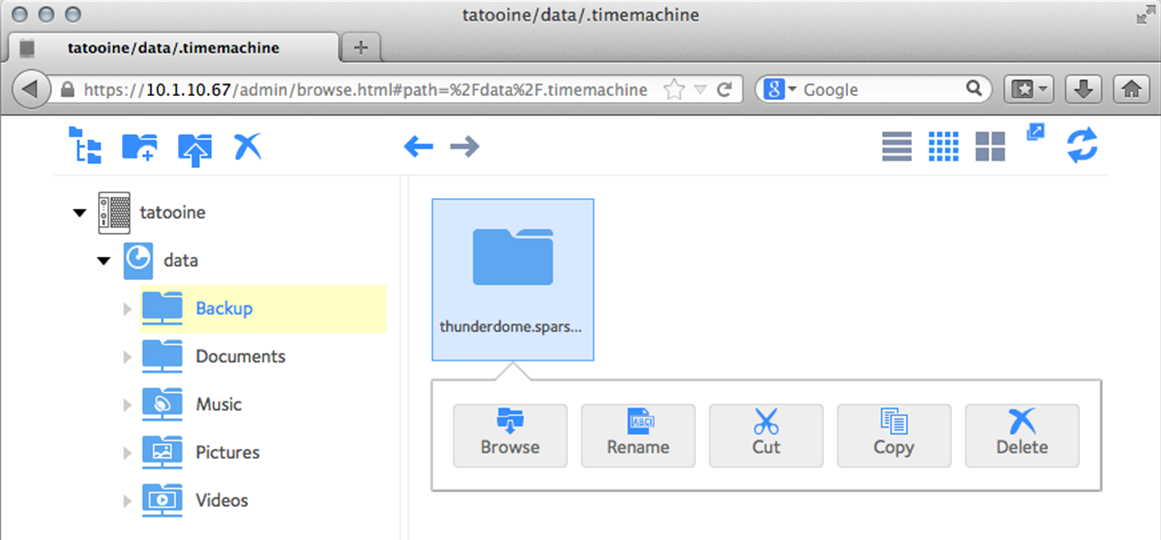
2. Removal via ReadyNAS OS integrated share browser (Firmware 6.0.0 and above):
(a) Browse to the following URI in your preferred browser, replacing [ReadyNAS] with the IP address or hostname of your ReadyNAS and replacing [volume] with your volume name (default “data”)
Note: Do not include the brackets []. These are included for visibility.
https://[ReadyNAS]/admin/browse.html#path=%2F[volume]%2F.timemachine
(b) If prompted for login use your normal web interface credentials
2c) Select the appropriate sparse bundle and click the “Delete” button:
3. Removal via SSH console (All firmwares)
Note: Please keep in mind that NETGEAR may deny support if you have enabled root SSH access.
http://www.readynas.com/forum/viewtopic.php?p=111042#p111042
This method assumes you have a basic understanding of interacting with Linux/UNIX via command line interface.
(a) If not previously enabled, enable the SSH service on your NAS via one of the following methods:
(a1) For devices running RAIDiator 4.1.x:
(a1a) Download the “EnableRootSSH” add-on from:
http://www.readynas.com/download/addons/4.00/EnableRootSSH_1.0.bin
(a1b) Install the add-on from Frontview:
Go to Add-ons > Add New
Use the “Browse…” button to browse to the location of the downloaded add-on.
Click “Upload and verify image...” to start the installation.
Confirm the installation by clicking “OK”
Once Frontview has confirmed validity of the add-on click “Install” to finish add-on installation.
The NAS will require a reboot to complete add-on installation. Click “OK” to confirm.
Select “Shut down and reboot device.” then click “Apply”.
(a2) For devices running RAIDiator 4.2.x:
(a2a) Download the “EnableRootSSH” add-on from:
http://www.readynas.com/download/addons/x86/4.2/EnableRootSSH_1.0-x86.bin
(a2b) Install the add-on from Frontview:
Go to Add-ons > Add New
Use the “Browse…” button to browse to the location of the downloaded add-on.
Click “Upload and verify image...” to start the installation.
Confirm the installation by clicking “OK”
Once Frontview has confirmed validity of the add-on click “Install” to finish add-on installation.
The NAS will require a reboot to complete add-on installation. Click “OK” to confirm.
Select “Shut down and reboot device.” then click “Apply”.
(a3) For devices running RAIDiator 5.3.x:
(a3a) Download the “EnableRootSSH” add-on from:
http://www.readynas.com/download/addons/arm/5.3/EnableRootSSH_1.0-arm.bin
(a3b) Install the add-on from Dashboard:
Go to Add-ons > Add Add-on
Use the “Browse…” button to browse to the location of the downloaded add-on.
Click “Upload” to start the installation.
Confirm the installation by clicking “Install”
The NAS will require a reboot to complete add-on installation. Click “Yes” to confirm.
(a4) For devices running ReadyNAS OS 6.x:
(a4a) Login to the web interface of your device.
(a4b) Under “System” click “Settings”.
(a4c) Under “Services” click “SSH”.
(a4d) Confirm the SSH access disclaimer by clicking “Yes”.
(b) Login to the NAS via SSH using an SSH client of your choice.
(c) Change directory to the following location:
(c1) For devices running RAIDiator 4.x and 5.x:
/c/.timemachine
(c2) For devices running ReadyNAS OS 6.x:
/[volume]/.timemachine
Where [volume] is the name of your volume (default “data”)
(d) Locate the appropriate sparse bundle and remove it.