

Introduction: The web browser is presenting a Certificate error when logging into the management web interface.
This article will display how to add the page as a Trusted site, and clear the certificate warning page.
Version of Chrome used, should not matter.
Objective: To show how to install a Certificate on Google Chrome, for ReadyNAS OS 6.
What is a Cert?
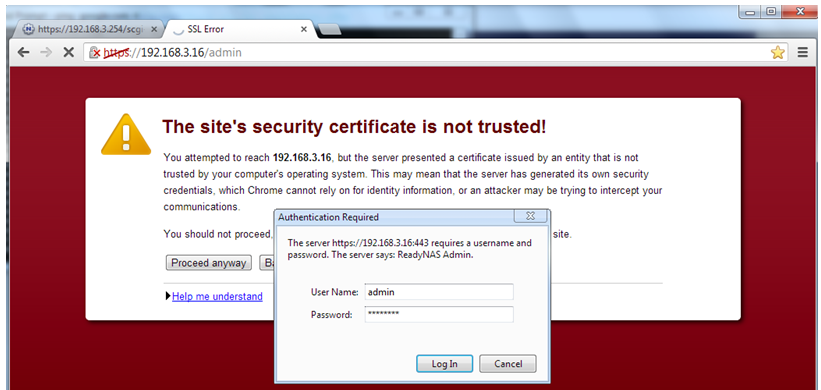
A security certificate is an assurance by an independent third party (e.g. VeriSign or Digi-Sign) of ownership of a website. A website's certificate identifies the web server and it enables the browser to establish a secure connection with the site. Here, when accessing the NAS web interface, you are not surfing the Internet, but you still get the Certificate untrusted message as shown below.
When you see the word 'security', that does not refer to the protection of the data on the NAS. Data access would be kept secure by use of passwords, and setting folder permissions.
Limitations:
- Ensure that the IP address or NAS Hostname does not change, or the whole process shown below, would need to be repeated.
- Certificate errors are related to the browser used, and not be firmware on the NAS.
Export
- This is normally what we see when accessing the ReadyNAS dashboard. The customer usually wants to eliminate this certificate error.
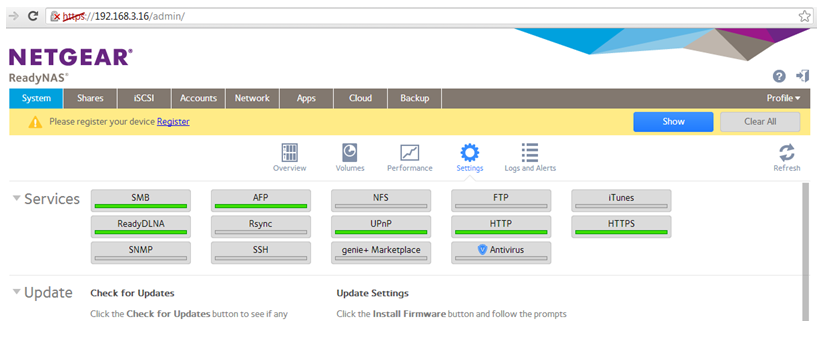
- Login to the dashboard and enable HTTPs.
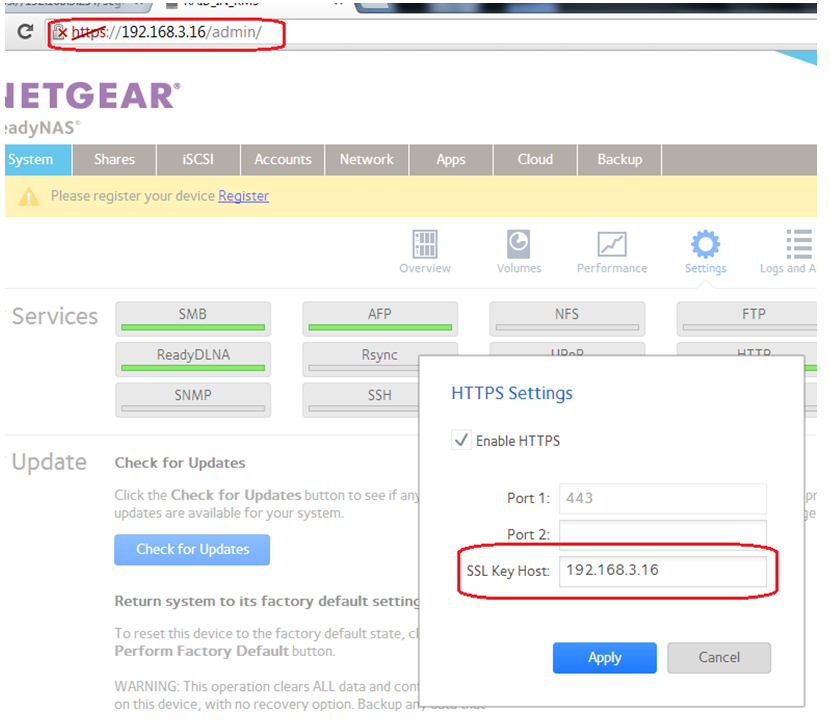
- When you click on it, make sure the SSL Key Host is the IP address of the ReadyNAS itself.
- Click on the X beside https on the link.
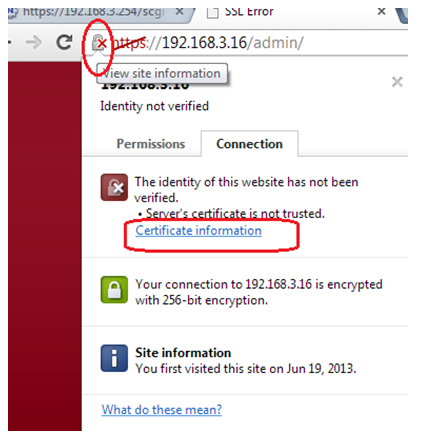
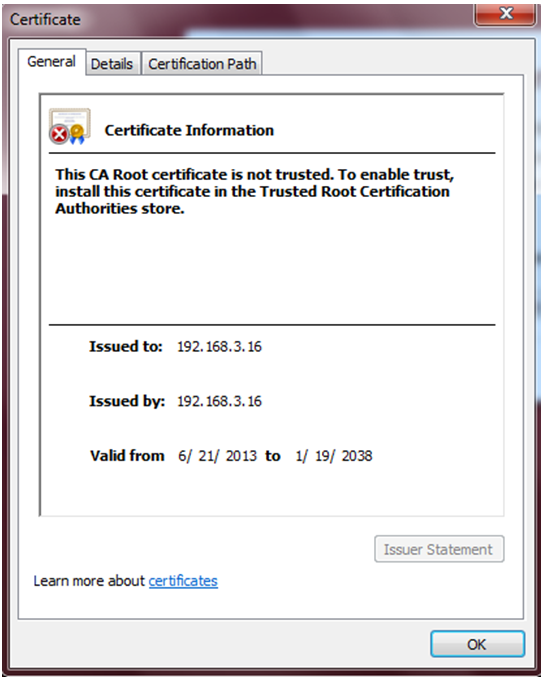
- Click on 'Certificate Information'.
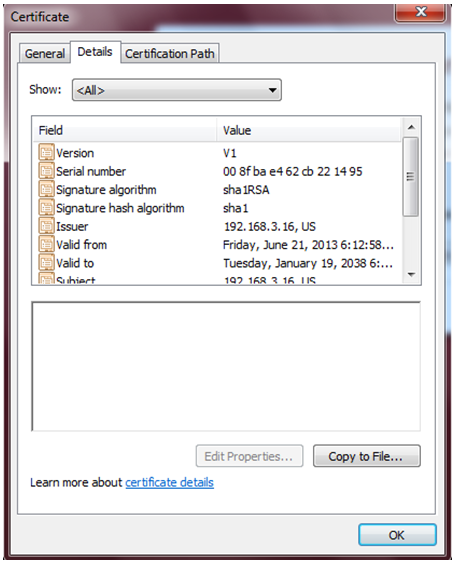
- Click on 'details', and you will see the option 'Copy to File'.
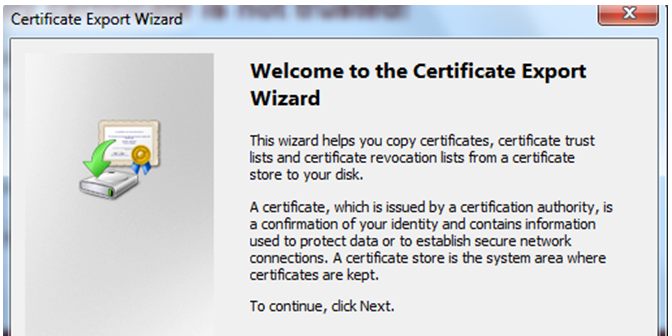
- The Export Wizard will open as shown.
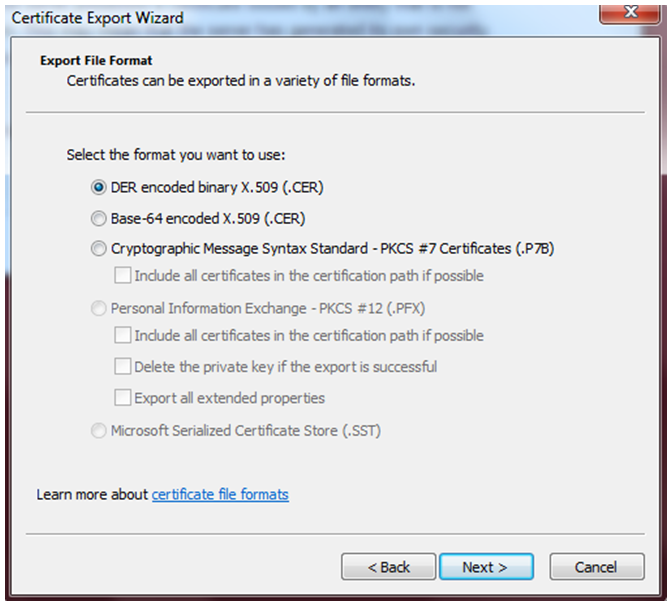
- Pick DER and 'Next'.
- Make up a file name. Click 'Browse' to pick the directory you save the cert file to. Eg C: drive or Desktop.
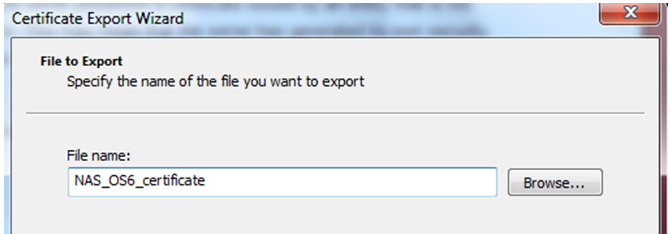

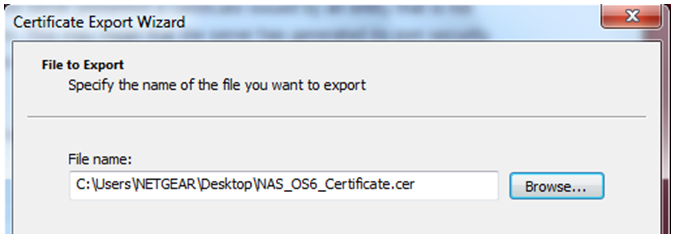
- Click 'Browse' and 'Next'.
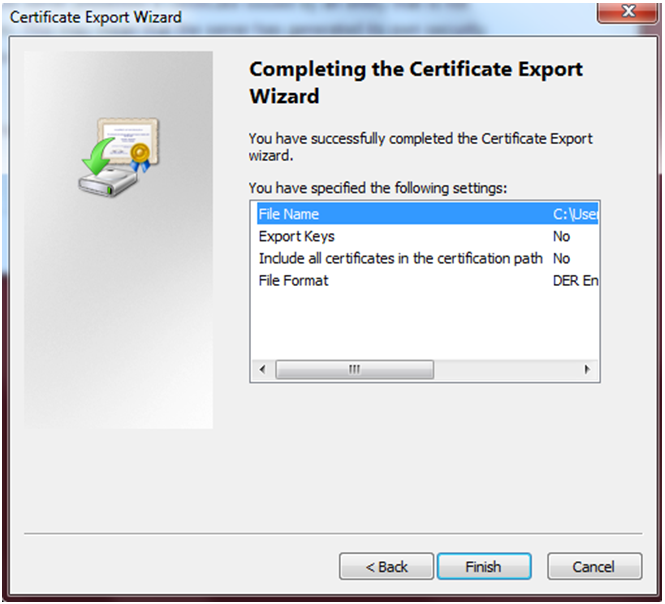
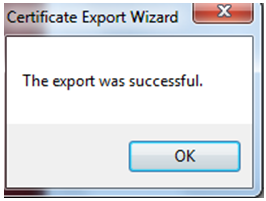
- Click 'Finish' and 'OK'.
Import
- Now to import the Certificate.
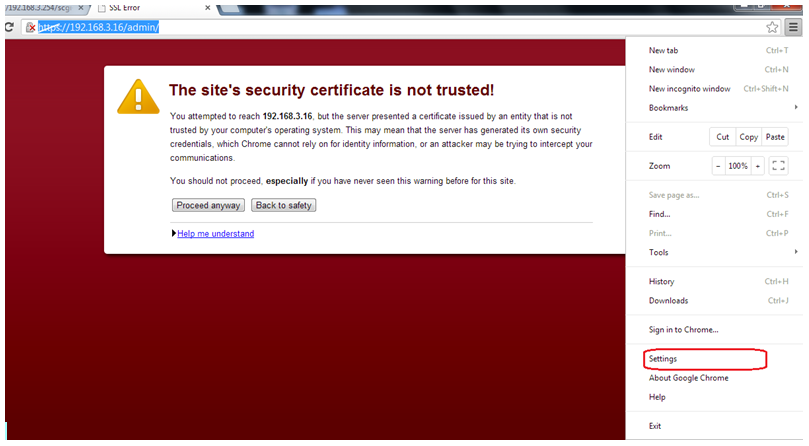
- On the Tools menu, click 'Settings'.
- At the bottom of the screen, click on 'Show Advance Settings' and you will see the HTTPS/SSL option.
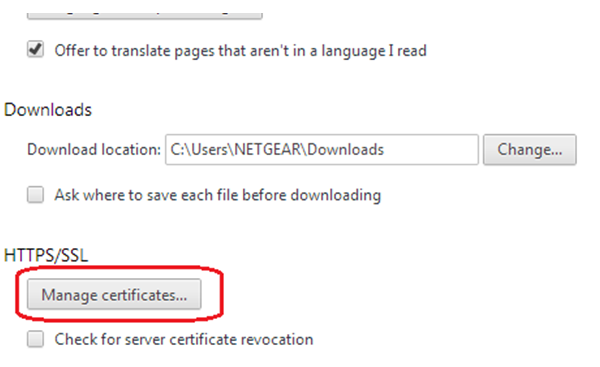
- Click on 'Manage certificates'.
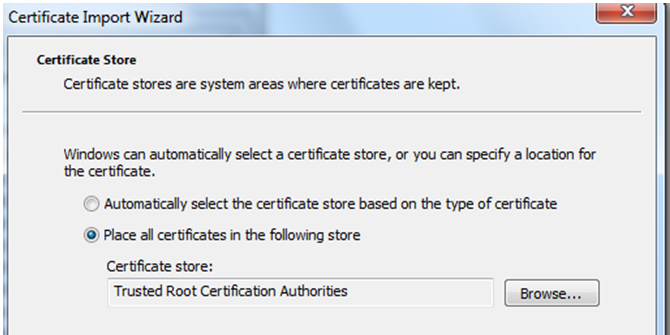
- Click on 'Trusted Root Certification Authorities.'
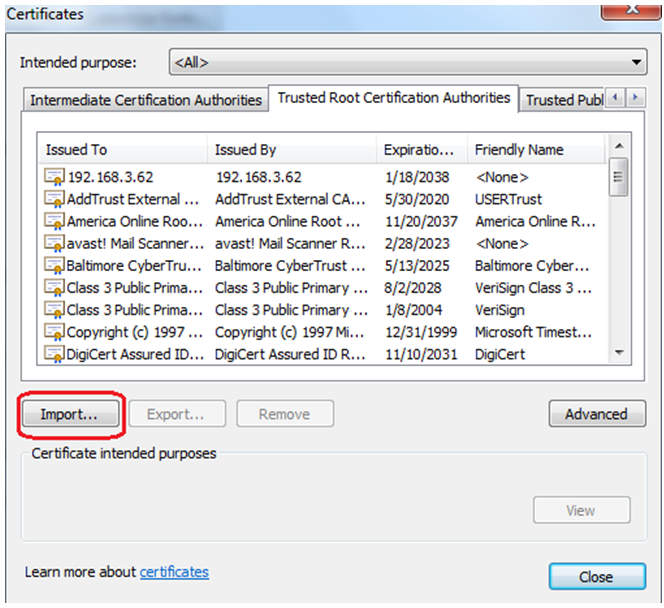
- Click on 'Import' and the Wizard will open as shown.
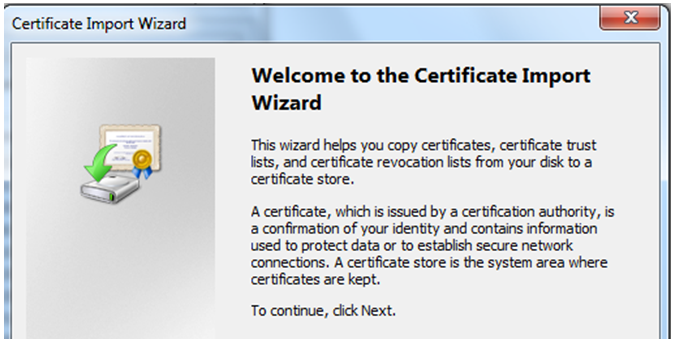
- Click 'Next'.
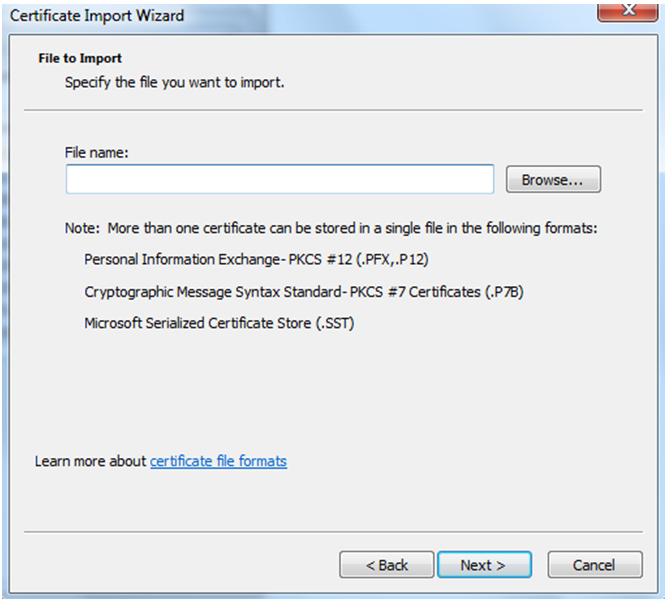
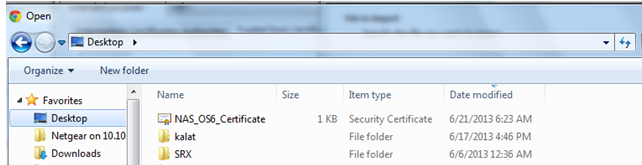
- Click Browse. Select the *.cer cert file saved earlier, and 'Next'.
- Click on 'Next'.
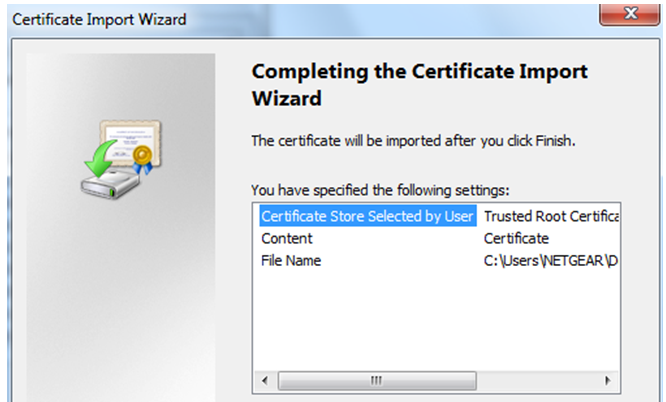

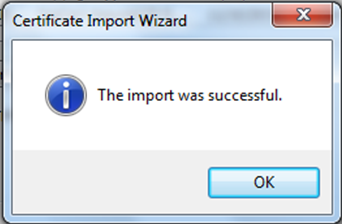
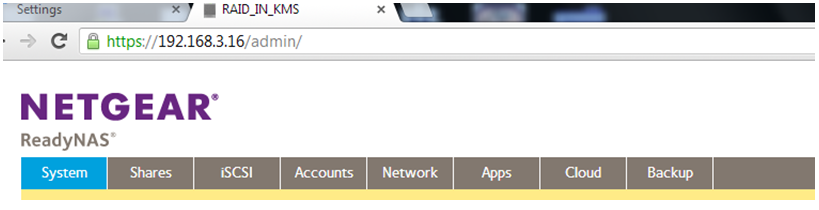
- Once complete, close and then re-open the Chrome Browser . You should not have any further Certificate warnings. Note the green padlock symbol on address bar.
Related articles:
Installing a Certificate on IE for ReadyNAS OS 6