

This article describes how to migrate files and folders from an iSCSI LUN on ReadyDATA to an iSCSI LUN on ReadyNAS.
In this example, the following iSCSI LUN exists on the ReadyDATA:

A server running Window Server 2012 R2 connects to this LUN. Inside the LUN is an NTFS formatted volume containing various files and folders:

- On the ReadyNAS admin page, go to the iSCSI tab.
- Click New LUN.
- Enter the new LUN details and click Create. It is recommended to use a thick LUN with Bit Rot Protection disabled.

- Click New Group.
- Edit the name of the new LUN group if required and click Create. Here, we use the default name.

- Click on the LUN and choose Assign:

- At the prompt, choose to assign to the LUN group created in step 5 and click Apply.

- Click the Properties button beside the newly created LUN Group.
- Set Allowed Initiators to Selected and click the plus icon:

- In the Name field, enter the IQN of the server and click Create. If you are unsure of how to find this on Windows operating systems, please refer to Note 1 at the bottom of this article.

- Select the Allowed checkbox beside the IQN you added in the previous step and click Apply.

- On the Windows server, open the iSCSI Initiator.
- In the Targets tab, enter the IP address or hostname of the ReadyNAS and click Quick Connect.
- When prompted, click Done.
The Windows server is now connected to both the ReadyDATA iSCSI LUN and the ReadyNAS iSCSI LUN:

- Open the Computer Management console.
The newly added ReadyNAS LUN appears as an unknown disk. - Right click the disk and select Online.

- Right click the disk again and select Initialize Disk.

When prompted, choose GPT partition style and click OK. - Right click the disk and click New Simple Volume.

- Follow the wizard to format the disk.
- We now have both iSCSI LUNs connected. The ReadyDATA LUN contains the existing files and folders. The ReadyNAS LUN is empty and ready to accept migration of the data.

Next, we will copy the data from the ReadyDATA LUN to the ReadyNAS LUN. You can use any file based transfer program. Here we use robocopy so that we can preserve permissions on the files and folders inside the LUN. - Open a command prompt or PowerShell prompt.
- Run the command:
robocopy.exe [source] [destination] /e /copyall
The data is copied from the source to the destination. When completed, you see a summary of the operation.
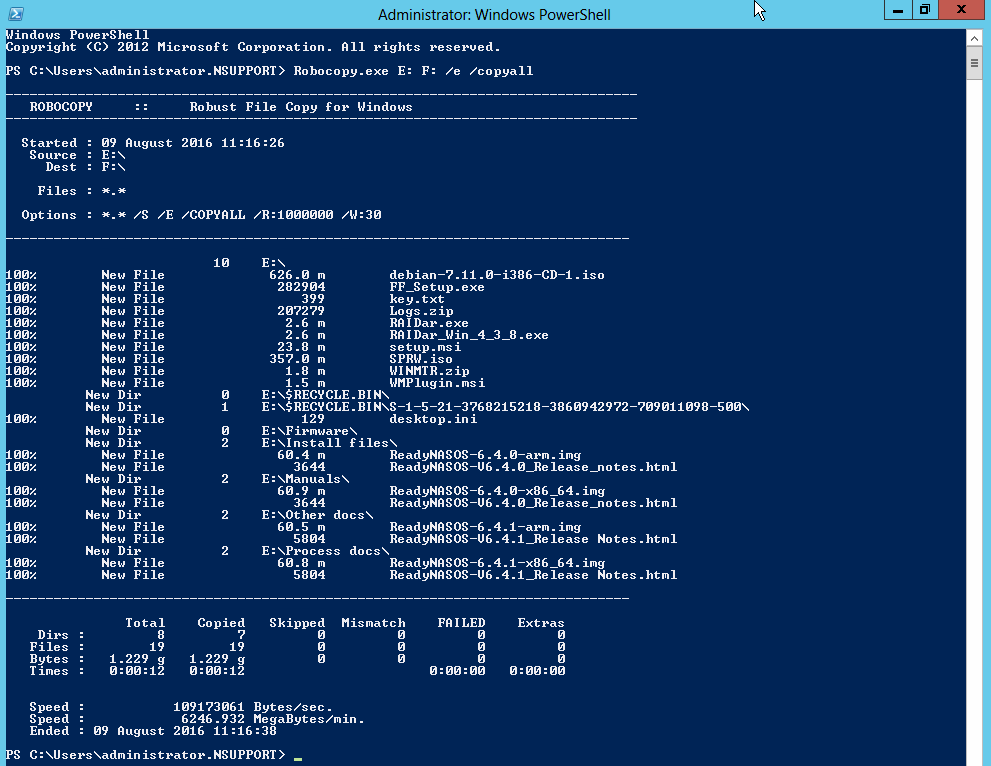
Note: 7 directories are copied from a total of 8 because the Recycle Bin is a special directory which is not copied.
Note 1 - How to find the IQN on Windows.
- On the Windows machine, open the iSCSI Initiator.
- Go to the Configuration tab.
- The IQN is listed in the Initiator Name field where it can be selected and copied.

Last Updated:07/07/2025
|
Article ID: 30972