

This article explains how to configure Windows Server Backup to back up to an SMB share on a ReadyNAS OS 6 system.
Not what you're looking for? Return to the ReadyNAS Backup FAQ
This article applies to the following Windows Server operating systems:
- Windows Server 2012 R2
- Windows Server 2012
- Windows Server 2008 R2
- Windows Server 2008
Note: When backing up to an SMB share, Windows will maintain only the latest backup and erase previous backups. If you wish to maintain multiple previous backups, then use an iSCSI LUN on the ReadyNAS instead of an SMB share.
Before setting up the Windows Server Backup, please ensure the following are in place:
- For Server 2012 and Server 2012 R2, the SMB protocol version on the ReadyNAS must be set to version 2.0. Refer to the Change the SMB Protocol Version section of the article ReadyNAS OS 6 - SMB Plus App
- The ReadyNAS must be joined to Active Directory. Refer to the guide How do I configure active directory mode on my ReadyNAS OS 6 storage system?
- There must be sufficient capacity on the ReadyNAS. The volume usage after backups are in place should not exceed 85% of the total volume space.
Create the destination share on the ReadyNAS:
- Log in to the ReadyNAS admin page.
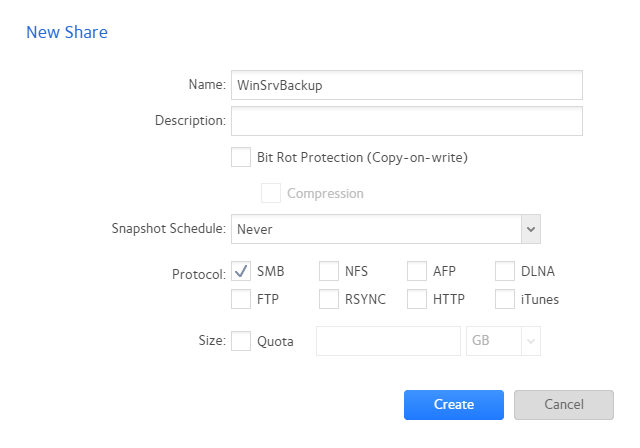
- Go to Shares and click the New Share button.
- Enter a name for the share.
- Ensure that Bit Rot Protection is disabled.
- Set Snapshot Schedule to Never.
- Enable the SMB protocol.
- Click the Create button.
Restrict SMB access on the share on the ReadyNAS:
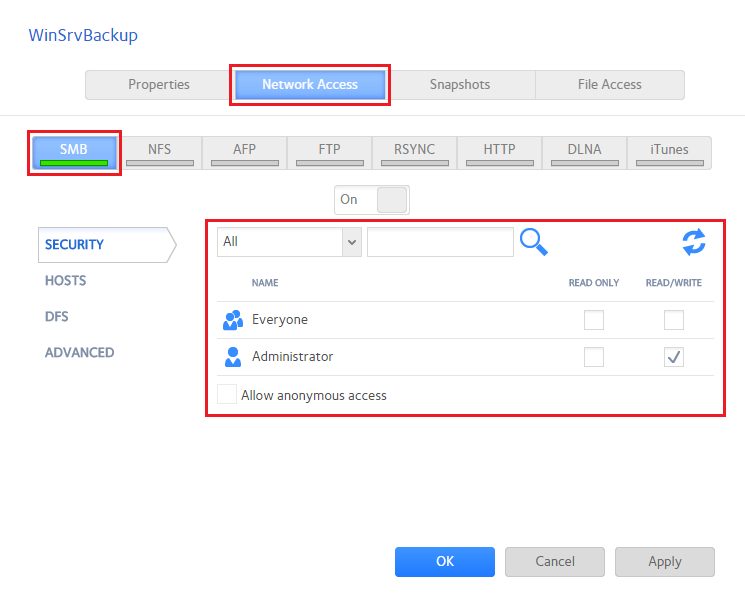
In this example, we allow access to the share for only the domain administrator.
- On the ReadyNAS, click on the gear icon beside the newly created share and press Settings.
- Click the Network Access tab.
- Go to the SMB section.
- Disable Allow anonymous access.
- Remove READ/WRITE access for Everyone.
- Search for the user administrator and allow READ/WRITE access for that user.
- Click OK.
Configure the backup job on the Windows Server:
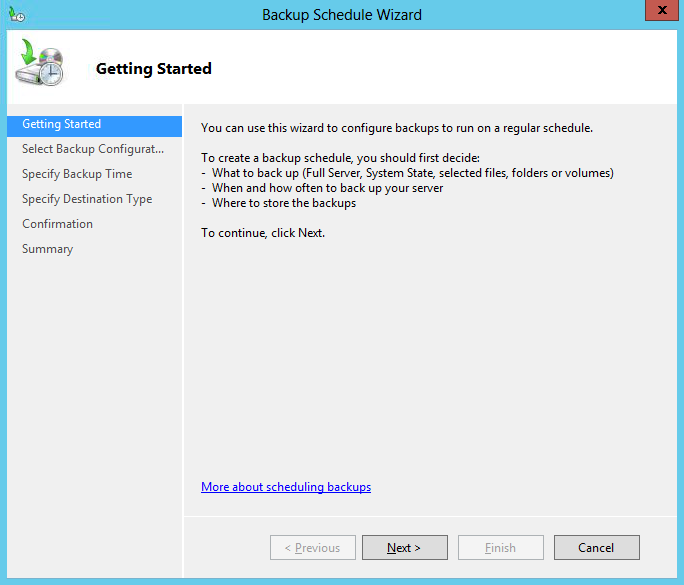
- On the Windows Server, go to Administrative Tools and open Windows Server Backup.
- In the Actions menu, click on Backup Schedule. This opens the Backup Schedule Wizard. Click Next:
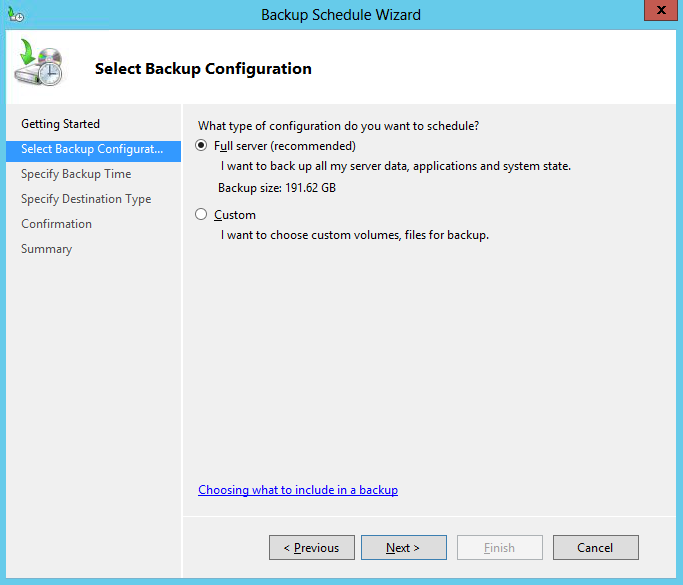
- Select Full server (recommended) or Custom depending on your requirements and click Next:
- Specify the backup time and schedule as needed and click Next:
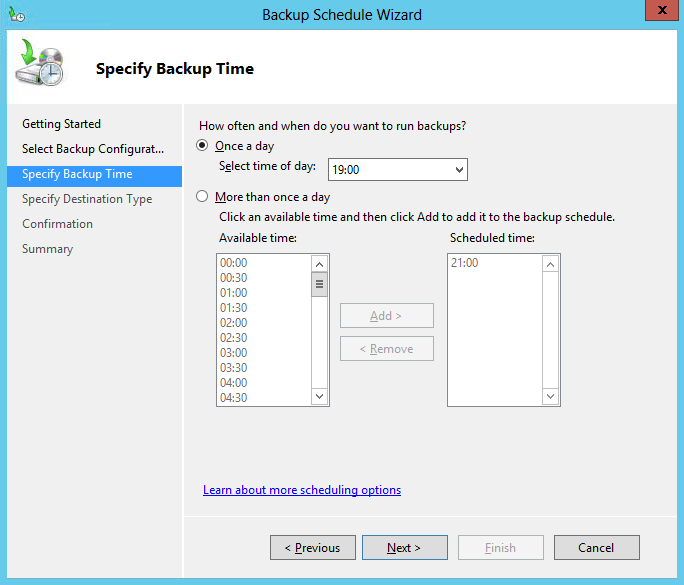
- Select Back up to a shared network folder and click Next:
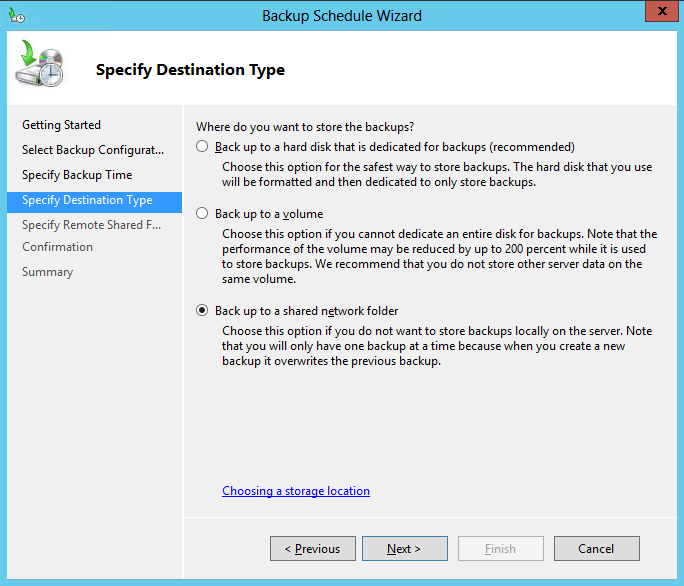
- In the Location field, enter the path to the share on the ReadyNAS and click Next:
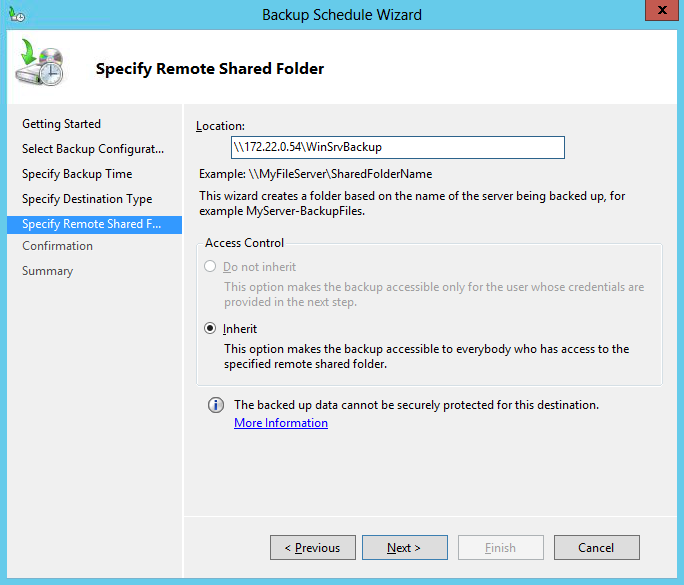
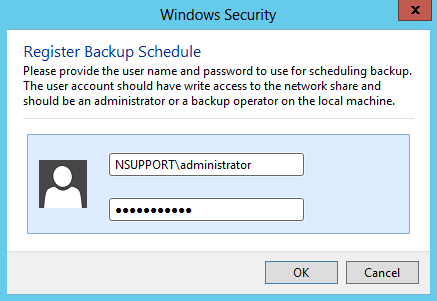
- When prompted, enter a user account with the privileges to write to the ReadyNAS share and run backups on the Windows server. In this example, we are using the domain admin account to which we granted read and write share access earlier.
- At the Confirmation screen, review the configuration and click Finish. Click Close.

The backup is now successfully configured. To run the backup, you can wait for the scheduled time to arrive or run it manually from the Windows Server Backup console.