

Overview:
This article will guide you on how to apply the fix for the wireless and firmware update issue of WNR2500.
Note: There is no Mac nor Linux fix tool so you must use a Windows OS to apply this fix.
Symptoms:
Note: Fix is only applicable if BOTH symptoms below exist.
- All wireless clients can't view the WNR2500 wireless name. SSID broadcast already enabled on the router admin page and wireless LED is lit on the router.
- When updating the firmware the router will not accept any firmware file and gets an error “This firmware file is incorrect! Please get the firmware file again and make sure it is the correct firmware for this product”.
Steps:
- Download the WNR2500 Fix Tool_1. Unzip the folder WNR2500 Fix Tool_1 and save it to your Desktop.
- Upload firmware version 1.0.0.30 or later on WNR2500. You can download latest firmware here.
- Connect a PC directly to the WNR2500 using wired connection.
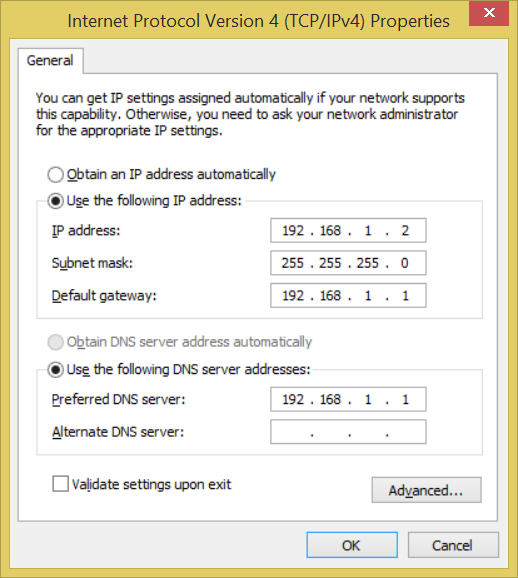
Note: Disable wireless adapter and other networking adapters on this PC. - Assign a static IP address of 192.168.1.2 on the PC as seen below, and click OK.
a. Open Network and Sharing Center.
b. Go to Local Area Connection.
c. Click on Properties and double-click on Internet Protocol Version 4.
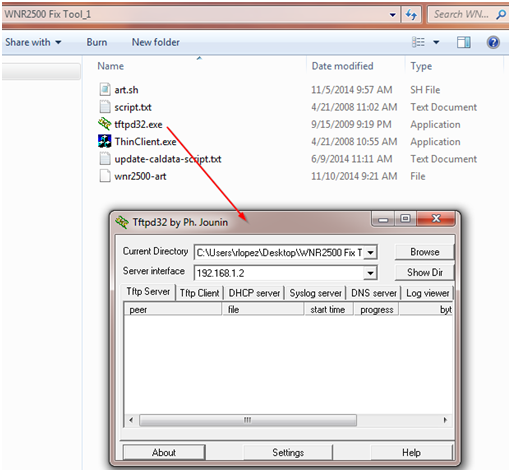
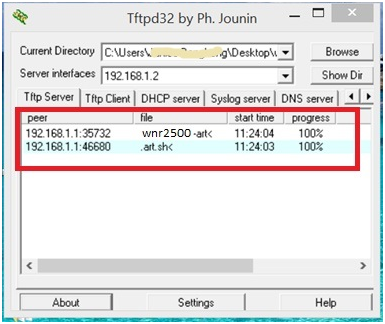
- From the WNR2500 Fix Tool_1 folder, open tftp32. Make sure the IP address is 192.168.1.2 is set on Server Interface.
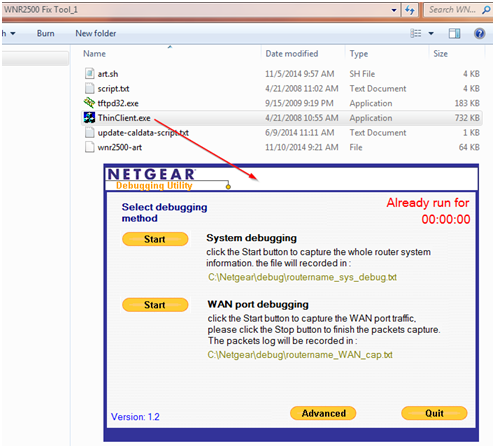
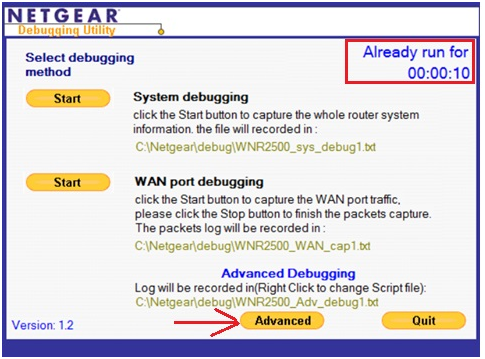
- Open Thinclient and click on Advanced button.
- Click on Open script file and choose update_caldata-scripts.txt from WNR2500 Fix Tool_1 folder. Then click OK.
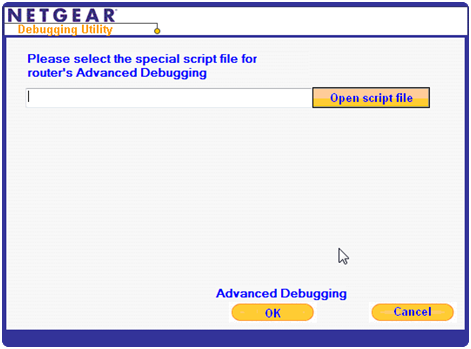
- Click OK on Advanced Debugging button. You should see the time running on the Thinclient and 2 files transferred on tfpt32 window.
- The router will reboot automatically which means the fix is successful. Wait until all the LEDs lit up normally on the router then check if you can now see the SSID.
Last Updated:07/08/2025
|
Article ID: 27187