

Not what you're looking for? Return to the ReadyNAS Share and Permission FAQ.
Overview
This article describes how to set up permissions on sub-folders within shares on a ReadyNAS that is in user security mode.
Note: If you only require restriction of permissions at the root share level, then this can be done using the network access settings for the share in the ReadyNAS web interface.
Note: If you require instructions on how to do this when in domain mode, please refer to Setting Active Directory folder permissions on ReadyNAS OS 6
Scenario for this guide
- ReadyNAS OS 6 unit is in user security mode.
- A share (called Resources) is created on the ReadyNAS.
- There are 2 groups - students and teachers which each contain some users.
- Within the share, public and private sub-folders exists.
- Members of both groups are allowed to read/write the public sub-folder.
- Only members of the teachers group are allowed to read/write the private sub-folder.
- Both groups are forbidden to create new folders in the root of the Resources share.
Process
1. Create groups and users on the ReadyNAS
- Go to Accounts - Groups - New Group and create a group called 'students'

- Repeat the process to create a group called 'teachers'
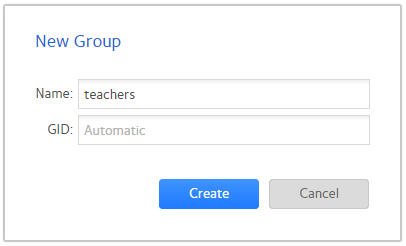
- Go to Accounts - Users - New User and create a user called 'stuart' who is a member of the 'students' group
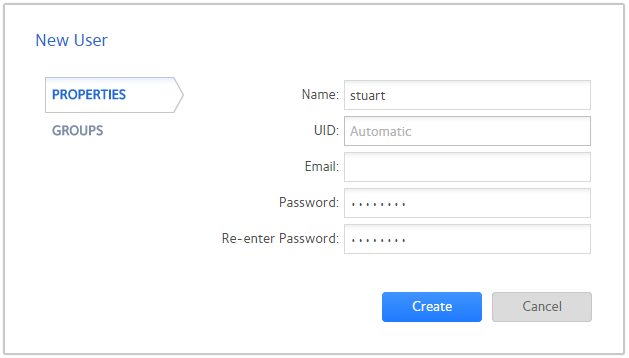
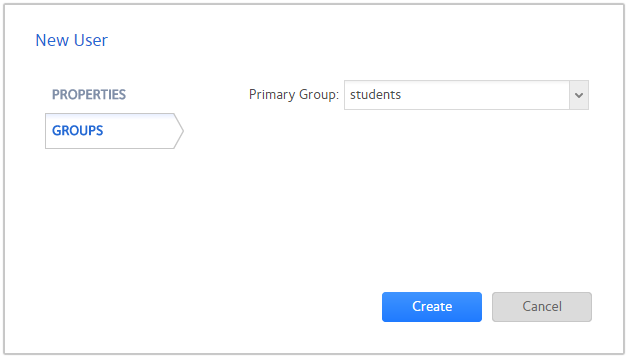
- Repeat the process to create a user called 'teddy' who is a member of the 'teachers' group
2. Create the share on the ReadyNAS and adjust settings on it
- Go to Shares - New Folder and create a share called 'Resources'

- In the settings of the share under Network Access ensure that Read/Write is enabled for Everyone and admin. Also ensure that 'Allow anonymous access' is unchecked

3. Set up root share permissions from a Windows client
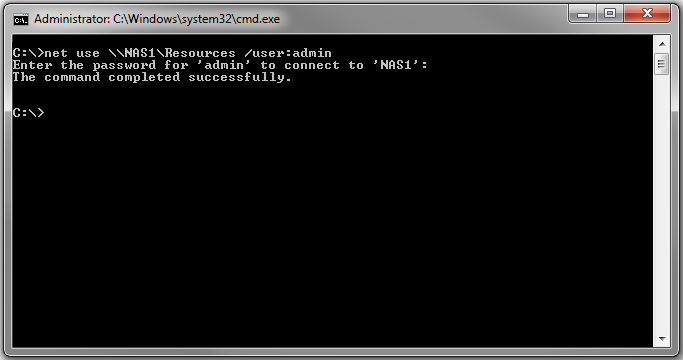
- Connect to the share as the ReadyNAS 'admin' user (this can be done using a command prompt as shown below)
- Right click on the share and choose 'Properties', then go to the 'Security' tab
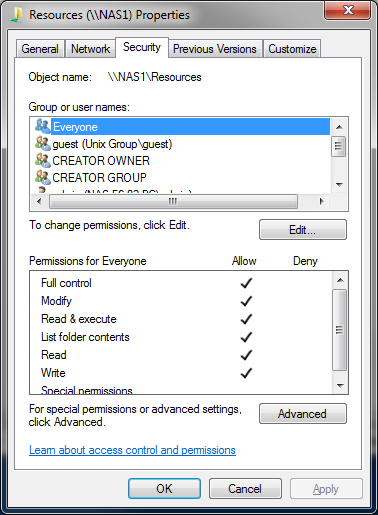
- Remove the 'Everyone' group from the list of access rights. To do this, click 'Edit'. Highlight 'Everyone' and press Remove.
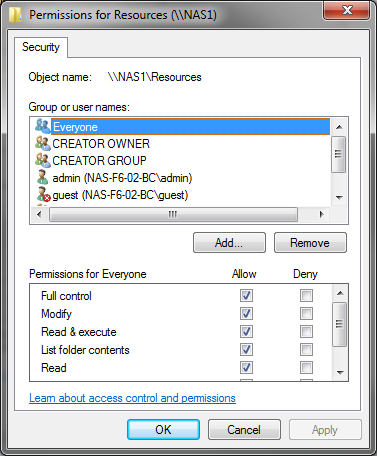
- Add the 'students' and 'teachers' group and grant them read access as shown below
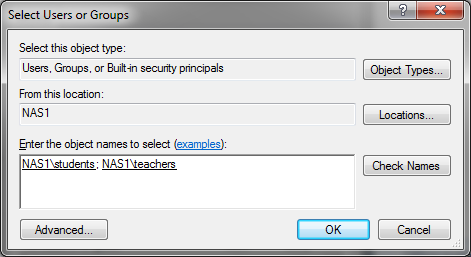
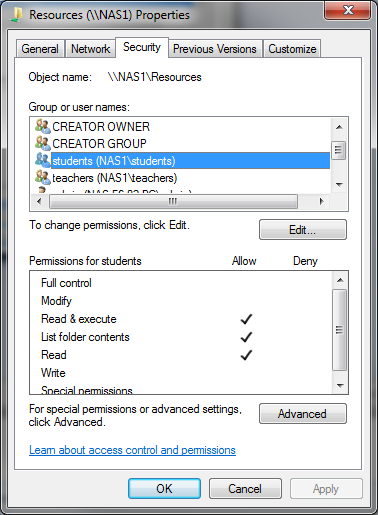
- Press OK, then Yes when prompted and finally OK again.
4. Create sub-folders
- While still connected as the 'admin' user, create the required sub-folders - in this case 'Private' and 'Public'
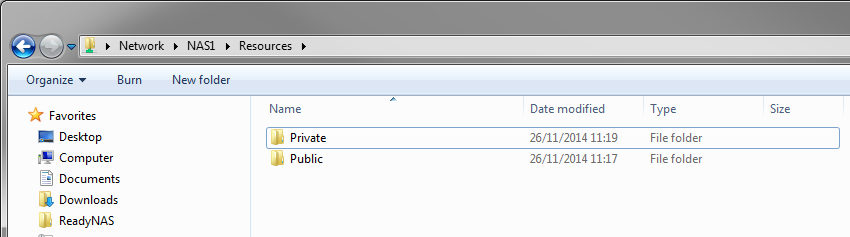
5. Set permissions on the 'Public' sub-folder (read/write access for both groups)
- Right click on the 'Public' sub-folder, choose Properties and go to the Security tab
- Through inheritance from the share above, the 'students' and 'teachers' groups will have read only access already.
- Add to their permissions by giving each group write access as shown below:
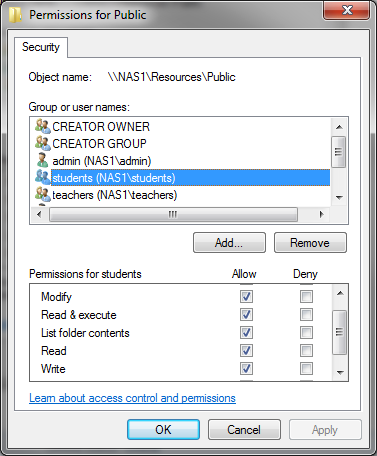
- Apply these changes by pressing OK and then OK again.
6. Set permissions on the 'Private' sub-folder (read/write access for 'teachers' group only)
- Right click on the 'Private' sub-folder, choose Properties and go to the Security tab
- Through inheritance from the share above, the 'students' and 'teachers' group will have read only access already. We want to remove access for 'students'.
- To do this go to Advanced - Change Permissions and untick the option 'Include inheritable permissions from this object's parent'.
- When prompted choose 'Add' to convert and add inherited parent permissions as explicit permissions on this object.
- Remove the 'students' group from the list of permission entries
- Tick the box 'Replace all child object permissions with inheritable permissions from this object', press OK and press Yes when prompted.
- Press OK again.
- Finally edit the permissions for the 'teachers' group to grant them write access as shown below and press OK.
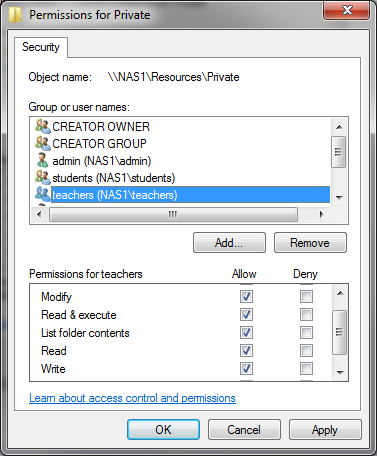
- Press OK again to complete the changes.
7. Test access settings
- Confirm that users from the 'teachers' group can read and write in both sub-folders.
- Confirm that users from the 'students' group can read and write to the public sub-folder but cannot access the private sub-folder.
- Confirm that users from both groups cannot create folders/files at the root share level.