

ReadyDATA Replicate can be used to Replicate data from your primary ReadyDATA storage to secondary ReadyDATA Storage.
This can be done using cloud based Replicate (via https://readydata.netgear.com) or local Replicate. Both will work however this article will focus on local Replicate.
This article describes how to do the following:
- Run continuous Replicate from the primary ReadyDATA to the secondary ReadyDATA.
- In case of loss of access to the primary system, bring the secondary system online (fail-over).
- When the primary system is recovered, Replicate changes from the secondary system back to the primary system so that protection is restored.
- When the ReadyDATAs are back in sync, bring the primary system back online (fail-back).
- Finally, re-create the Replicate job from primary to secondary so that protection is restored.
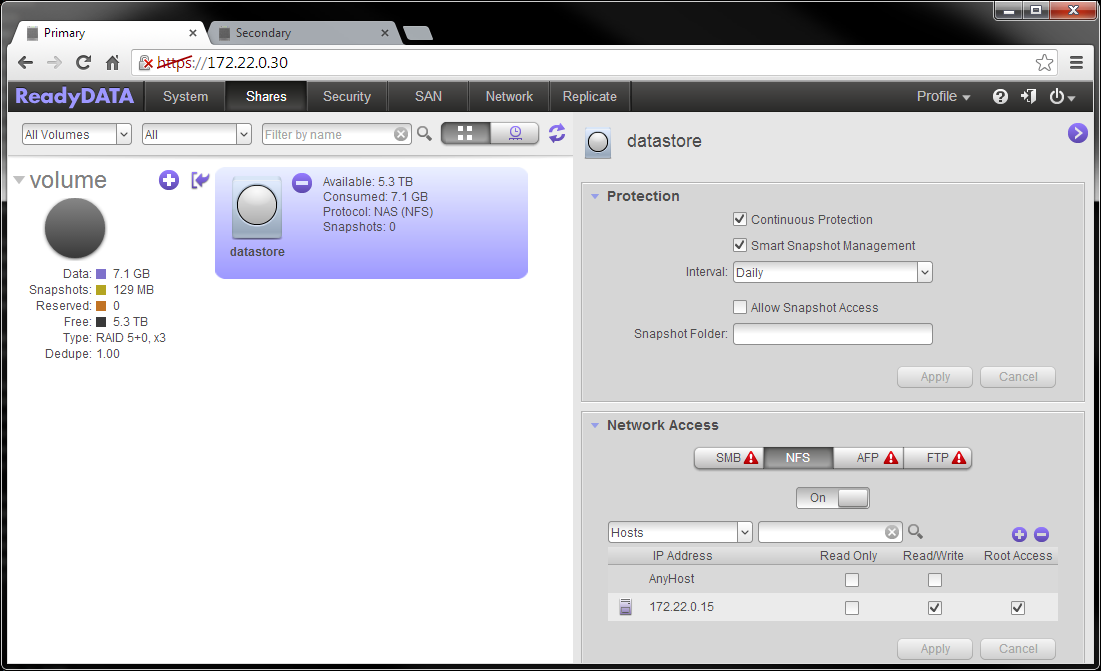
In this example, we have a share with NFS access enabled on the primary ReadyDATA:
A VMWare ESX host is connecting to this share and using it as an NFS datastore:
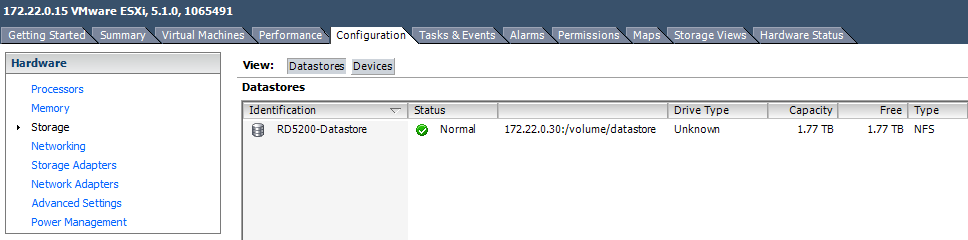
Stored on this NFS datastore is a running virtual machine.
Step 1: Enable Replicate and Exchange Certificates Between ReadyDATAs
- On each ReadyDATA go to System - Settings and verify that the Replicate service is started. In this example, we will use local Replicate. When using local Replicate, the ReadyDATAs should not be joined to the Replicate online portal (so the Username/Password field should be empty).
- On each ReadyDATA go to the Replicate tab and click on Certificates
- On the primary ReadyDATA in the Local Certificate section, click the Copy to Clipboard button. The Copy Certificate screen opens, displaying the certificate:
-
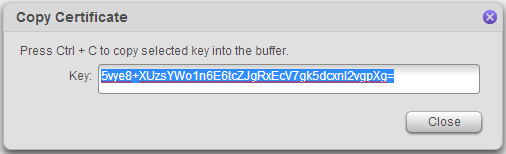
- Copy the string to the clipboard and press the Close button
- On the secondary ReadyDATA, click the + icon.
- The New Certificate screen displays:
-
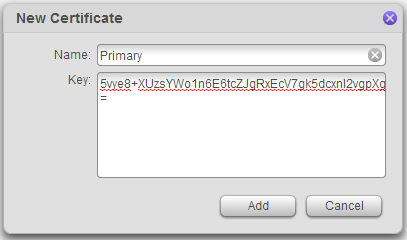
- Give the certificate a name and paste the certificate into the key field. The press Add.
- Repeat the process exchanging the roles of the ReadyDATAs. Note that this exchange of certificates in each direction is a once off task.
Step 2: Create a Replicate Job from Primary to Secondary ReadyDATA
- On the primary ReadyDATA, go to Replicate - Jobs and click New Job
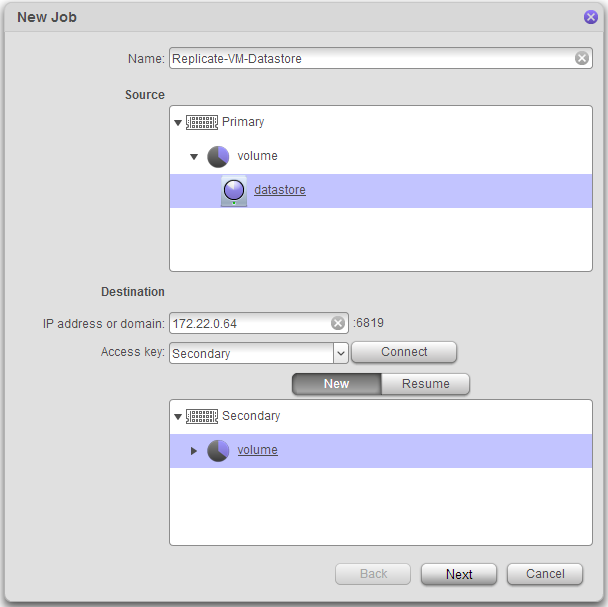
- Give the job a name, select the source dataset, enter the IP of the secondary system, select the corresponding certificate entry and press Connect. Then choose the volume on the secondary unit on which the dataset should be replicated to:
-
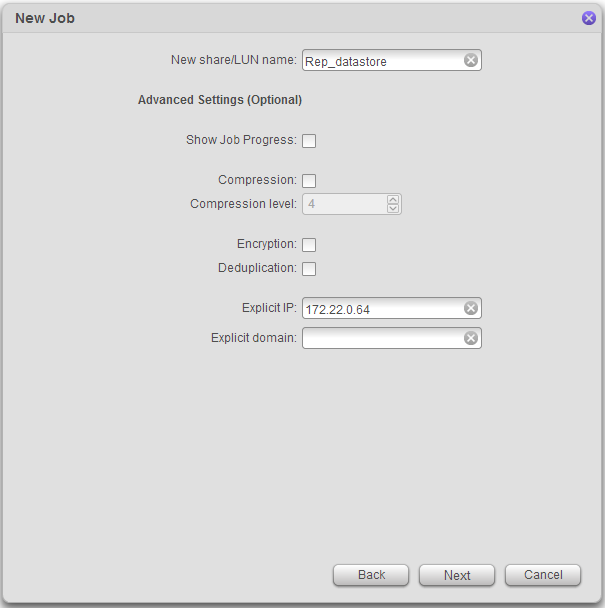
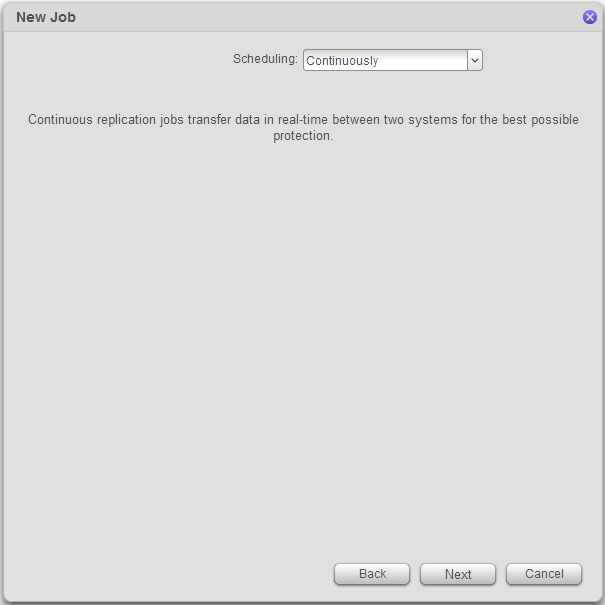
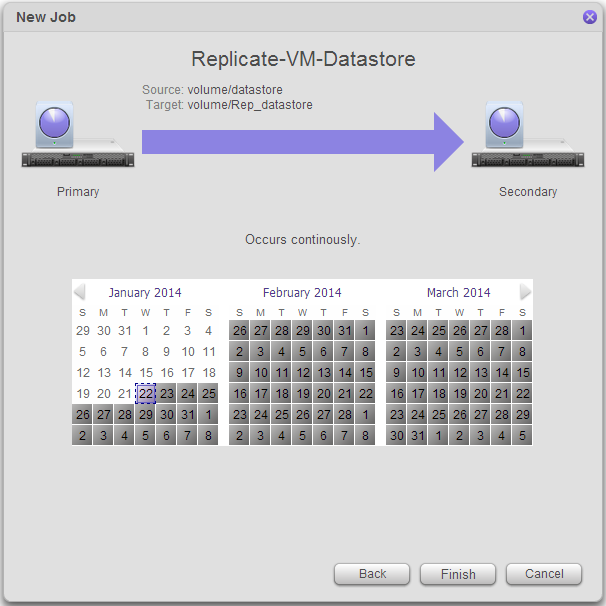
- Complete the remaining job configuration windows as shown below and finally, press Finish. In this example, we are mostly using default options. Note that the compression, encryption and deduplication options mentioned here are only applied during the data transfer. When the data is stored on the destination system, it will have the same characteristics as the source dataset.
-
- When the job configuration is completed, the job will begin doing the initial sync as shown below. Note that depending on the size of the source dataset and the bandwidth of the network connecting the two ReadyDATAs, then this initial sync may take a long time. You may wish to 'seed' the job before doing this initial sync. Please refer to the section on 'Seed or Reseed Replication' in the ReadyDATA software manual or look at this article for more info on this.
-
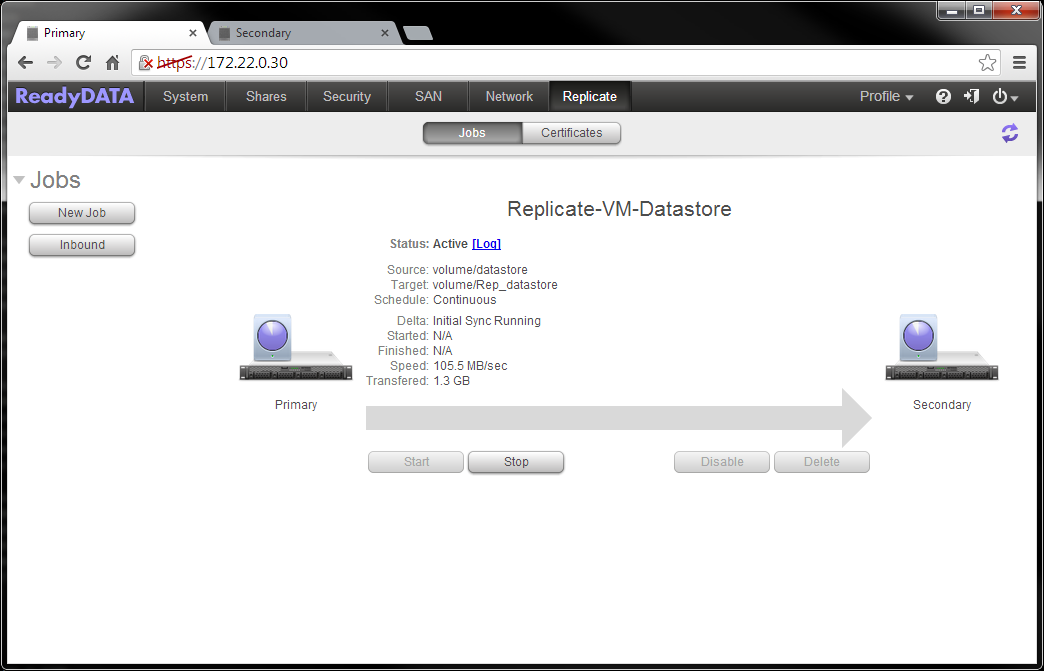
- After the initial sync is complete, then the secondary dataset will be only a few seconds behind the source dataset. As changes are happening on the primary, the blocks that are being changed are being automatically sent to the secondary system. As shown below, the secondary system is only three seconds behind the primary:
-
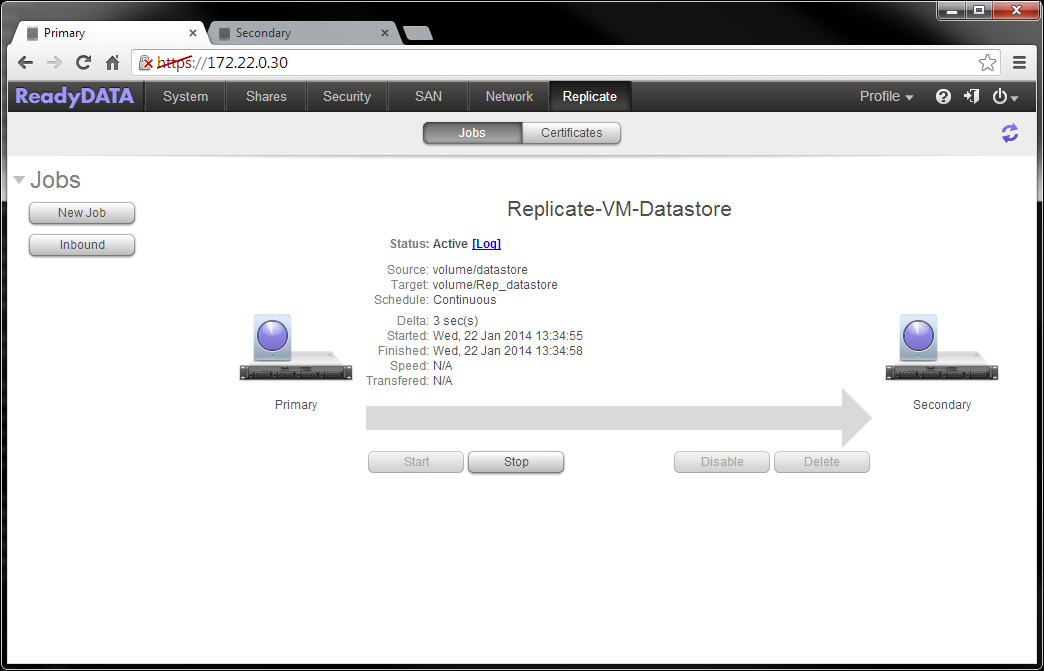
- The primary ReadyDATA is now protected through Replication to the secondary ReadyDATA.
Step 3: Fail-Over.
- Assume access to the primary ReadyDATA is lost. We want to fail-over to the secondary ReadyDATA.
- Go to the dataset on the secondary ReadyDATA, configure the NFS settings as needed and press Apply:
-
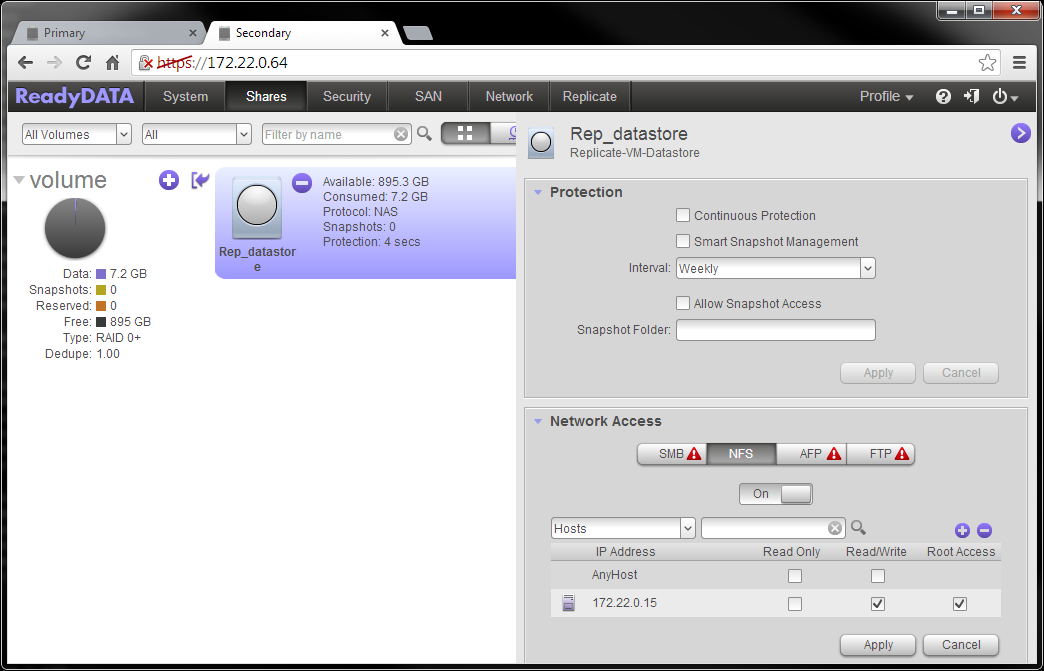
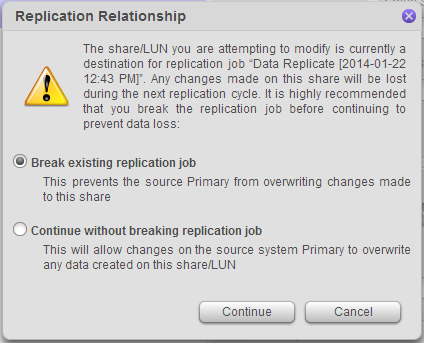
- After pressing Apply, you may get a pop-up like below. It is important to break the Replicate job because if the primary ReadyDATA were to come back online while the secondary was in use, then the data on the secondary ReadyDATA (which would now be in active use) would risk being overwritten by 'old' data from the primary ReadyDATA. Therefore choose 'Break existing replication job' and press Continue. This will remove the Replicate job configuration from the secondary ReadyDATA. When the primary ReadyDATA comes back online, the job will have a status of 'Broken'.
-
- The NFS datastore on the secondary system is now ready to be used. On the VMWare ESX host, connect to the secondary ReadyDATA:
-
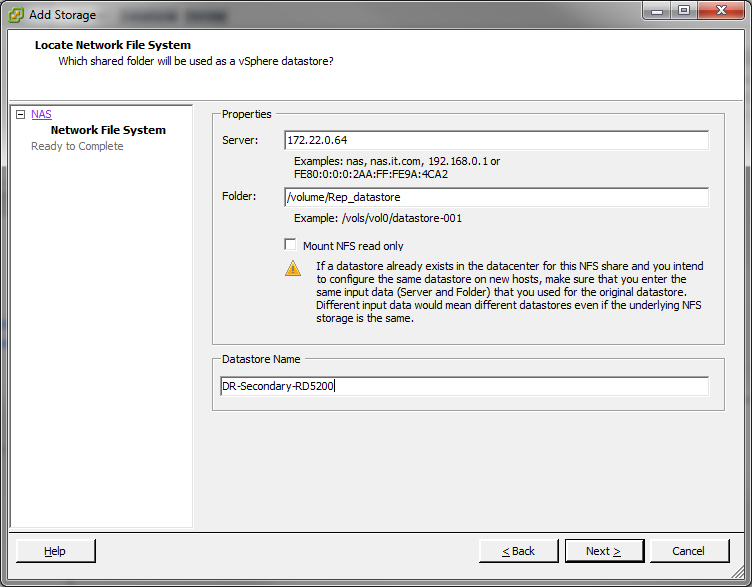
- It should now be available as a datastore for VMWare as shown below:
-
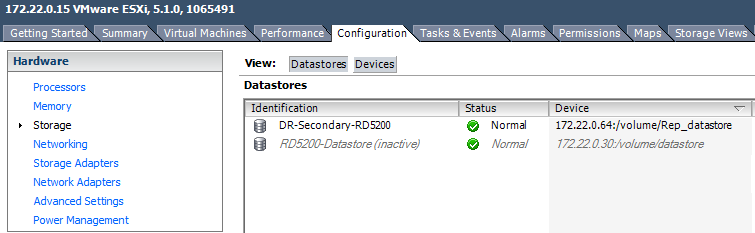
- Now you can browse into the datastore, find the VMs, add them to the inventory and bring them back online:
-
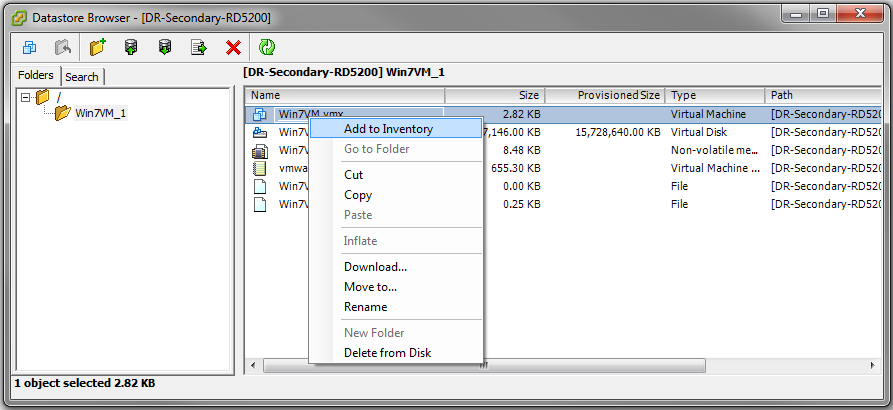
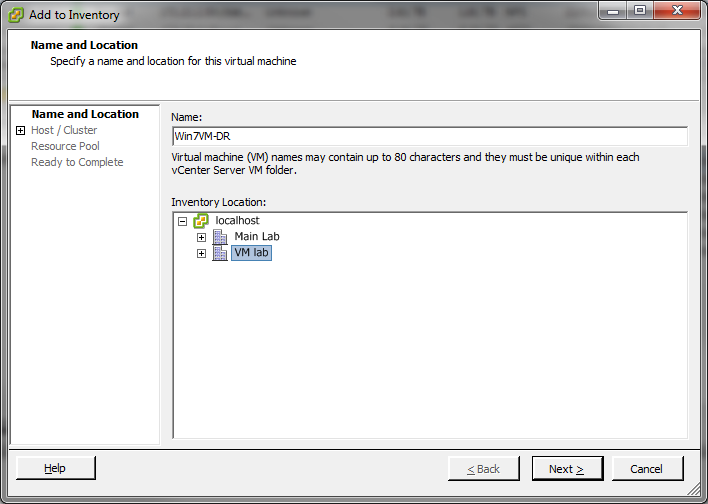
- The VMs are now back up and running and can be used.
Step 4: Restore Primary ReadyDATA & Replicate changes on Secondary back to Primary.
- Next, assume that access to the primary system is restored. We want to fail-back to the primary system. But the VMs on the secondary system have been in use and have been changing so this means that the data on the primary system is now stale. Therefore we need to bring the primary ReadyDATA back in-line with what is the current dataset on the secondary ReadyDATA. To do this, we create a Replicate job from secondary ReadyDATA to primary.
- On the secondary ReadyDATA, go to Replicate - Jobs and click New Job
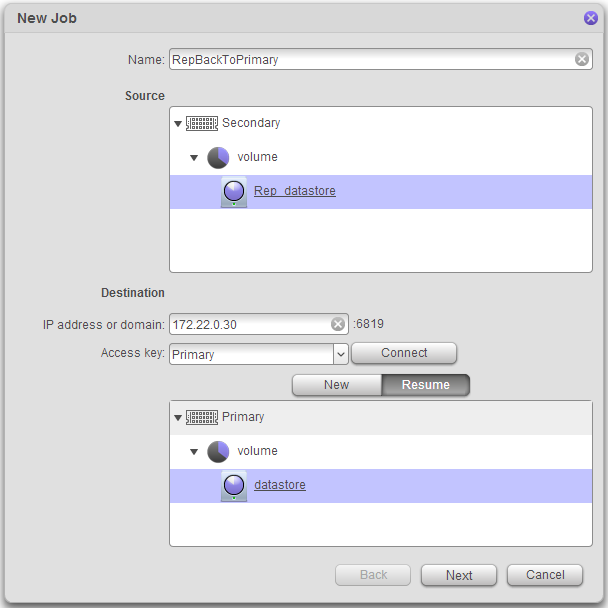
- Give the job a name, select the source dataset, enter the IP of the primary system, select the corresponding certificate entry and press Connect. Select the Resume button, browse to the original dataset on the primary ReadyDATA and press Next. We are choosing Resume so that instead of transferring all data from scratch, we will instead use the data that is already on the primary system to 'seed' the job.
-
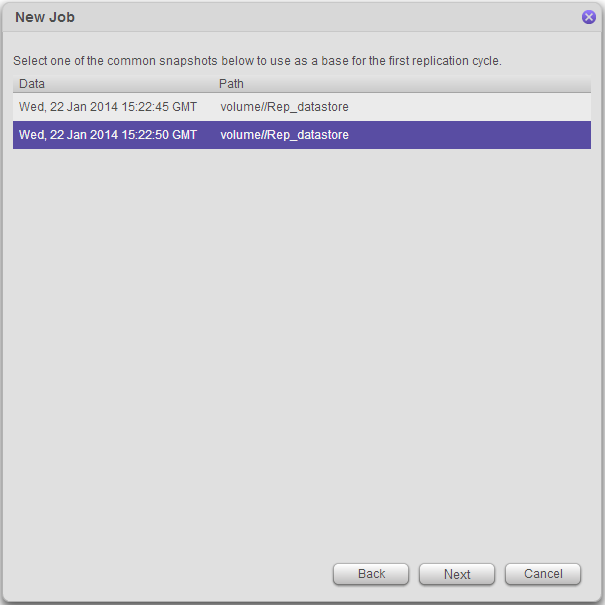
- Now you will see a list of available snapshots from where you can resume the Replicate job. Typically, you will want to choose the most recent snapshot. Once chosen, press Next:
-
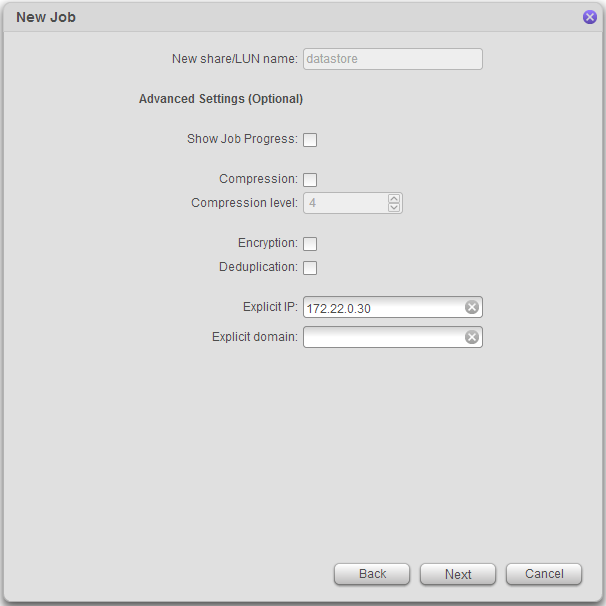
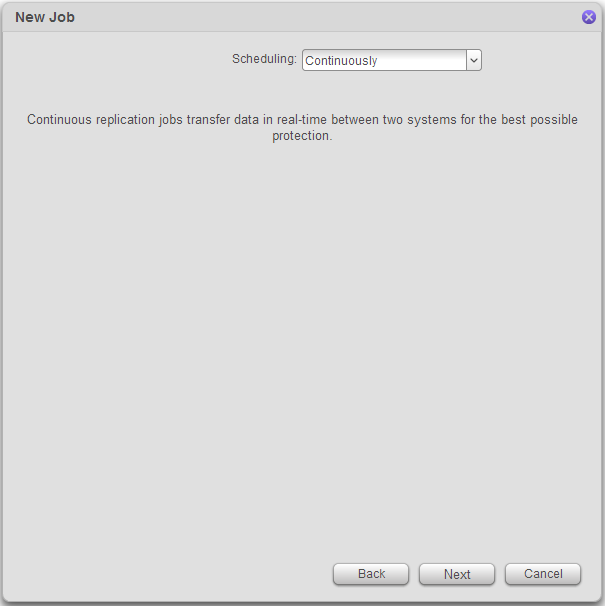
- Complete the remaining job configuration windows as shown below and finally, press Finish:
-
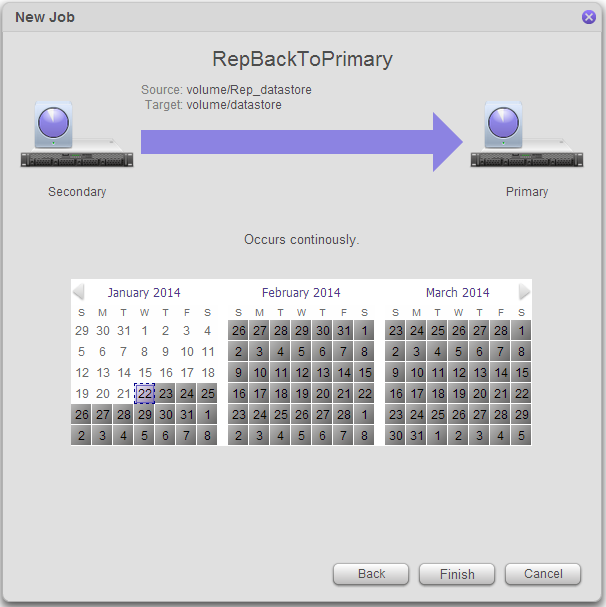
- The job will report that it is running 'Initial Sync'. However this will not take as long as the very first initial sync because it does not need to copy all the data but only the data that has changed since failing over to the secondary system:
-
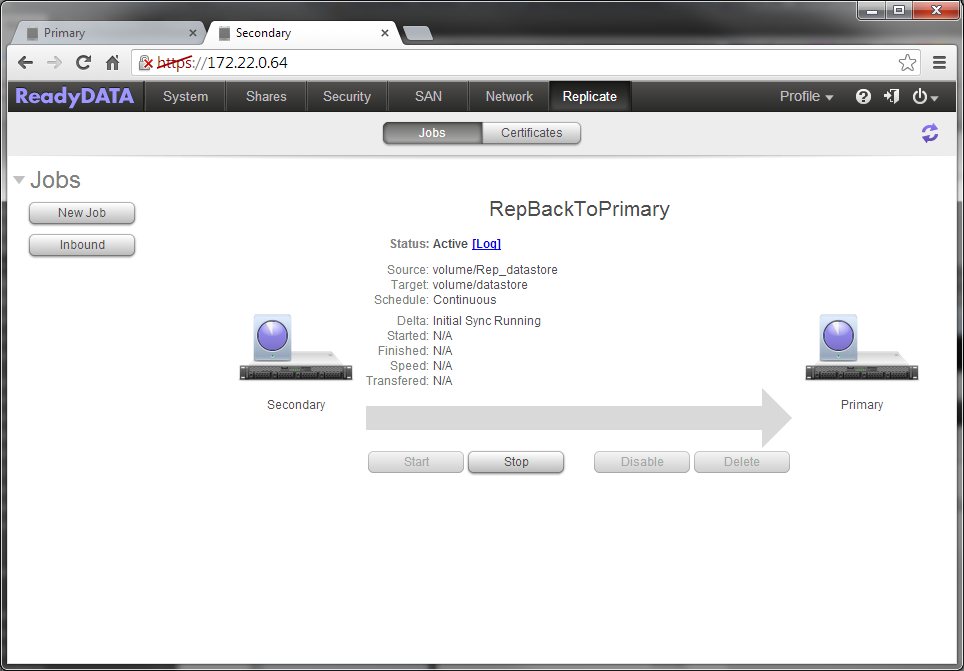
- After this sync has completed, the job should again be just a few seconds behind:
-
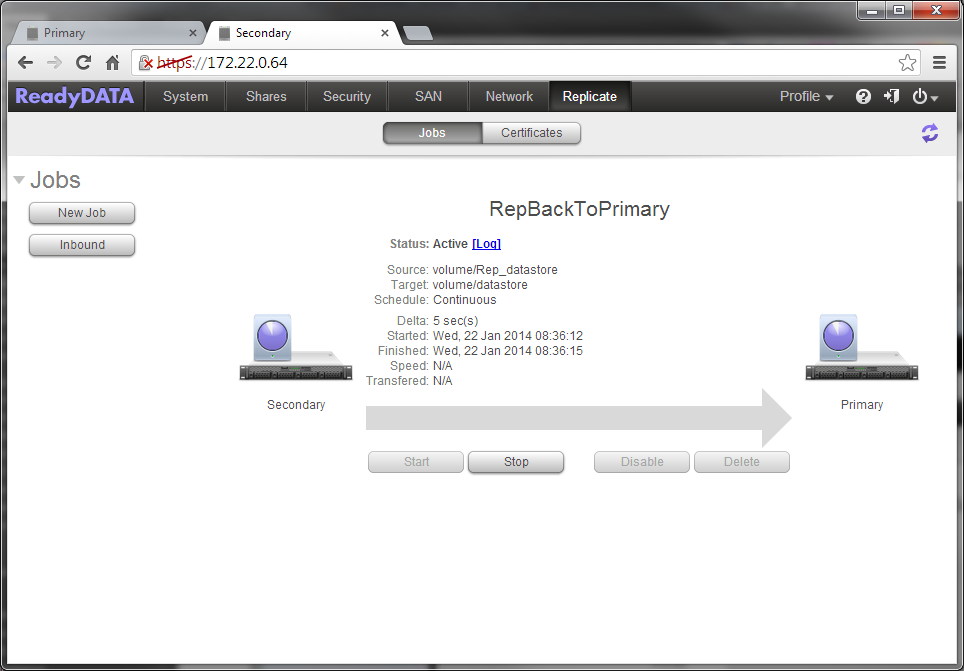
- We are now in a position to fail-back to the primary ReadyDATA.
Step 5: Fail-Back.
- At a suitable time, we will want to cut back over to the primary system.
- When this time comes, first stop the Replicate job running from the secondary ReadyDATA to the primary:
-
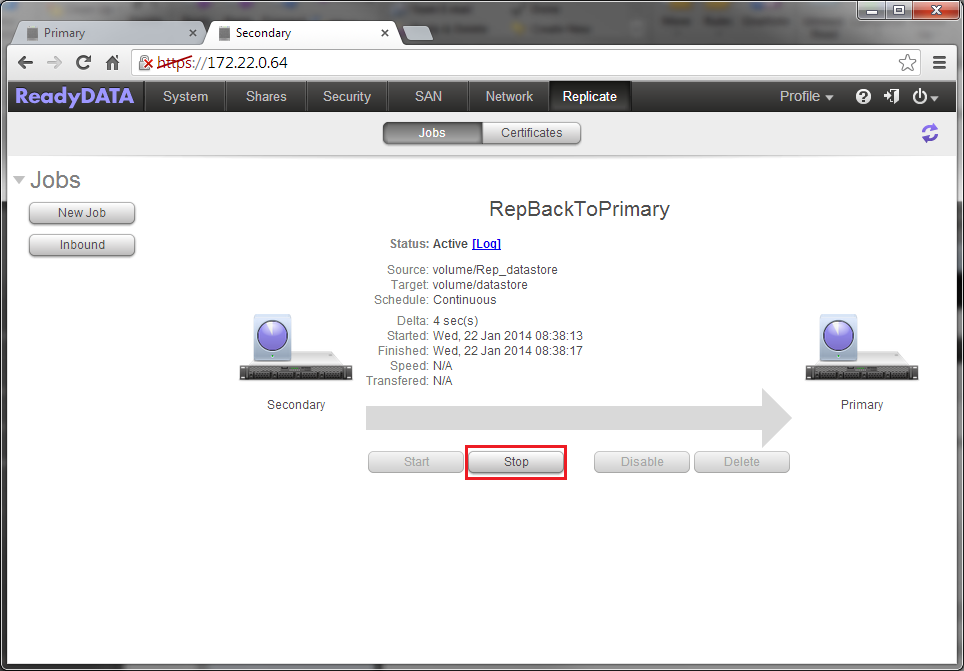
- Then delete the job:
-
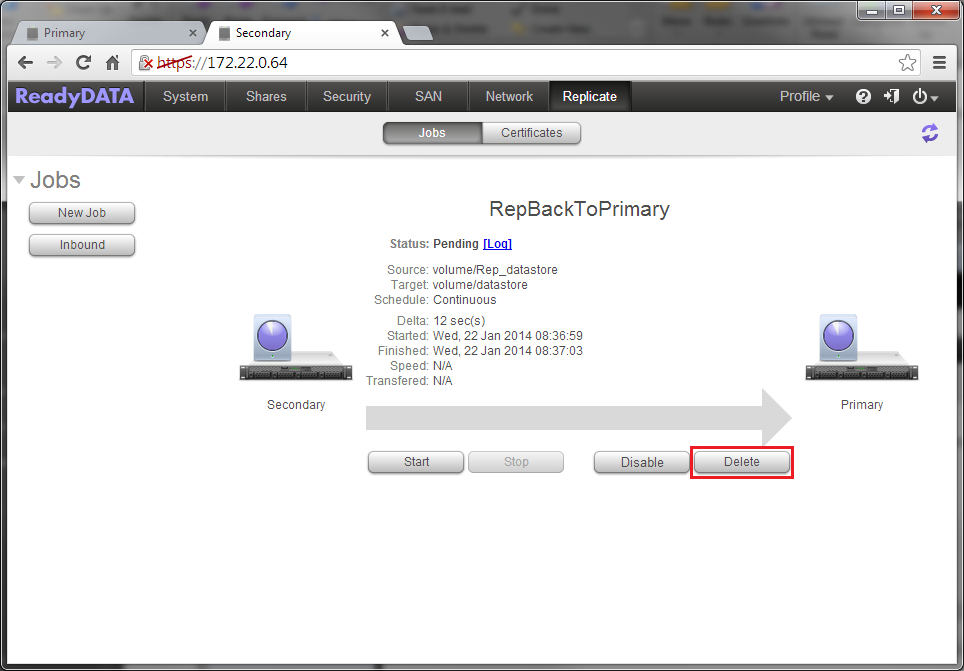
- Next, reconnect the VMWare ESX host back to the primary datastore and bring the VMs back online.
Step 6: Restore Protection.
- Now that we are back up and running on the primary system, we want to re-configure Replicate from the primary system back to the secondary system.
- Do this by following the instructions in step 2 but this time choose to resume the job from the existing dataset on the secondary system (seeding). Again this will mean that the initial sync will not need to transfer all data but only that which has changed on the primary.
- The primary ReadyDATA is now fully protected on the secondary ReadyDATA again.