

Depending on your specific Nighthawk model, the default router name is R7000, R7500, R8000, etc. If needed, the router name can be changed. The following article details the steps to log into your router and change the device name.
To change the router name:
Note: You can log into the router using the ROUTER LOGIN information listed on the bottom of the router. If you are unable to login using that method, follow the initial steps of this procedure.
- Ensure your computer is connected to the network either wirelessly or wired via an Ethernet cable.
- Click on Start and type cmd in the Search field. Press Enter.
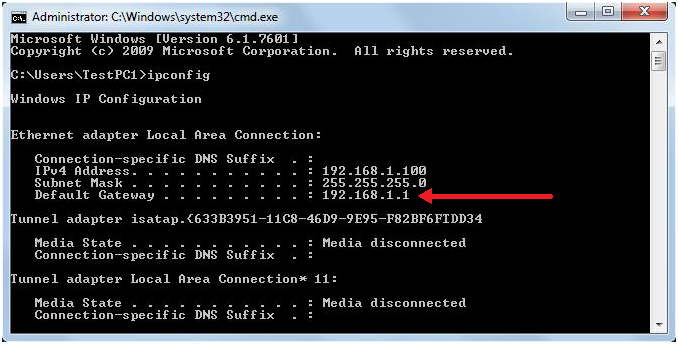
- Type ipconfig and press Enter.
- Your router IP address will appear next to Default Gateway. If the Default Gateway is blank, you are not connected to the network. Try connecting your PC to your router with an Ethernet cable to ensure you are connected to the network.
Note: If you were unable to find your router IP address in the previous steps or require specific operating system instructions such as Microsoft Windows 8, Apple iOS, or Mac OS X, see What is the IP address of my NETGEAR router? - Launch a web browser and type the IP address you noted in the previous step into the browser address bar.

- You are prompted to enter a username and password (Note: username and password are both case sensitive). The default login credentials are:
Username: admin
Password: password
Note: If these credentials do not work, you may have changed your admin password. If you cannot remember your new password, you must perform a factory reset to restore the router to the factory default settings. For more information, see Restoring a NETGEAR home router to the factory default settings - NETGEAR genie screen displays.
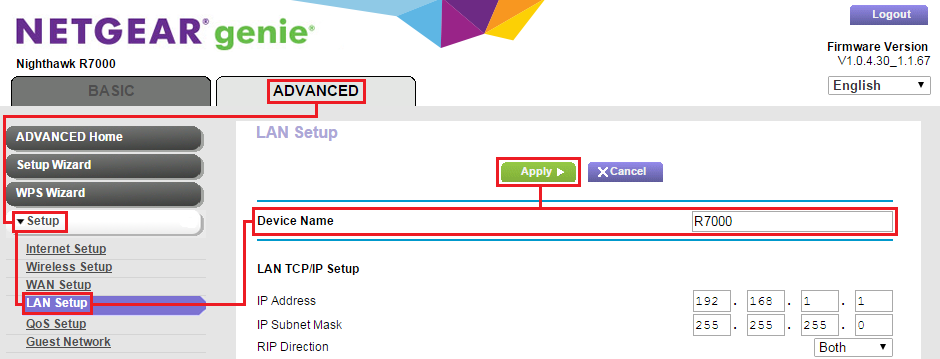
- Click ADVANCED > Setup > LAN Setup.
- Type a new name in the Device Name field.
- Click Apply to save the new router name.
Last Updated:07/07/2025
|
Article ID: 24087