

To enable the ReadyDATA to time-stamp files correctly, ensure that the time and date settings are accurate.
To set system time and date:
1. Click System > Overview > Hardware.
The Dashboard home screen displays the system information:
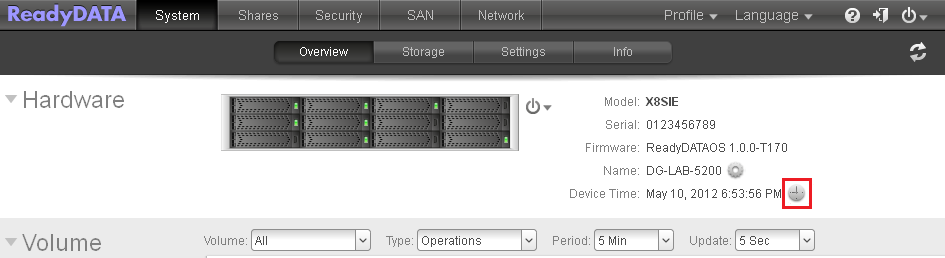
2. To the right of the Device Time field with the date and time, click the clock icon.
The Date and Time Settings screen displays:
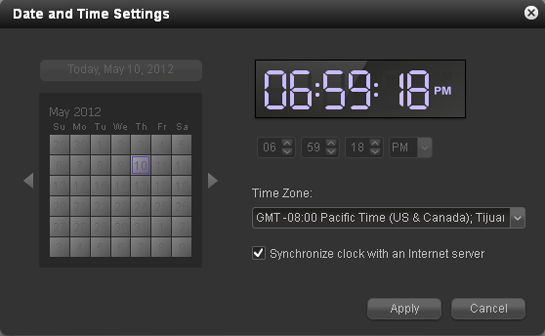
3. From the Time Zone drop-down list, select the correct time zone for your location.
So that your files are correctly time-stamped, NETGEAR recommends that you select the time zone in which the ReadyDATA is physically located.
4. Select the correct date and time by doing one of the following:
- Select the Synchronize clock with an Internet server check box. When you select this check box, the calendar and time drop-down lists dim, and the system's date and time are synchronized with a NETGEAR NTP server.
- Clear the Synchronize clock with an Internet server check box, and use the calendar and time drop-down lists to set the date and time manually.
5. Click Apply.
If you change the time zone, you need to restart the ReadyDATA, as follows:
a. Click the Power icon in the upper right corner of the navigation bar:
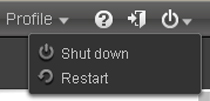
b. From the drop-down list, select Restart.
c. Confirm your selection.
The ReadyDATA shuts down gracefully and then restarts.
If you enabled email alerts, the ReadyDATA sends a message after it restarts.