

If your volumes use a protected RAID configuration, your system can recover from the failure of a disk. When you replace the failed disk, the system rebuilds the volume using the new disk and no data from the volume is lost.
Each disk tray includes a Fault LED that turns solid red when its disk fails. You can also use the local admin page to set up email alerts that notify you when a disk fails. In addition, the local admin page provides information about the failed disk.
ReadyNAS supports hot-swap drive bays, so you do not need to power down your storage system when replacing a disk.
If you want to add a previously formatted disk to your storage system, see the
WARNING: Replace one disk at a time. Wait for the volume to resynchronize your data before replacing another disk. If you attempt to replace more than one disk at a time, the system crashes.
To replace a 3.5-inch hard disk drive (HDD):
1. Press the disk tray release latch.
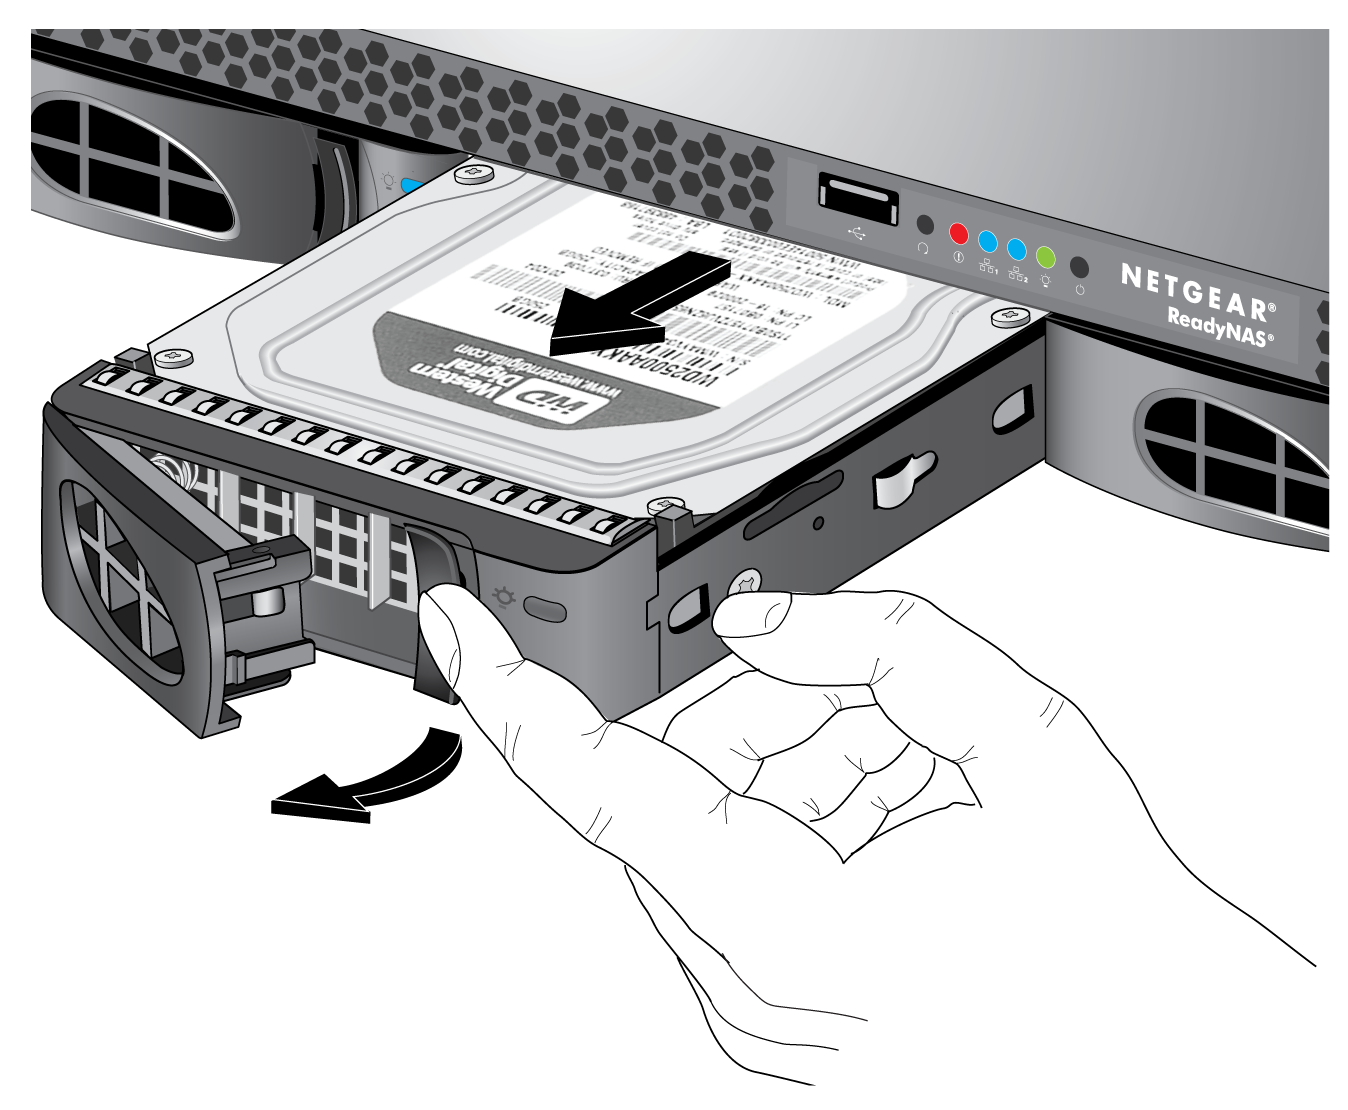
The disk tray handle pops out.
2. Pull out the disk tray.
3. Remove the screws and the old 3.5-inch HDD from the tray.
4. Place the new 3.5-inch HDD in the disk tray.
5. Secure the HDD in the tray using the screws.
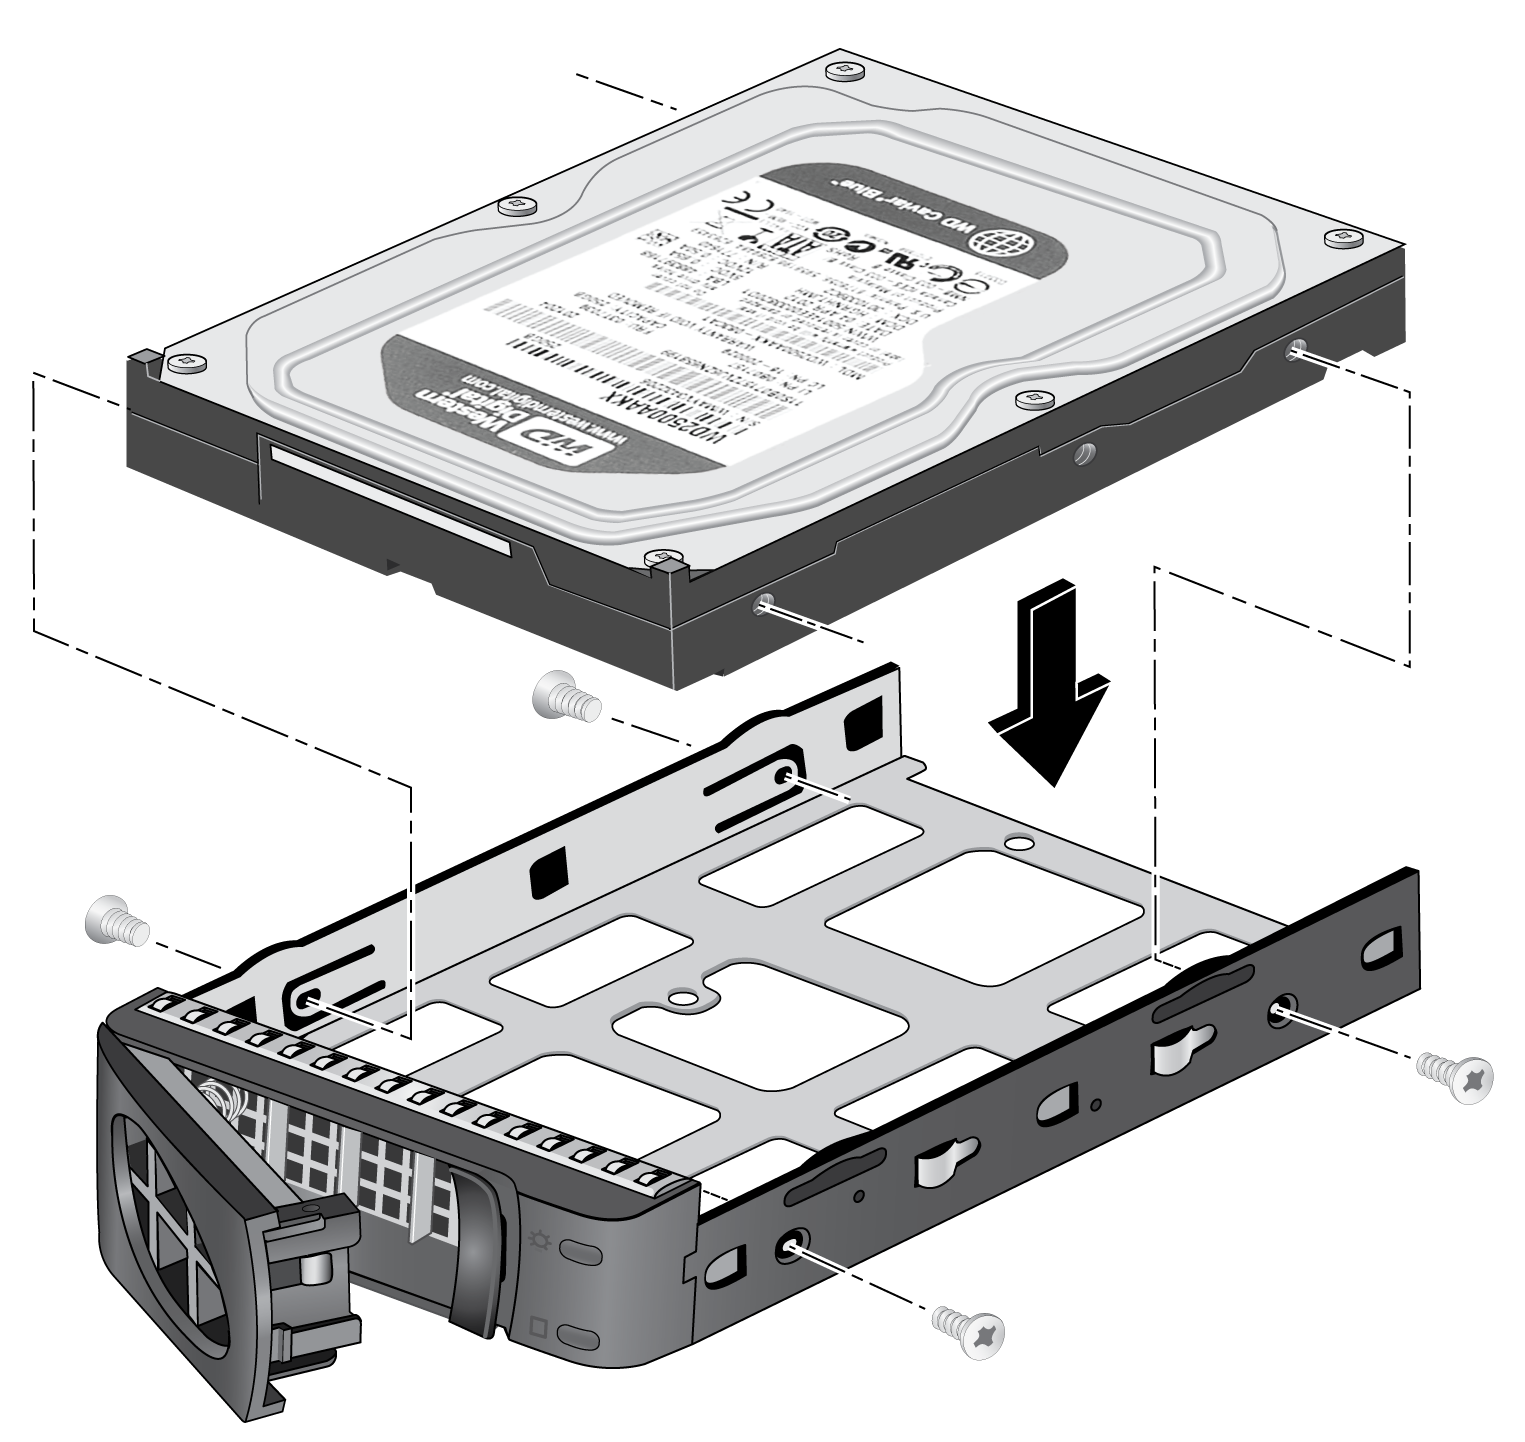
Make sure that the hard disk connectors face the interior of the disk tray when you assemble the disk.
6. Slide the disk tray back into the drive bay of the system.
7. Press the disk tray handle until it latches closed.
The disk tray is secured in the drive bay.

If the volume that contained the failed disk uses a protected RAID configuration, the system automatically resynchronizes the volume using the new disk. Resynchronization might take several hours, depending on the disk size. You can continue to use your storage system, although access is slower until the volume resynchronization finishes.
To replace a 2.5-inch hard disk drive (HDD) or 2.5-inch solid-state drive (SSD):
1. Press the disk tray release latch.

The disk tray handle pops out.
2. Pull out the disk tray.
3. Remove the screws and the old 2.5-inch HDD or SSD from the tray.
4. Place the new 2.5-inch HDD or SSD in the disk tray.
5. Secure the drive in the tray using the screws.
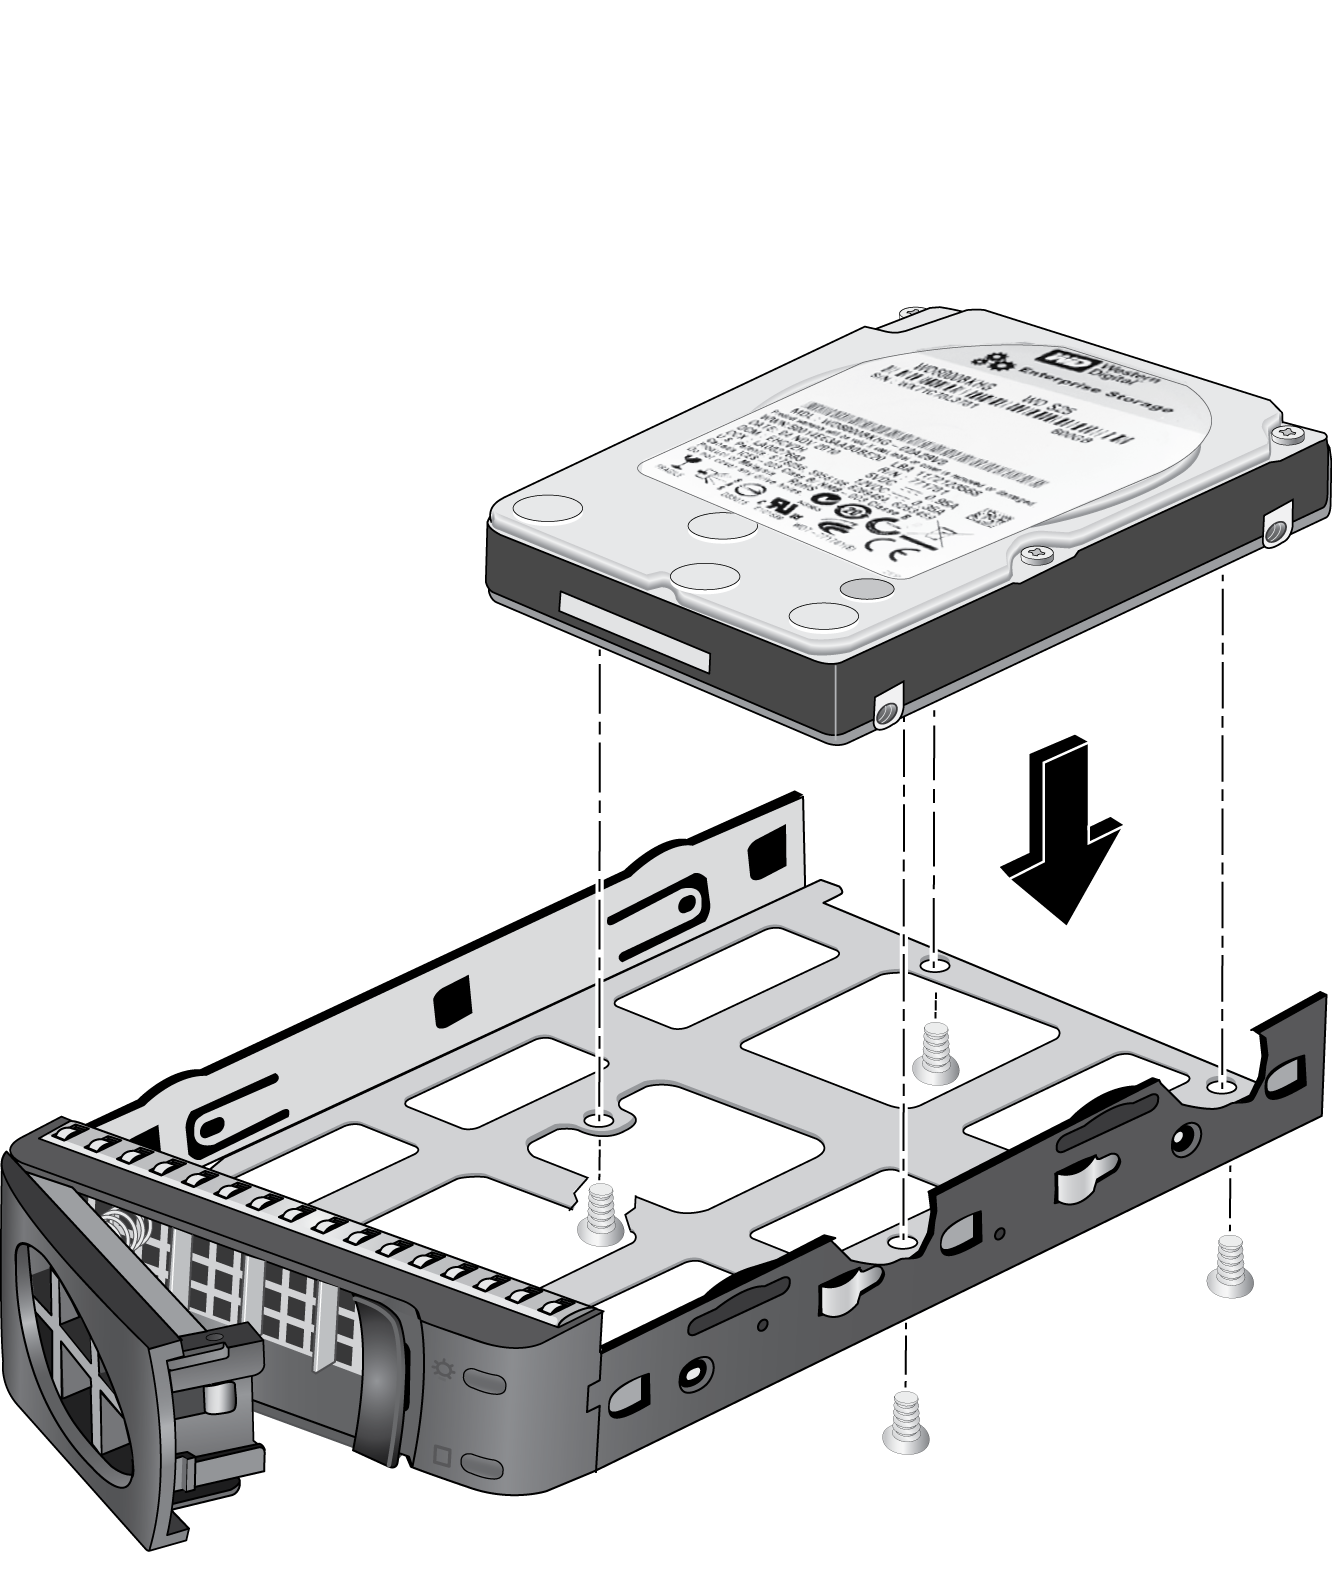
Make sure that the hard disk connectors face the interior of the disk tray when you assemble the disk.
6. Slide the disk tray back into the drive bay of the system.
7. Press the disk tray handle until it latches closed.
The disk tray is secured in the drive bay.
If the volume that contained the failed disk uses a protected RAID configuration, the system automatically resynchronizes the volume using the new disk. Resynchronization might take several hours, depending on the disk size. You can continue to use your storage system, although access is slower until the volume resynchronization finishes.
For more information about RAID configurations, the
This article applies to the ReadyNAS 2120 storage system.