

If your UPS is not automatically detected when you connect it to your ReadyNAS system, you must manually add the UPS.
To add a UPS:
1. Select System > Settings > UPS.
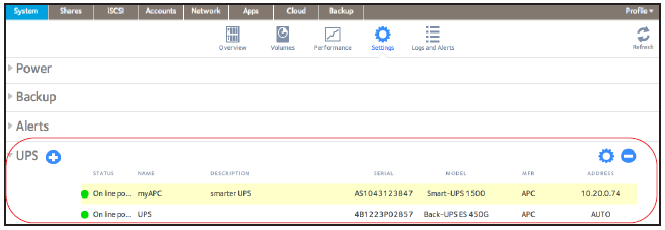
2. Click the + icon ( ) next to the UPS heading.
The Add UPS screen displays.
The options displayed depend on the type of UPS that you want to add.
Remote UPS options

SNMP UPS options

3. Configure the settings as explained in the following table:
|
Item |
Description |
|
|
Name |
Enter a name to identify the UPS:
|
|
|
Description |
An optional description to help identify the UPS. |
|
|
Type |
From the drop-down list, select one of the following options:
|
|
|
SNMP UPS Only |
Address |
Enter the IP address of the SNMP UPS. |
|
Community |
Enter public or private, depending on the manufacturer's requirement or the UPS's configuration. |
|
|
MIB |
From the drop-down list, select the MIB for one of the following manufacturers:
|
|
|
Remote UPS Only |
Address |
Enter the IP address of the remote UPS. |
|
User |
For a remote UPS that is attached to a Linux server that is running NUT, enter the user name used to access the remote UPS.
|
|
|
Password |
For a remote UPS that is attached to a Linux server that is running NUT, enter the password used to access the remote UPS.
|
|
4. Click the Add button.
The UPS is added to the UPS list.
This article applies to the following ReadyNAS and EDA storage system models:
-
ReadyNAS 102
-
ReadyNAS 104
-
ReadyNAS 312
-
ReadyNAS 314
-
ReadyNAS 316
-
ReadyNAS 516
-
ReadyNAS 2120
-
ReadyNAS 3220
-
ReadyNAS 4220
-
EDA 500