

To display and manage the system logs:
1. Select System > Logs and Alerts.
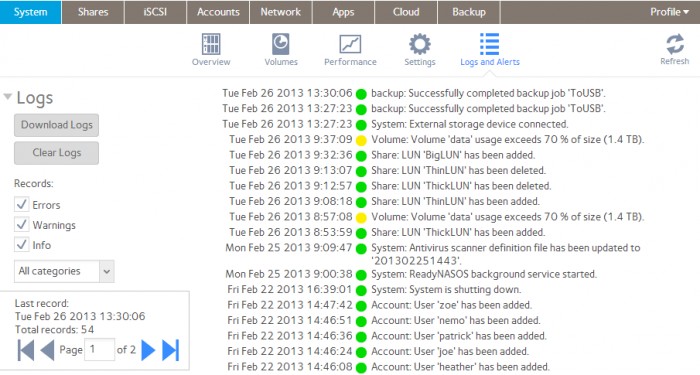
2. (Optional) To view additional messages, use the navigation box in the lower left corner of the screen.
3. Do any of the following:
-
Download the logs. Click the Download Logs button to download a zipped file with all log files to your browser's default download location. The default name of the zipped file is System_log-<host name>.zip, in which <host name> is the host name of the ReadyNAS. For more information on configuring the host name, please see the How do I change the host name on my ReadyNAS OS 6 storage system?
-
Clear the logs. Click the Clear Logs button. The log entries onscreen are cleared but the log files remain intact.
-
Configure the logs. Under Records, select which message levels and categories are logged. These selections affect the system logs, alerts, SNMP traps, and onscreen messages.
-
Message levels. By default, the Errors, Warnings, and Info check boxes are selected, causing errors, warnings, and informational messages to be logged. You can clear any check boxes.
-
Message categories. By default, messages for all categories are logged. From the drop-down list, you can select to log individual categories only: System, Disk, Volume, Share, Account, or Miscellaneous.
-
Last Updated:07/07/2025
|
Article ID: 23106