

To create a bonded adapter:
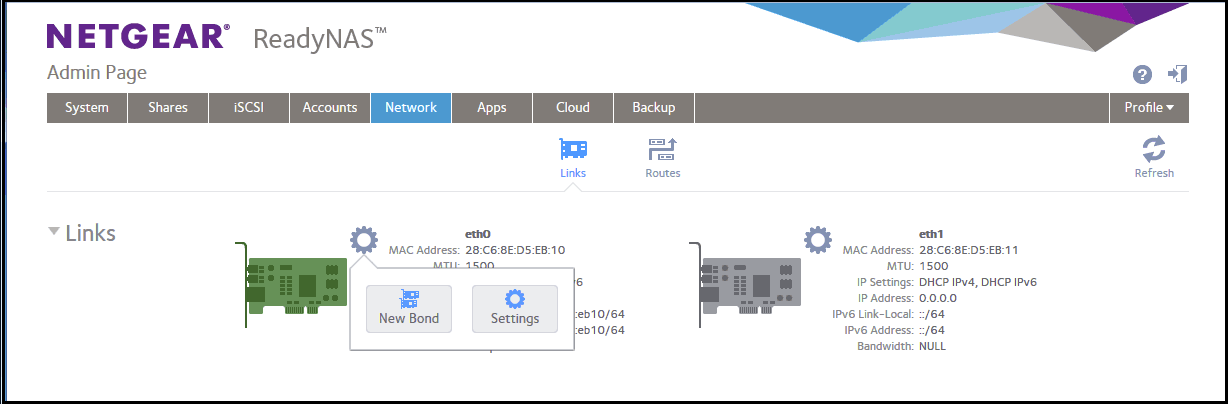
1. Select Network > Links.
2. Select one of the Ethernet interfaces that you want to bond.
3. From the pop-up menu that displays, select New Bond.
A pop-up screen displays.
The options displayed depend on the teaming mode that is selected.
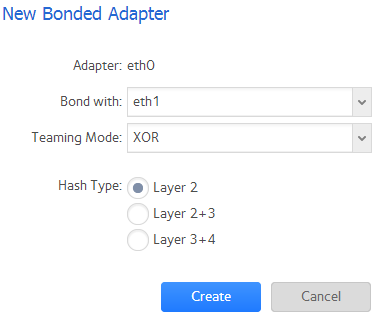
4. From the Bond with drop-down list, select another available Ethernet interface to include in the bonded adapter.
5. From the Teaming Mode drop-down list, select a teaming mode.
For more information about teaming modes, see the What are bonded adapters and how do they work with my ReadyNAS OS 6 storage system?
6. (For IEEE 802.3ad LACP and XOR only) Select the radio button next to the hash type option that you want to use.
For more information about teaming modes, see the What are bonded adapters and how do they work with my ReadyNAS OS 6 storage system?
7. (For Active Backup only) From the Primary Device drop-down list, select the Ethernet interface that is active by default.
Other Ethernet interfaces in the bond become active if and only if the active interface fails.
8. Click the Create button.
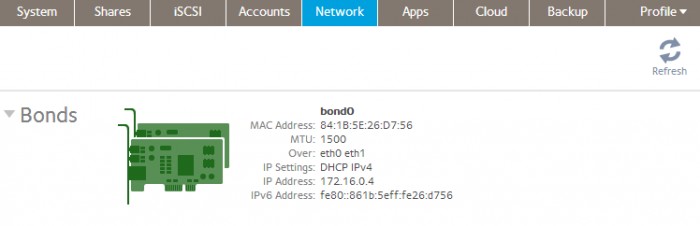
The new bonded adapter displays on the Network screen. The bonded adapter is named bondX, where X is a number in sequential and ascending order.
This article applies to the following ReadyNAS and EDA storage system models:
-
ReadyNAS 102
-
ReadyNAS 104
-
ReadyNAS 312
-
ReadyNAS 314
-
ReadyNAS 316
-
ReadyNAS 516
-
ReadyNAS 2120
-
ReadyNAS 3220
-
ReadyNAS 4220
-
EDA 500