

To configure an Ethernet interface:
1. Select Network > Links.
2. Select the Ethernet interface that you want to configure.
-
Ethernet interfaces with active links are colored green.
-
Ethernet interfaces with inactive links are colored gray.
3. From the pop-up menu that displays, select Settings.
_new.PNG)
A pop-up screen displays the settings for the selected Ethernet interface.
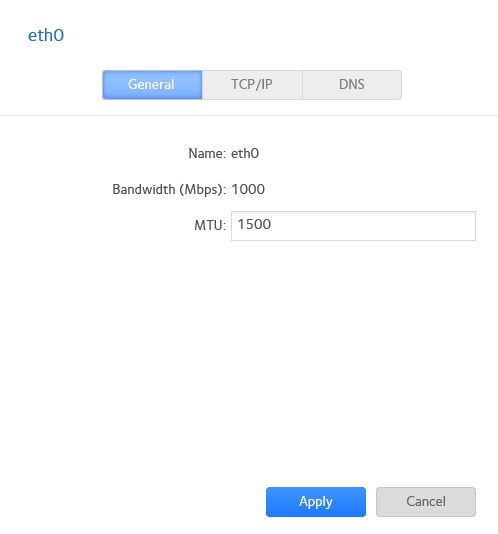
4. On the General tab, configure the settings as explained in the following table:
|
Item |
Description |
|
Name |
Cannot be edited. Displays the name of the Ethernet interface. |
|
Bandwidth (Mpbs) |
Cannot be edited. Displays the bandwidth of the Ethernet interface. |
|
MTU |
Enter the MTU in bytes. The default setting is 1500 bytes. |
5. Click the TCP/IP tab.
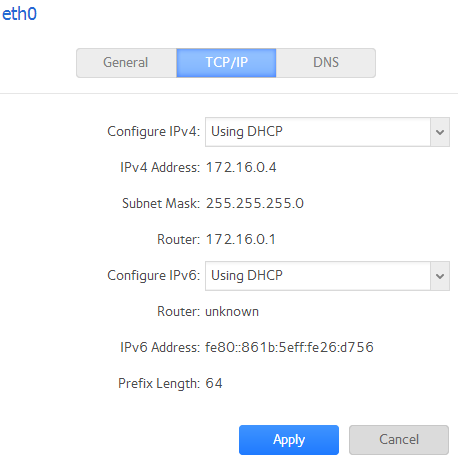
6. Configure the TCP/IP settings as explained in the following table:
|
Item |
Description |
|
|
IPv4 settings |
||
|
Configure IPv4 |
From the drop-down list, select how IPv4 is configured:
•Manually. You need to enter the IPv4 address and subnet mask for the ReadyNAS, and the router through which the ReadyNAS is connected to the network. |
|
|
IPv4 Address |
Enter the IPv4 address for the ReadyNAS. |
Manual configuration only. |
|
Subnet Mask |
Enter the subnet mask for the ReadyNAS. |
|
|
Router |
Enter the IPv4 address for the router through which the ReadyNAS connects to your network. |
|
|
IPv6 settings |
||
|
Configure IPv6 |
From the drop-down list, select how IPv6 is configured:
•Using DHCP. The ReadyNAS functions as a DHCPv6 client. The IPv6 settings are automatically configured by a DHCPv6 server on your network. •Manually. Enter the IPv6 address and prefix length for the ReadyNAS and the router through which the ReadyNAS is connected to the network. |
|
|
Router |
Enter the IPv6 address for the router through which the ReadyNAS connects to your network. The default setting is unknown. |
Manual configuration only. |
|
IPv6 Address |
Enter the IPv6 address for the ReadyNAS. |
|
|
Prefix Length |
Enter the prefix length for the ReadyNAS. The default prefix length is 64. |
|
Note: NETGEAR recommends that you use DHCP address reservation to make sure that the DHCP server always assigns the same IP address to the interfaces of the ReadyNAS. The MAC addresses of the physical interfaces are shown on the Network screen.
Note: If you enter an IP address manually, you must provide DNS server information if you want to access your ReadyNAS system over the Internet. For more information on DNS, see the What are the basic network concepts I need to understand before operating my ReadyNAS OS 6 storage system? If the IP address changes, your browser loses its connection to your storage system. To reconnect to your ReadyNAS system, use ReadyCLOUD to rediscover your device. For more information, see the How do I find my ReadyNAS OS 6 storage system on my network and set-up ReadyCLOUD?
7. Click the Apply button.
Your changes are saved.