

If a disk fails, your system provides email alerts and status messages about the need to replace a disk. You do not need to power down your unit when replacing a disk.
To replace a 2.5-inch disk:
1. If a disk failed, scan disk LEDs on the disk bays to identify the failed disk.
2. Pull the disk tray release pull switch.
The tray handle pops out.
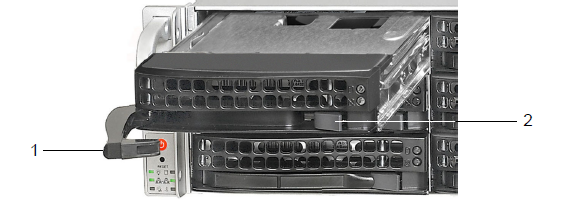
1. Disk tray handle
2. Disk tray release pull switch
3. Pull out the disk tray, turn the disk over, remove the screws, and separate the metal plate and the disk tray.
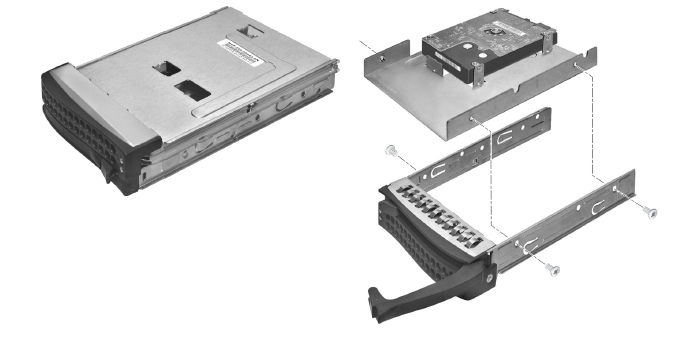
4. Remove the screws that hold the disk drive to the metal tabs and remove the old disk drive.
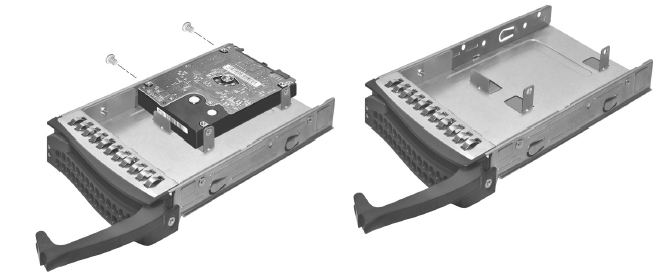
5. Replace the disk drive and reassemble the disk tray.
For more information, see the How do I add a disk to my ReadyDATA 5200, EDA2000, or EDA4000?.
6. Slide the disk tray back into the unit and secure the handle.
To replace a 3.5-inch disk:
1. If a disk failed, scan disk LEDs on the disk bays to identify the failed disk.
2. Pull the disk tray release pull switch.
The tray handle pops out.
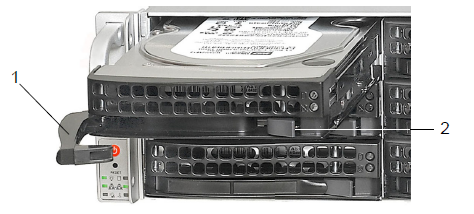
1. Disk tray handle
2. Disk tray release pull switch
3. Pull out the disk tray, remove the screws, and remove the old disk drive.
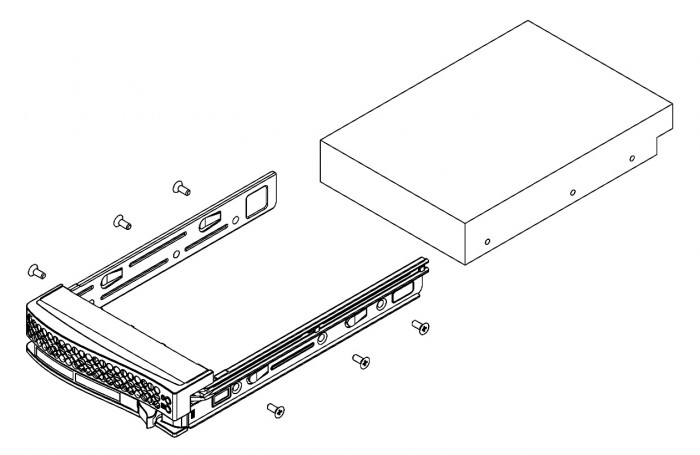
4. Replace the disk drive and reassemble the disk tray.
For more information, see the How do I add a disk to my ReadyDATA 5200, EDA2000, or EDA4000?.
5. Slide the disk tray back into the unit and secure the handle.