

The following figure shows the front and side panels of ReadyNAS 104:
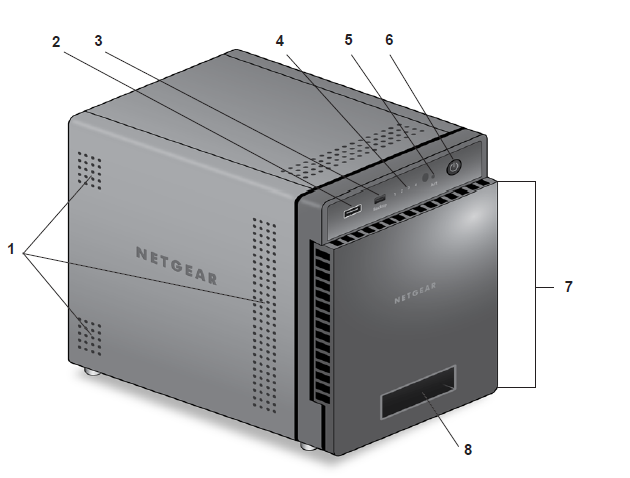
1. Exhaust vents
2. USB 2.0 port
3. Backup button and LED
4. Disk LEDs
5. Disk activity LED
6. Power button and LED
7. Drive bay door
8. Status display screen
The following figure shows the drive bays of ReadyNAS 104:
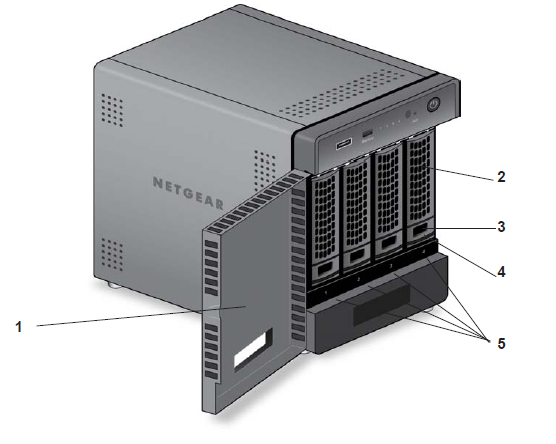
1. Drive bay door
2. Disk tray handle
3. Recessed disk tray locking mechanism
4. Disk tray release latch
5. Drive bays
The following figure shows the rear panel of ReadyNAS 104:
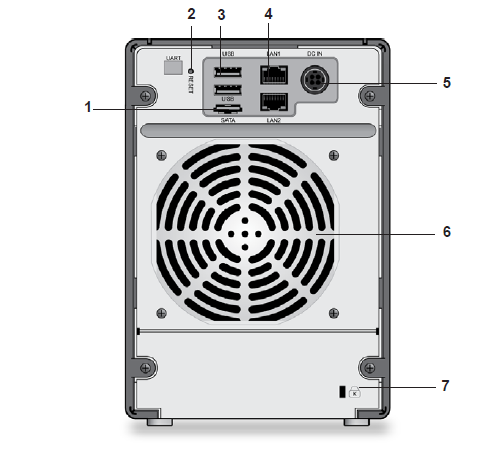
1. E-SATA port
2. Reset button
3. USB 3.0 ports
4. LAN ports with LED status indicators
5. Power cable socket
6. Exhaust fan
7. Kensington lock
Last Updated:07/07/2025
|
Article ID: 23022