

You can use your ReadyNAS storage system to back up data stored on your Mac OS X Time Machine.
To back up data stored on your Time Machine to your ReadyNAS system, follow these steps:
- Select Backup > Time Machine from the FrontView main menu.
The Time Machine screen displays.
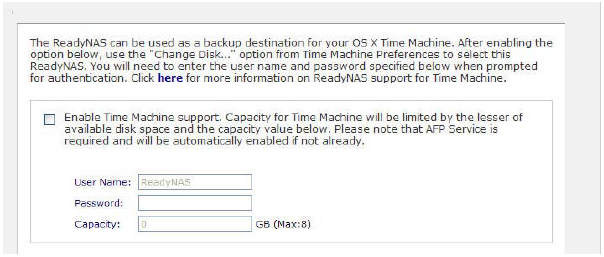
- Click the Enable Time Machine support check box.
- Enter ReadyNAS in the User Name field.
- Create a password and enter it in the Password field.
- Enter the maximum amount of space on your ReadyNAS storage system that you want to devote to Time Machine backups in the Capacity field.
If Time Machine backups exceed this quota, the ReadyNAS system deletes older versions of Time Machine backups to bring Time Machine backups within this quota.
- Click the Apply button.
Your settings are saved.
- Launch Time Machine and click the Choose Backup Disk button.
A pop-window displays that lists available disks, including your ReadyNAS system.
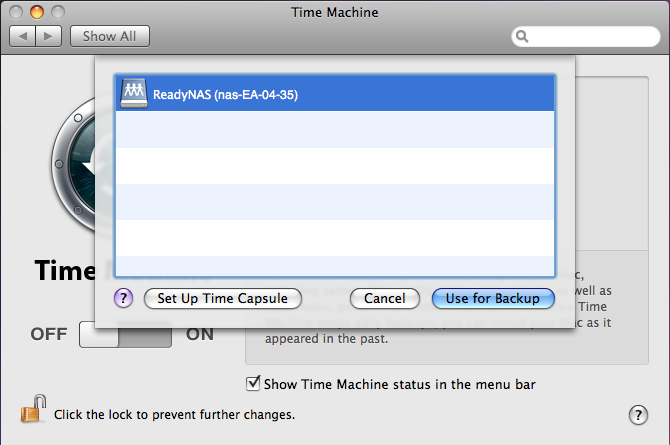
- Select your ReadyNAS system and click the Use for Backup button.
A dialog box displays, prompting you to provide login credentials.
/timemachine_login.png)
- Enter the user name you created in Step 3 in the Name field.
- Enter the password you created in Step 4 in the Password field and click the Connect button.
Time Machine begins the backup. This can take several minutes.
Last Updated:07/07/2025
|
Article ID: 21356