

You can access shares on your ReadyNAS system using a network-attached Linux or Unix device.
Note: Your ReadyNAS system does not support NIS because it is unable to correlate NIS information with CIFS user accounts. In mixed environments where you want CIFS and NFS integration, manually specify the user ID and group ID of the user and group accounts to match your NIS or other Linux or Unix server settings. Your ReadyNAS system can import a comma-delimited file containing the user and group information to coordinate Linux or Unix login settings.
To access a share using a network-attached Linux or Unix device, follow these steps:
- Ensure that the NFS file-sharing protocol is enabled on your ReadyNAS system.
For more information, see the How do I manage file-sharing protocols on my ReadyNAS Ultra series, Ultra Plus series, NVX Pioneer, or Pro Pioneer storage system? support article.
- Using a terminal program, enter the following command:
mount<ReadyNAS_IP_address>:/<share_name> <share_name>
Note the following:- <ReadyNAS_IP_address> is the IP address of your ReadyNAS system.
- <share_name> is the name of the share you want to access.
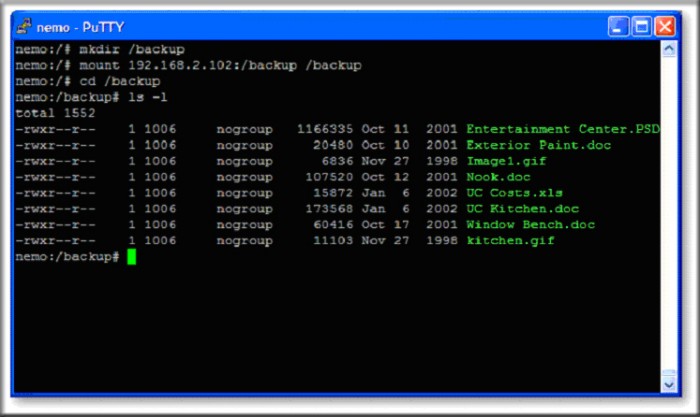
For example, if your ReadyNAS system's IP address is 192.168.2.102 and you want to mount the backup share, enter mount 192.168.2.102:/backup backup in your terminal program.
Last Updated:07/07/2025
|
Article ID: 21264