

You can use Dashboard to create jobs to restore data that you backed up. You can restore backed up data that is on the ReadyNAS system onto a device, as shown in the following figure.

You can also use Dashboard to create a backup job to restore data to your ReadyNAS system that you backed up to another network-attached device as shown in the following figure.
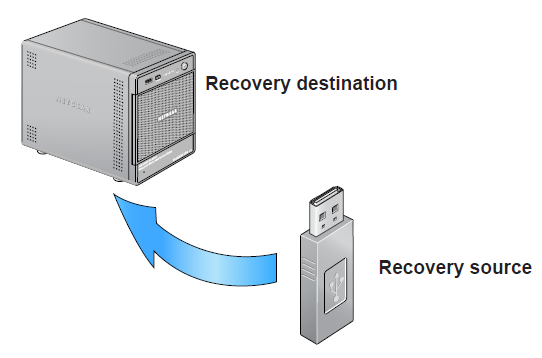
WARNING! Although this is a recovery procedure, your ReadyNAS system treats it like a backup job. This means that you use Dashboard screens labeled backup and you reverse the source and destination systems you used when you backed up the data that you are recovering.
By default, all backup jobs are scheduled to run every day. You can edit these settings after you create each backup job.
Backup and recovery jobs using Time Machine require different procedures.
To recover backup data to a network-attached device, follow these steps:
- Select Configure > Backup and click the New Backup Job icon.

The New Backup Job dialog box displays.

- In the Name field, enter a name for the new recovery job.
The name you choose can have a maximum of 255 characters.
- From the Source drop-down menu, select a restore source on your ReadyNAS system.
Depending on how your ReadyNAS system is configured, these options vary.
- From the Destination drop-down menu, select a recovery destination that is not part of your ReadyNAS system.
- Select a USB device that is attached to your ReadyNAS system or a remote device.
- Click the Create button.
The job is added to the list of backup jobs in the left pane. If you selected a remote recovery destination, complete the fields in the Backup Destination section.
- If you selected a remote recovery destination, complete the fields in the Backup Destination section.

- If necessary, enter the remote host name, the folder path, and any login credentials required to access that path.
If you select a backup destination that requires a path, use a forward slash (/) to separate directories, for example:
/<share name>/<folder name>
Do not use a backslash (\) in paths.
If you select a USB device that is connected to your ReadyNAS system, you can leave the path blank to put the data at the top level of the USB device's directory. You can enter a folder path to place the backed-up data in a specific folder.
- (Optional) Click the Test Connection button to determine if your ReadyNAS system can access the remote destination.
In the left pane, the status LED icon for this job changes from gray to red or green to indicate test results. Red indicates connection failure and green indicates connection success.
- In the Backup Schedule section, clear the Enabled check box.
Clearing this check box forces the recovery procedure to be started manually, which ensures that the recovery job does not happen automatically.
WARNING! To ensure the integrity of the data stored on your primary device, never schedule a recovery job to run automatically.
- (Optional) In the Backup Options section, adjust option settings.
- From the Schedule full backup drop-down menu, select Every Time.
- From the On completion send drop-down menu, select what type of logs to send when the recovery job finishes.
You can send a log that lists only errors during recovery, full logs consisting of file listings (can be large), or status and errors (status refers to completion status). Log email messages are restricted to approximately 10,000 lines. For more information about viewing full logs, see View a Backup Log on page 82.
- Ensure that the Remove the contents of the backup destination check box is clear.
Selecting this check box erases the destination path contents before the backup is performed, which NETGEAR does not recommend for recovery jobs. WARNING! When using this option, ensure that you have correctly identified your backup source and backup destination. If you reverse them, you might permanently delete your source files. NETGEAR recommends not enabling this option unless your destination device is very low on storage space. Best practice is to experiment with this option using a test share to make sure that you understand how it works.
- (Optional) Select the After backup is complete, change ownership of files in the backup destination check box.
Your ReadyNAS system attempts to maintain original file ownership whenever possible. However, you can automatically change the ownership of the backed-up files to match the ownership of the share. This allows anyone who can access the backup share to have full access to the backed-up files.
- Click the Apply button.
Your settings are saved and this recovery job displays in the left pane. Because you cleared the Enable check box, you must manually start the backup job.
- Highlight this job in the left pane and click the Run button.
- Click the Go button for this recovery job.
The recovery process begins.