

To achieve a scheduled backup copy of data directly from one ReadyNAS to another (without a PC being required), RSync is usually the best protocol to use (although other protocols will work).
This article shows how to set up such a backup, step-by-step.
Note: In example, 2 x ReadyNAS Ultra 4 , Host (10.0.0.4) , Destination (10.0.0.3)
- Login to the Frontview of both ReadyNAS (Host and Destination) and go to Services and click Standard File Protocols.
- Check the tick box to enable for Rsync on both ReadyNAS devices.
- Click Apply then click OK on the notification window to save the changes.

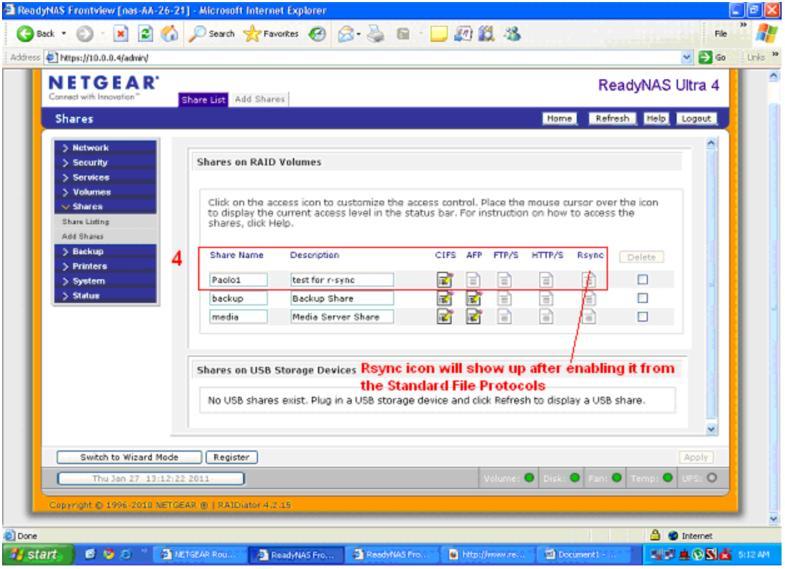
- Once enabled, an RSync column will show on the share listing screen. In this example, we created a share name “Paolo1” on the Host NAS (10.0.0.4)
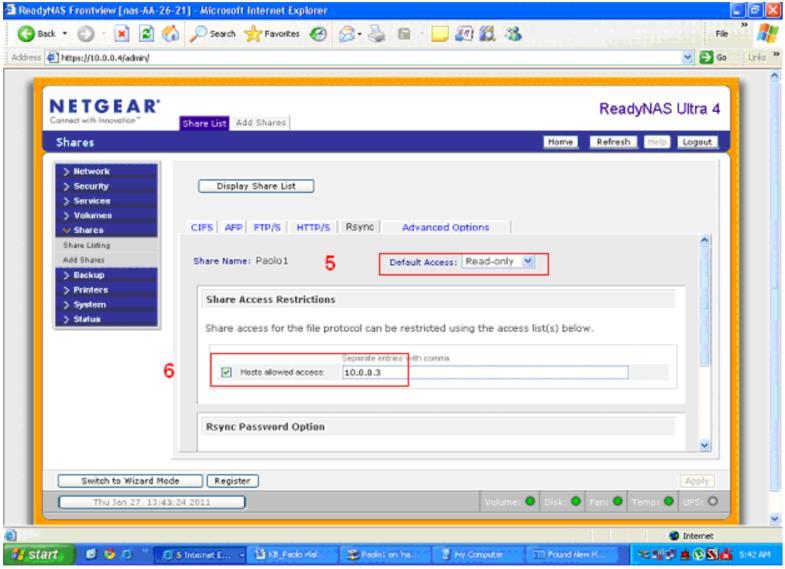
- On the Host NAS, set the default access to Read-only , since the Host NAS will only act as the source of the files to be copied to the Destination NAS.
- Under Share Access Restrictions, enable Hosts allowed access , and enter the IP address of the destination NAS (10.0.0.3).
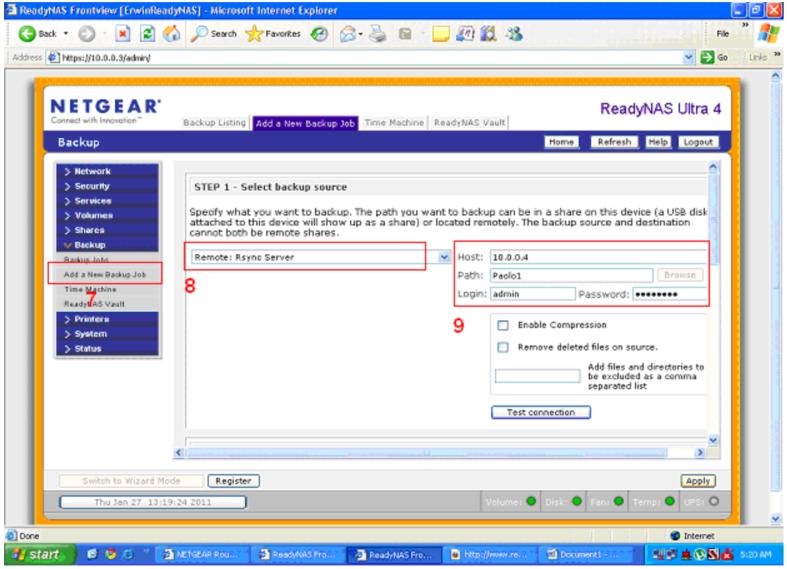
- Login to Frontview on the Destination NAS (10.0.0.3) and go to Backup and then Add a New Backup Job
- On the dropdown menu, select Remote: Rsync Server.
- For the Host, enter the IP address of the Host NAS (10.0.0.4). For the Path, specify the Share to be backed up. In this case, we used the share “Paolo1” that we created earlier. For the login and password, enter login details that have rights to access data to be backedup. We just used the admin account (admin / netgear1) of the Host (10.0.0.4).
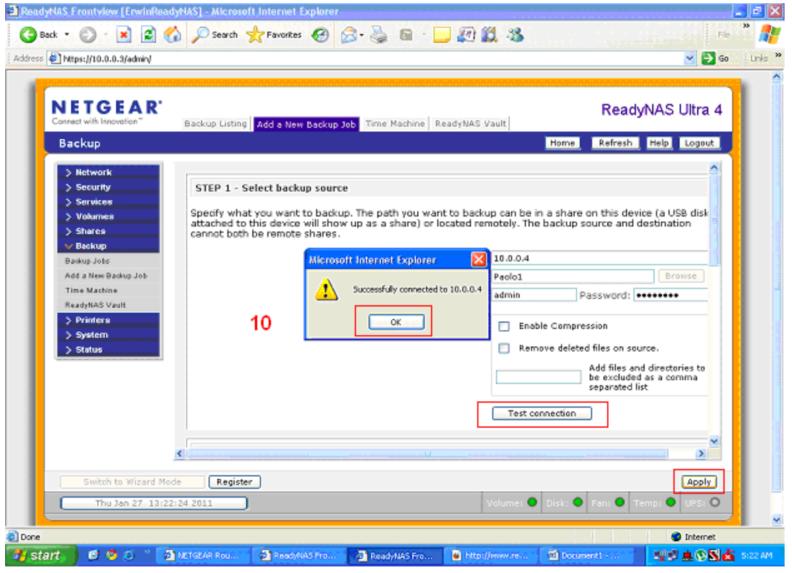
- Click Test connection. If successful, click Apply
- Select the destination share. In this example, we created a share named “Paolo” on the Destination NAS. The Share name “Paolo” should have the Default Access set to Read/Write.
Note: The share “Paolo” is where the Host NAS will save the files from the share “Paolo1”.
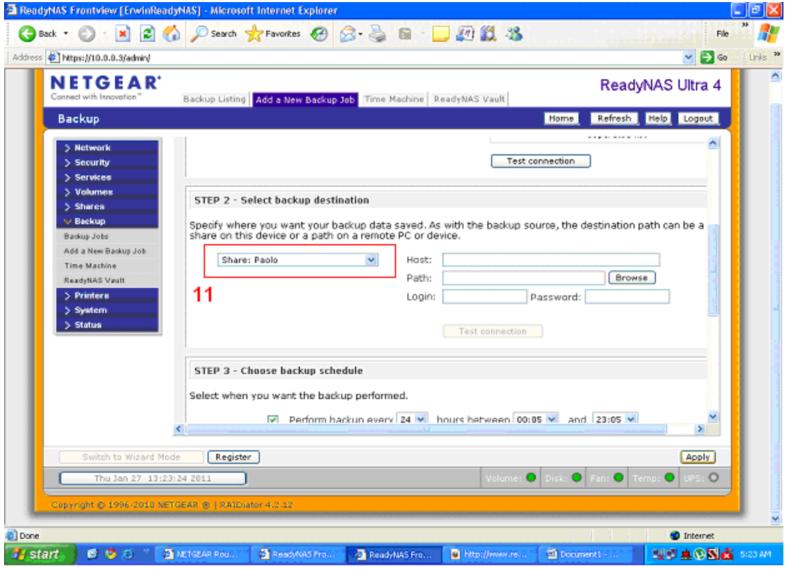
- Set the schedule for the RSync then click Apply.
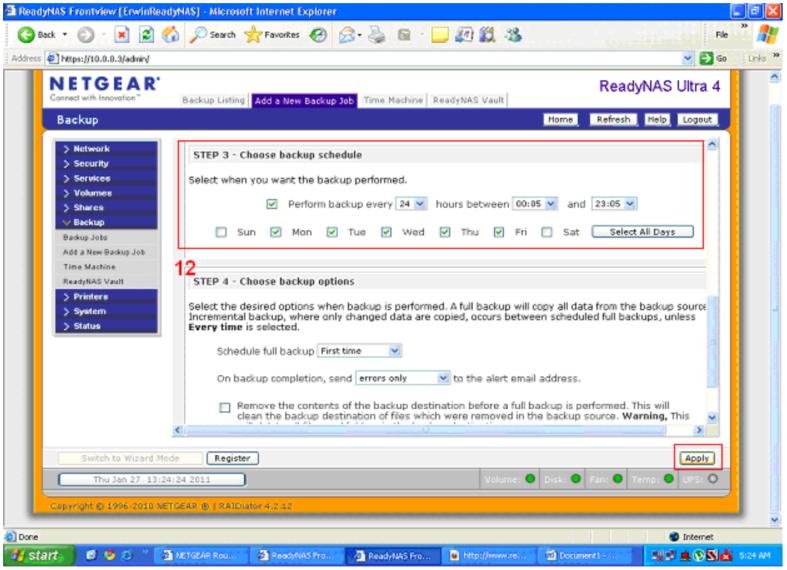
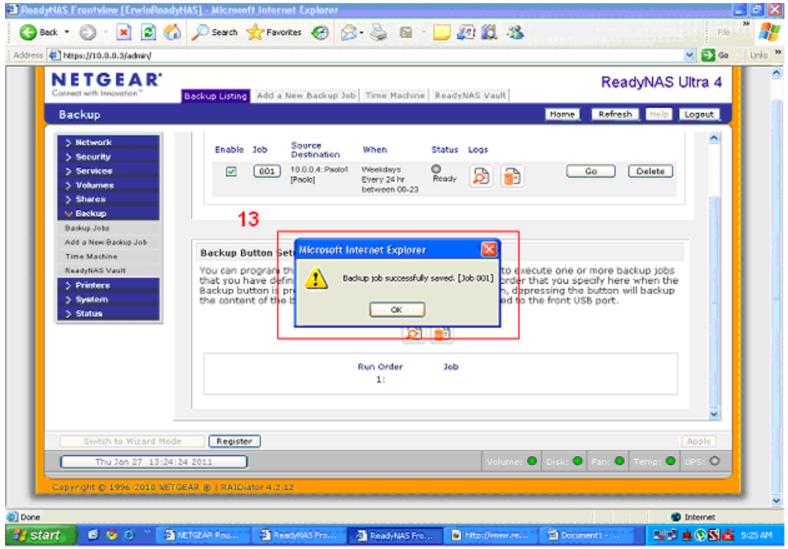
- Back-up job should be successfully saved.
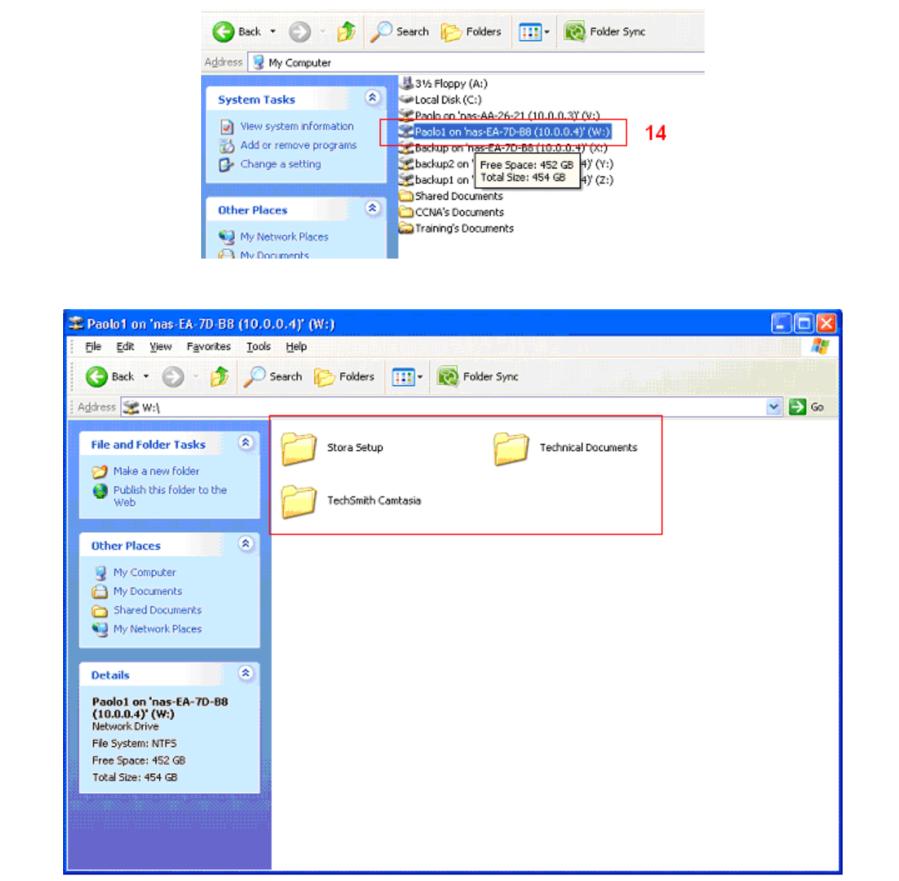
- Check the contents of Host share “Paolo1” using any protocol. In this case, we used CIFS / Mapping. In the diagram below, the share “Paolo1” has 3 folders currently saved.
- Run the Back-up job. Once started, click OK to proceed.
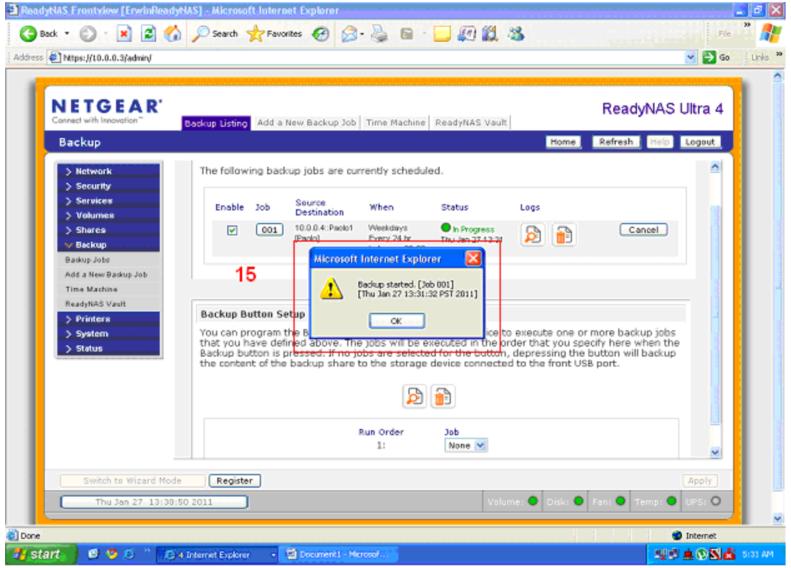
- A pop-up will appear once back-up is done. Click OK.
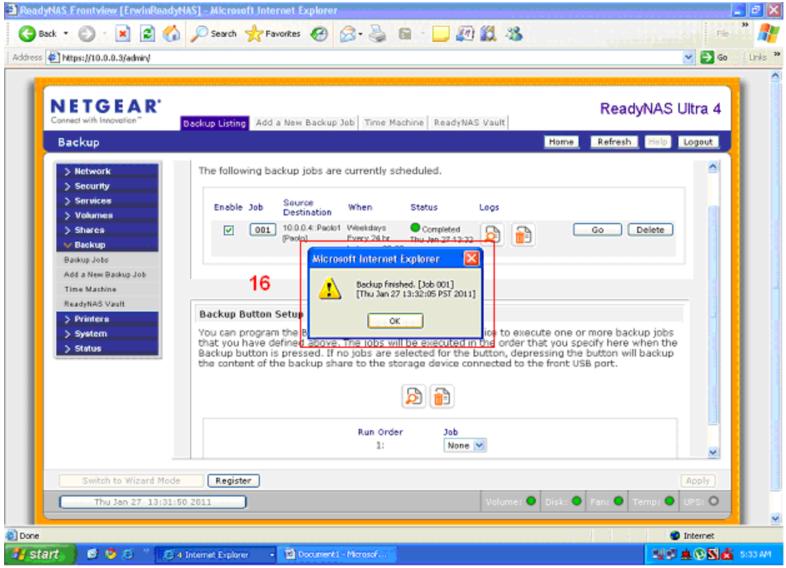
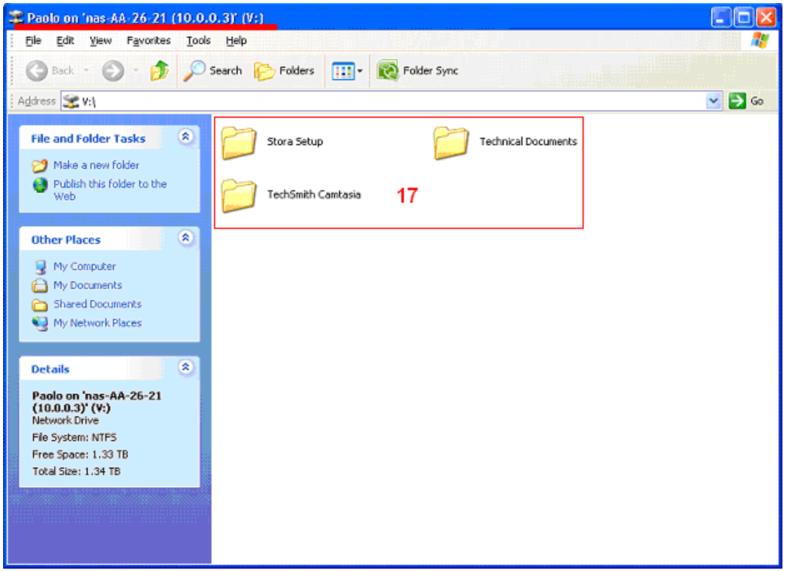
- Check the destination share to see if the files from the host share are successfully backed-up.
Further information:
Rsync is the file copying tool that widely used for backup and mirroring. It uses the delta copy algorithm which sends only the difference between the source file and existing file on destination and thus reducing the amount of data sent over the network. To learn more about rsync, see the Wikipedia entry at https://en.wikipedia.org/wiki/Rsync.