

Creating a network map in Mac OS X, to access a USB hard-drive that is connected to a NETGEAR router.
Note: The OS version used in this article is Mavericks.
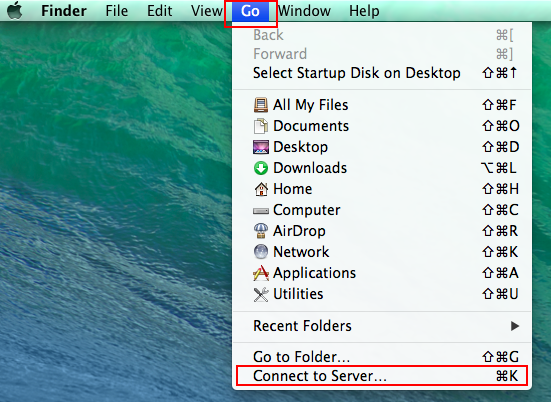
- When you are in Finder you can click Go and Connect to Server or you can type Command + K to get to the same menu.
-
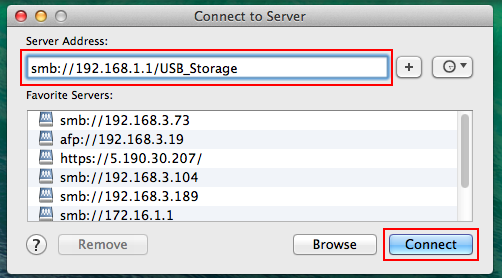
In the Server Address field, type the location of your ReadySHARE with this format smb://server/sharename (example: smb://192.168.1.1/USB_Storage) where server is the name or IP address of your ReadySHARE router and share name is the folder or drive that you want to mount.
-
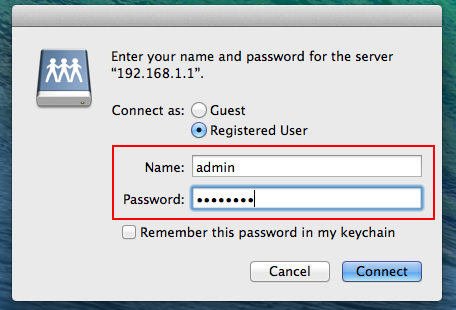
If your share requires authentication, you are prompted for that information here.
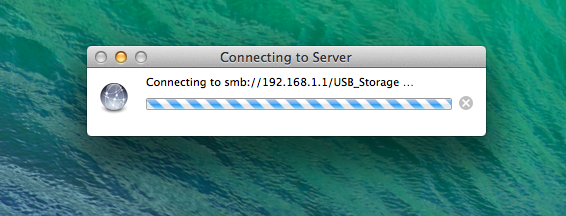
- Now if you have Connected Servers showing on your desktop, it shows up on your desktop and in Finder.

- To make a share mount automatically at Login:
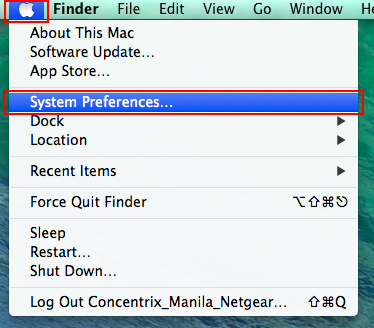
- You need to be in System Preferences for this, which you can get to by clicking on the Apple menu and then going to System Preferences.
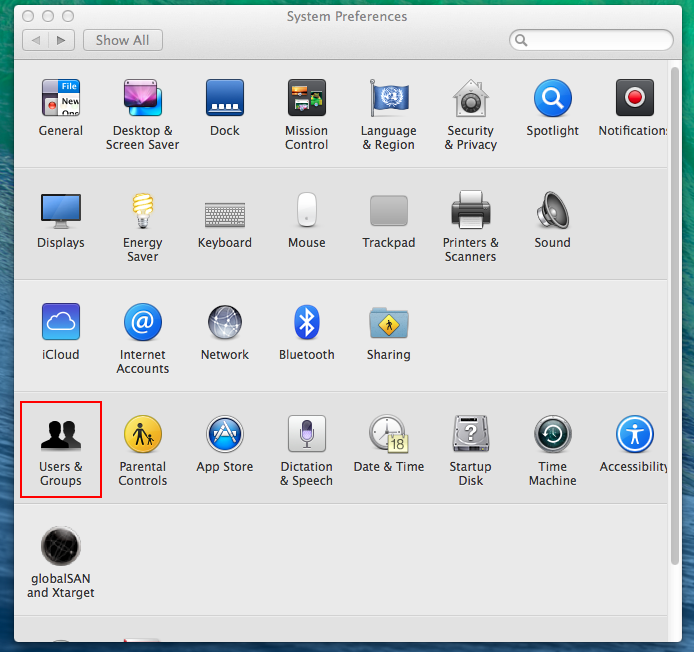
- Then go to Users and Groups. On lower versions before OS Maverick, choose Accounts.
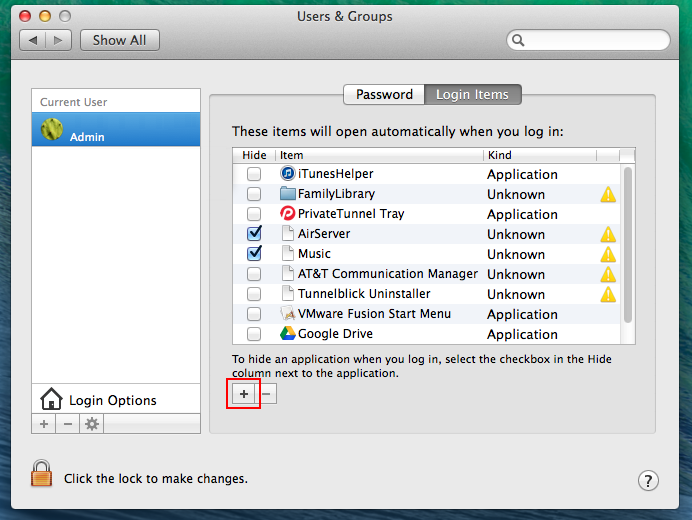
- Once in Users & Groups, click on the Login Items tab and press the + symbol at the bottom of the list. For older versions before OS Maverick, drag the share from your desktop or Finder window into the Login Items list to add the share on the list.
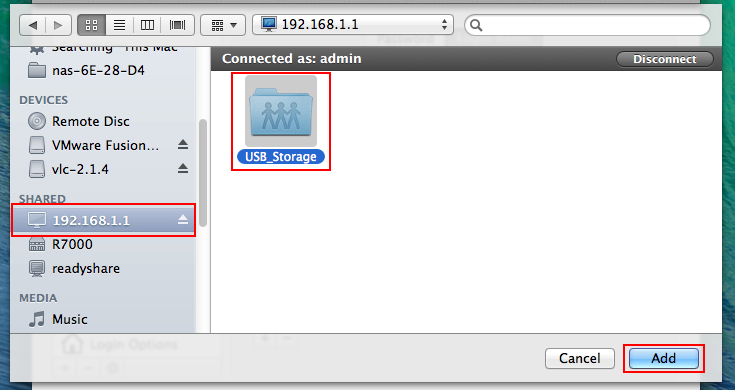

- If your share requires authentication, it might be possible to add the user name and password into your keychain with the check box in the authentication window. Some shares do not work with the keychain though.
- To solve the issue of a Finder window showing the network drive each time you log in, you can also check the Hide box in the Login Items list.
Last Updated:07/07/2025
|
Article ID: 19948