

Fixed Issues:
- Multicast packet with destination MAC address of 01:80:c2:00:00:1c and Ethernet type of 0x88CC causes loop in properly converged STP topology.
- Debugging URL of ‘devshell’ is accessible without authentication.
- Continuous "NIM: out of bounds usp used U=1, S=0 P=13 - port too large" errors are logged while loading the device view on WEB GUI.
Limitations
- Packet counter of 10G port does get incremented if packets with frame size greater than 64 bytes and Ether-Type set to “none”. This should not have any impact on real application since L2 packets should have valid ether-type and length information.
Notes:
- The released zip contains switch firmware (xs712t-v6.1.0.36.stk) and MIB files. Please unzip the file to extract the switch image for firmware upgrade.
Upgrade Procedure:
- Download the new firmware 6.1.0.36 from NETGEAR product support Website and store it in local PC, and remember its location in the PC’s file system. Then unzip it to get the switch image “xs712t-v6.1.0.36.stk”.
Download Link: http://www.downloads.netgear.com/files/GDC/XS712T/XS712T_V6.1.0.36.zip
- There are four methods to upgrade the new firmware from PC to the switch.
- HTTP
- TFTP
- USB
- SCC (Smart Control Center)
Below are the steps to upgrade the firmware via HTTP, which is the most convenient method. For the other three methods, please check the IG and SW User Manual for details.
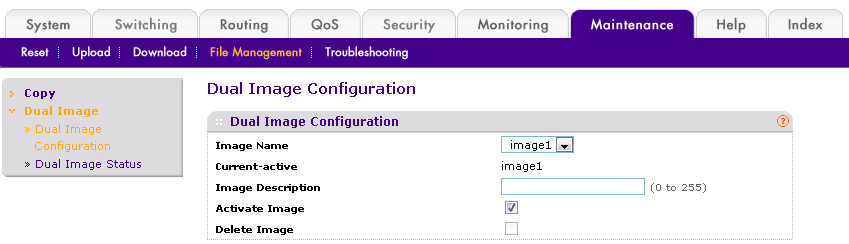
- To use HTTP method, go to GUI page “Maintenance > File Management > Dual Image > Dual Image Configuration”, find the backup (next-active) image.
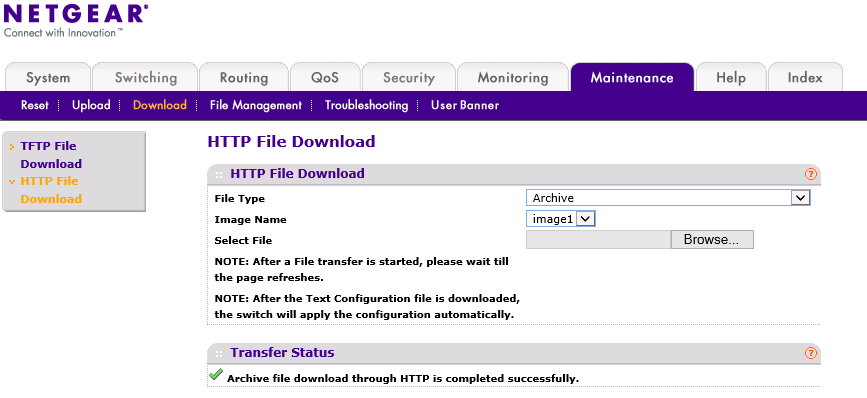
- Suppose the backup-image is image1, then go to “Maintenance > Download > HTTP File Download”, set File Type as ‘Archive’, set Image Name as ‘Image1’, select the firmware file ‘xs712t-v6.1.0.36.stk’ stored in local PC via Browser button, then click Apply button to start firmware downloading.

The download will take several minutes. Do not power cycle the switch before and the success message shows up as below.
- Go to GUI page “Maintenance > File Management > Dual Image > Dual Image Configuration”, set ‘Image Name’ with Image1; check the checkbox of ‘Activate Image’, then Apply.
Note: This guideline just takes ‘image1’ as example for firmware download. You can also download the image to ‘image2’.
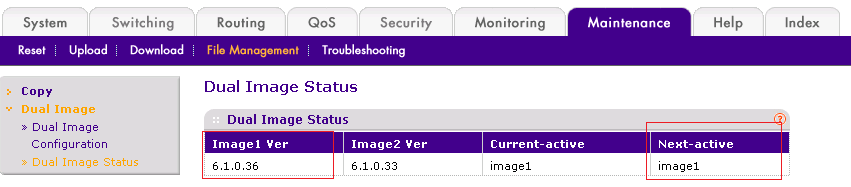
- Go to GUI page “Maintenance > File Management > Dual Image > Dual Image Status”, to double check 6.1.0.36 is correctly downloaded to image1 and image1 is the ‘next-active’ image. If not, go back to step 3 to download the switch image again.
- Go to GUI page ‘Maintenance > Reset > Device Reboot’, check the checkbox then click Apply button.

The restart may take several minutes, do not power cycle or reboot the switch before the process is complete.
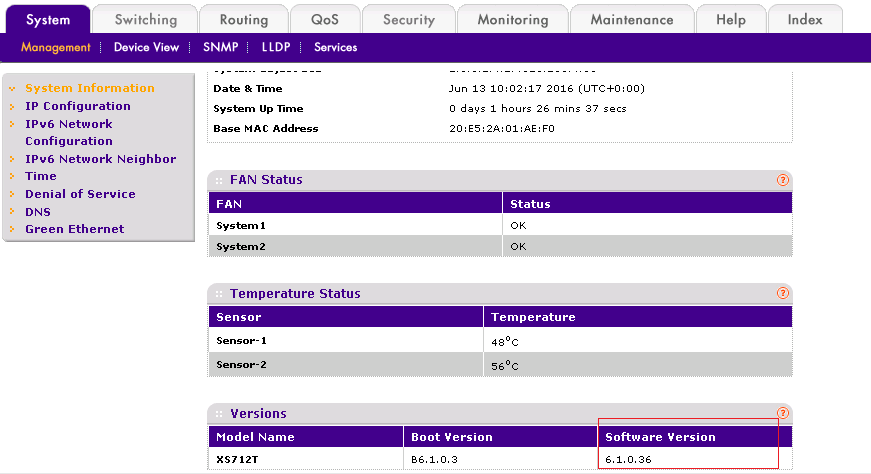
- After the switch is restarted, login the switch to double check whether the FW is upgraded correctly, via GUI page of “GUI page System > Management > System Information”.
Last Updated:10/17/2025
|
Article ID: 000038438