

This article describes how to generate a public/private SSH key pair and log-in to the ReadyNAS through SSH using these keys.
Note: The use of SSH on ReadyNAS is for advanced users only. Support may be denied if you use SSH on your ReadyNAS to run commands. See SSH access policy.
In this example, we use PuTTYgen to generate the public/private key pair and we use PuTTY to log in to the ReadyNAS.
PuTTYgen and PuTTY are free tools available from http://www.chiark.greenend.org.uk/~sgtatham/putty/
- Run PuTTYgen.exe
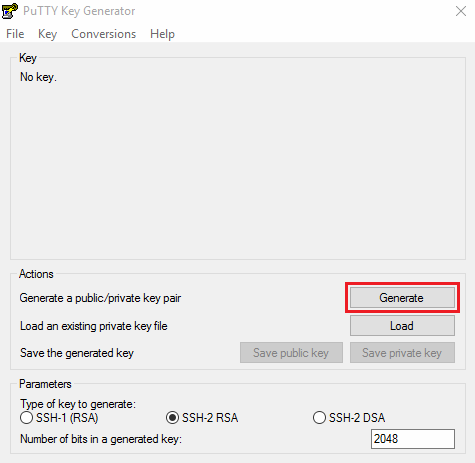
- Click Generate:
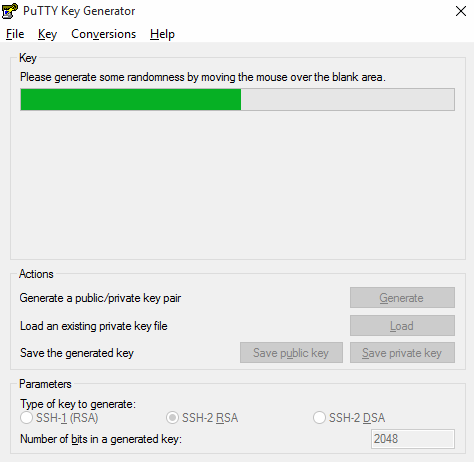
- When prompted, move the mouse randomly over the blank area until the keys generate:
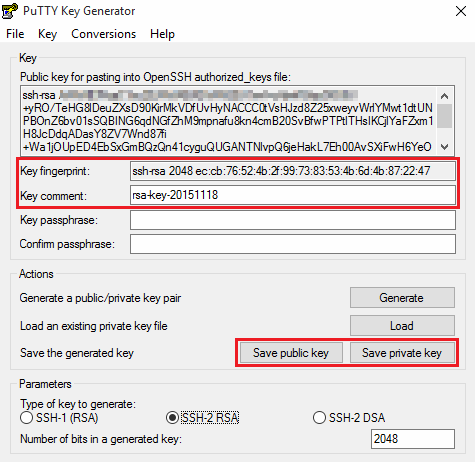
- When the keys are generated, enter a passphrase (optional) and then use the Save public key and Save private key options to save the keys to a safe location:
- Close PuTTYgen.
- On the ReadyNAS admin page, go to System > Settings > Services.
- Click on SSH.
- When prompted with the support warning, click Yes if you are sure you want to proceed.
- Select Enable SSH. Enable password authentication should be de-selected.
- Click Apply.
- Go to Accounts > Users.
- Click on an account and select Settings. Note: The admin and root accounts are linked, so by adding a key for the admin account, it will be added for the root account.
- Select SSH.
- Click Import Public Key.
- Browse to the public key saved in step 4 and then click Upload.
- Enable Allow shell access.
- Deselect the RSYNC ONLY checkbox.
- Click Apply:

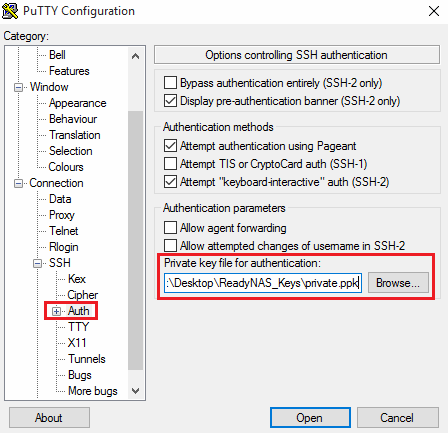
- Now open PuTTY, go to Connection > SSH > Auth. Browse to the private key file generated in step 4:
- In the same PuTTY window, go to Session, enter the IP address or hostname of the ReadyNAS, set the Connection type to SSH and press Open:

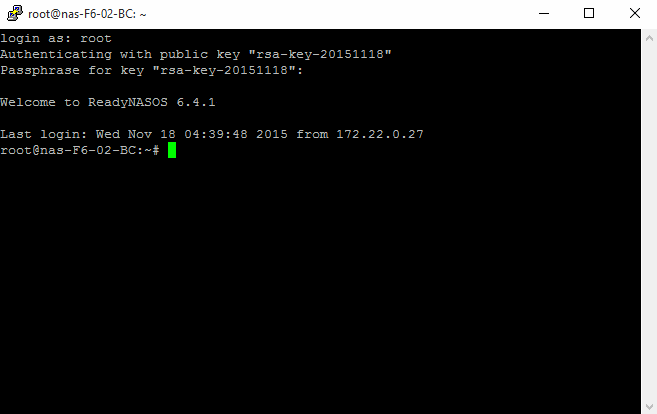
- Enter the username (root in this case) and enter the passphrase for the private key (if specified in step 4). You are logged in using the public/private key pair:
Last Updated:07/08/2025
|
Article ID: 30070