

This article helps you install your Nighthawk router in AP mode. During the initial setup of your router, NETGEAR genie helps you:
- Detect what type of internet connection you have.
- Detects if the router is connected to an existing network or gateway.
- Once NETGEAR genie detects that there is an existing network, it gives you the option to set your Nighthawk router to Access Point (AP) mode or to router mode.
To install the Nighthawk router in AP mode:
- Connect your Nighthawk router to your network.
- Power on your Nighthawk router and wait for the lights to become stable.
- Open an internet browser such as Safari, Internet Explorer, Mozilla Firefox or Google Chrome.
- Go to the address bar and type http://www.routerlogin.com/ or http://www.routerlogin.net/.
- Wait for NETGEAR genie to finish detecting whether there is an existing router in the network.
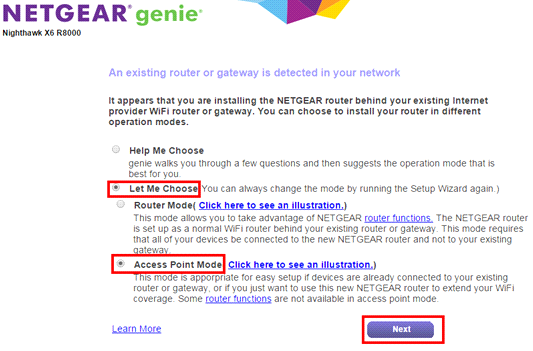
- Select Let Me Choose, then Access Point Mode. Click Next to proceed.
-
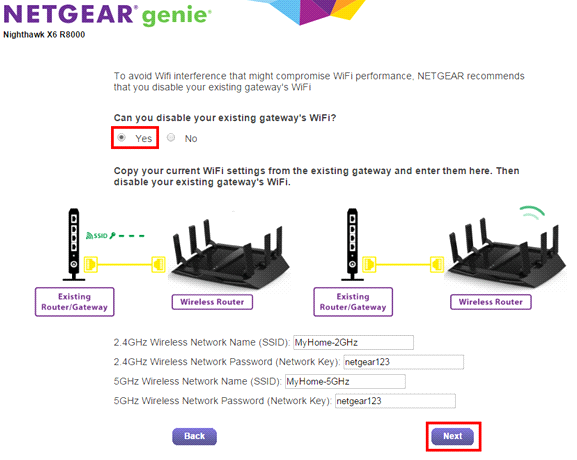
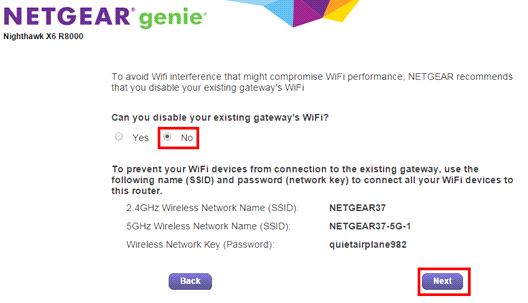
Choose the setting that applies for the next step (disabling your existing gateway's WiFi):
Select Yes if you can disable your existing gateway’s Wi-Fi. Enter your existing gateway SSID and passphrase in the SSID and passphrase fields. You will then need to manually disable your existing gateway’s Wi-Fi. For instructions on doing this, refer to your gateway's user manual.
Select No if you cannot disable your existing gateway's Wi-Fi.
- Wait for the router to finish rebooting.
- Click Next to finish the setup.
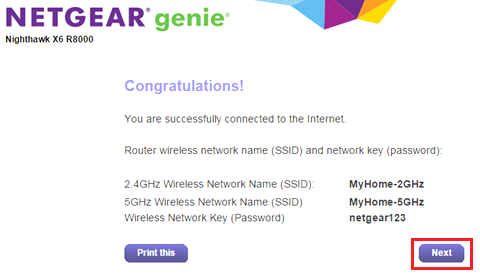
Your Nighthawk router is now installed as an Access Point.
Last Updated:07/07/2025
|
Article ID: 30025