

In this article, we describe the method on connecting your ReadyNAS to VMware ESX as a datastore using an NFS share.
You can also setup ReadyNAS OS 6 as an iSCSI datastore
Using vSphere Web Client?
Note: This document is applicable to VMware ESX 4.1 or newer.
ReadyNAS NFS share as a Datastore
Enabling the NFS protocol
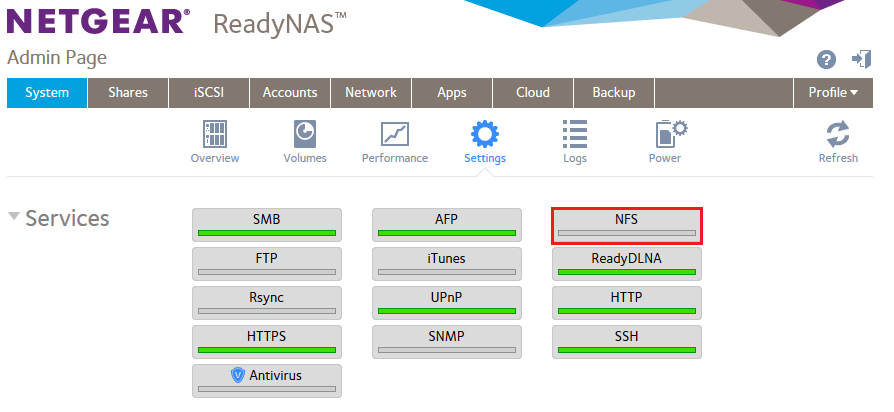
- Go to System > Settings
- Click NFS button to open the NFS properties page
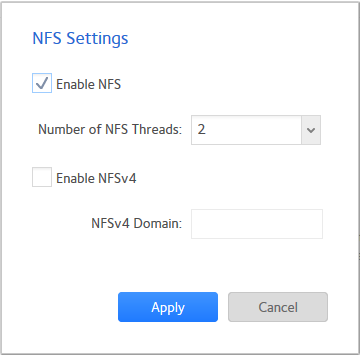
- Select Enable NFS and click Apply
Enable NFS on a new share
- Go to Shares.
- Click New Folder.
- Enter new share properties
- Select NFS > click Create

To enable NFS on an existing share that will be used as the VMware ESX Datastore
- Go to Shares
- Locate the share and left click on it once
- Select the setting button
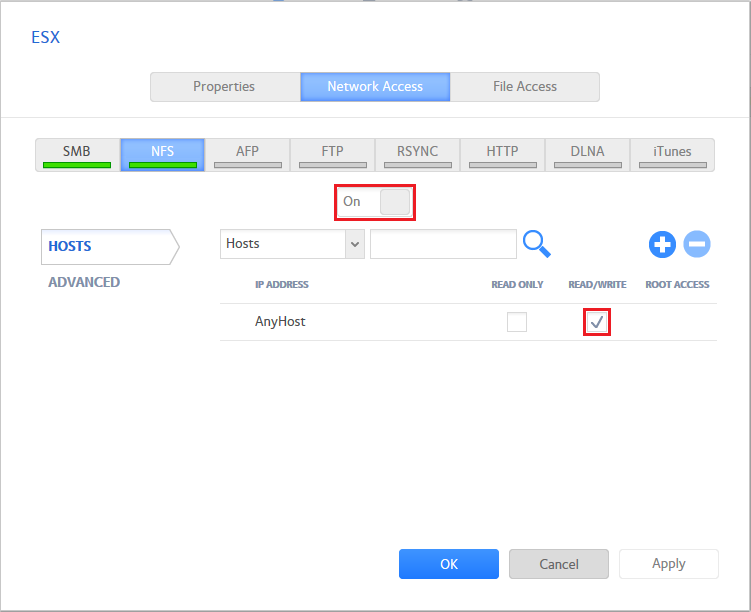
- Go to Network Access > NFS
- Turn toggle On
- Allow read/write access (in this example, we allow access to all hosts)
- Additional security settings can be applied on this page, such as root privilege
vSphere: Add the new NFS datastore
- Open up the vSphere client.
- Navigate to the Configuration tab, and select the Storage option under the Hardware section.
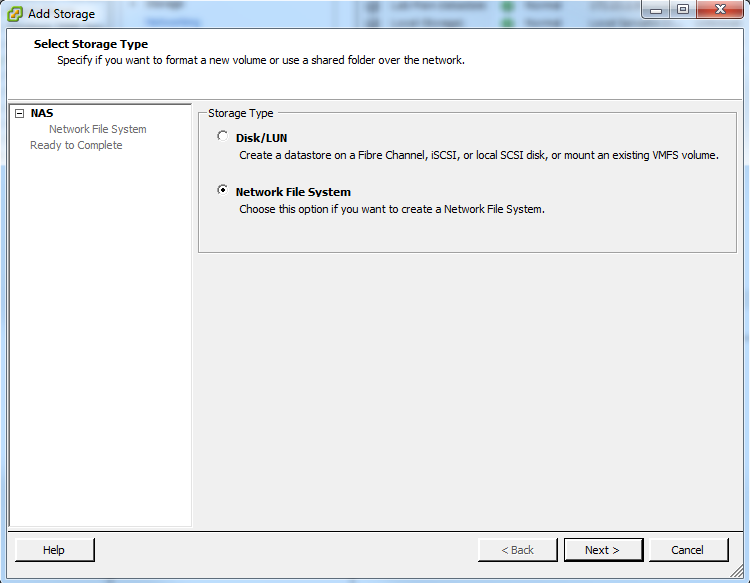
- Click on Add Storage in the upper-right corner.

- For Storage Type, select the Network File System option. Click Next
- Fill in your ReadyNAS details; IP/Hostname, Share Name.
- Choose a name for your datastore to be referenced in ESX. Click Next.
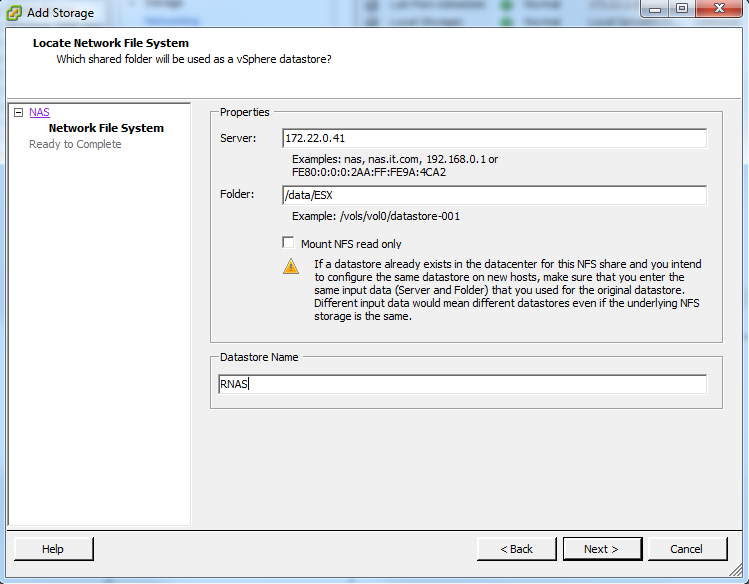
- The next page will display the summary. If everything looks good, click Finish.

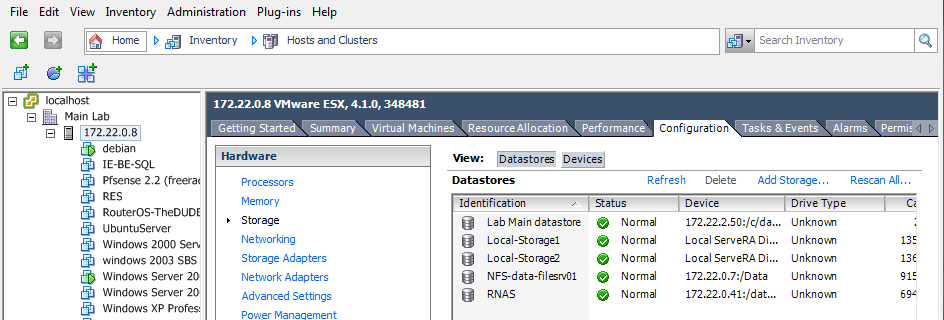
- If no errors occurred (invalid hostname/share, permissions), you should now see your ReadyNAS share displayed in the vSphere client.
vSphere: Using the new datastore
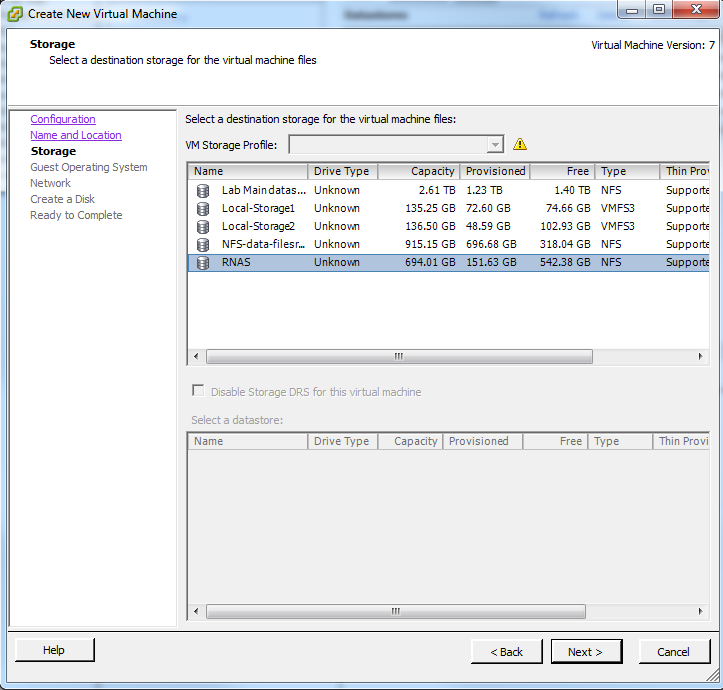
- Now that the ReadyNAS is connected to your ESX server, you can now create new Virtual Machines, and store their files directly on the ReadyNAS!
Last Updated:10/17/2025
|
Article ID: 28431