

This article describes how to configure the WC7520 and WC7600 wireless controllers for RADIUS authentication with the Microsoft Windows Server 2012 Network Policy Server. The article also describes how to use Active Directory Certificate Services and how to push wireless profiles to domain-joined computers that use a group policy.
The following services must already be installed on the Windows Server 2012R2:
- Active Directory Domain Services (AD DS)
- DNS
- DHCP
For the installation of additional services on Microsoft Windows Server 2012R2, the following requirements must be met:
- Install Active Directory Certificate Services (AD CS) and Network Policy Server (NPS).
- For AD CS, choose Certification Authority & Certification Authority Web Enrollment from the available options. For the purposes of this article, all options were left as default.
- For NPS configuration, click the Tools - Network Policy Server button. When the NPS console opens, click the Action - Register server button in Active Directory.
Configure the Network Policy Server (NPS) / RADIUS Server
To configure the Network Policy Server (NPS) / RADIUS server:
1. On the Windows 2012R2 server, open the NPS console.
2. On the left hand pane, click NPS (Local).
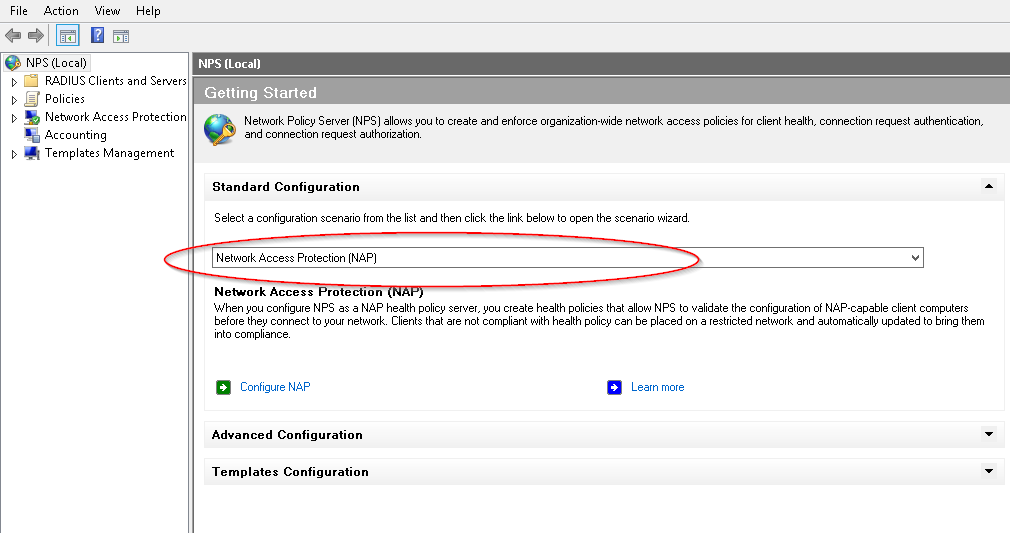
3. In the menu circled in red below, select RADIUS server for 802.1x wired or wireless connections and then click the Configure 802.1x button.
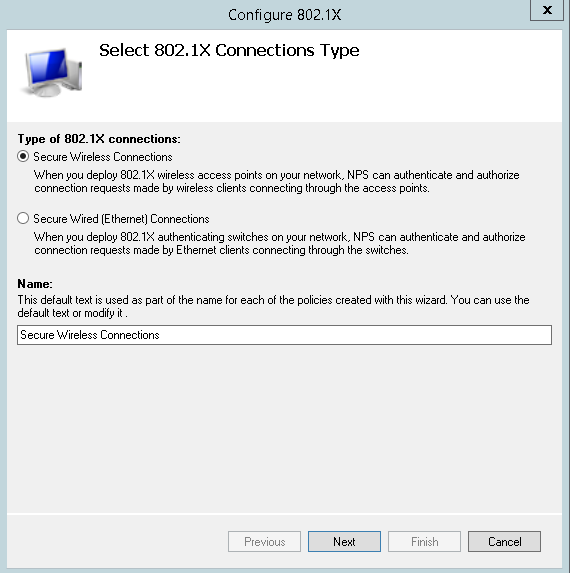
4. In the next screen, select the Secure Wireless Connections radio button.
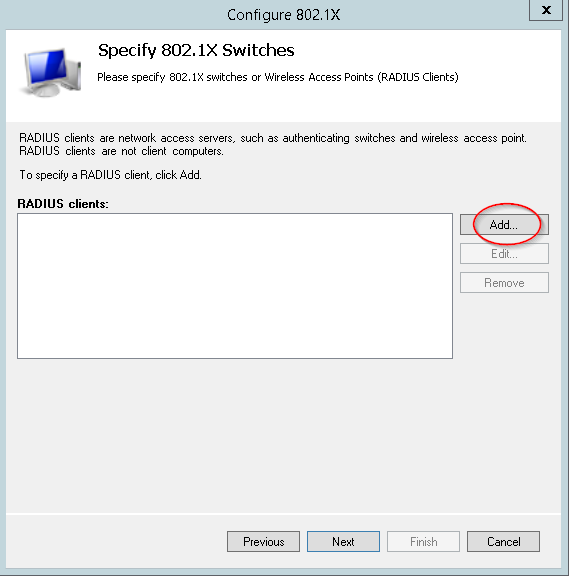
5. In the next screen, specify a RADIUS client.
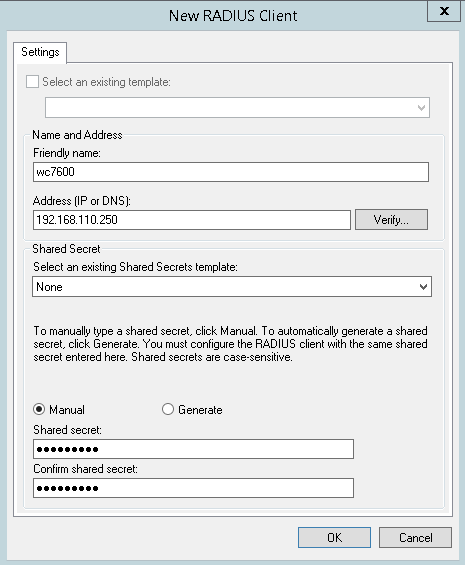
In the case of WC7520, a RADIUS client must be added for each access point, while in the case of WC7600 a RADIUS client must be added for the controller only. Ensure that the shared secret entered here is the same shared secret that will be entered into the wireless controller (as described later).
6. In the next screen, as the type, select Microsoft: Protected EAP (PEAP) and to review the settings, click the Configure button.
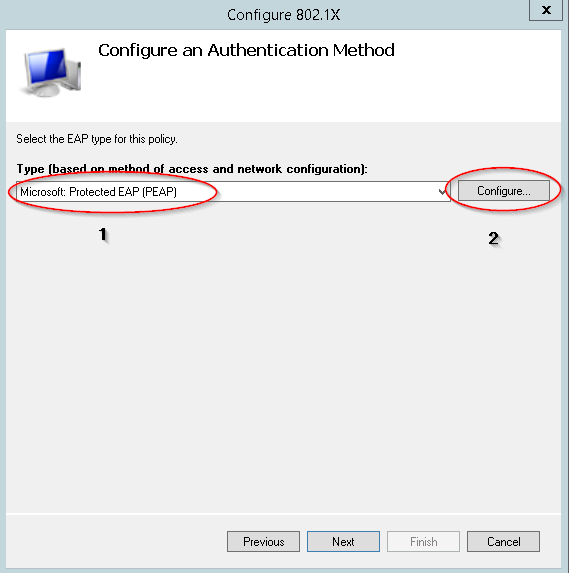
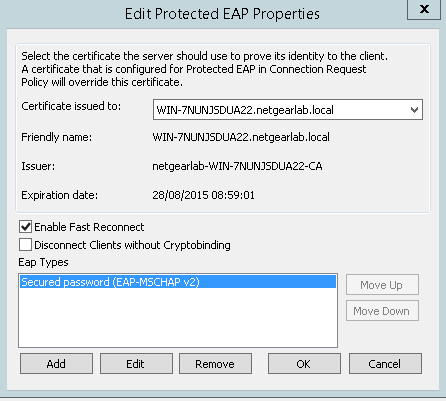
7. Click the OK button, then click the Next button, and finally click the Finish button.
Configure the Wireless Controller
To configure the wireless controller:
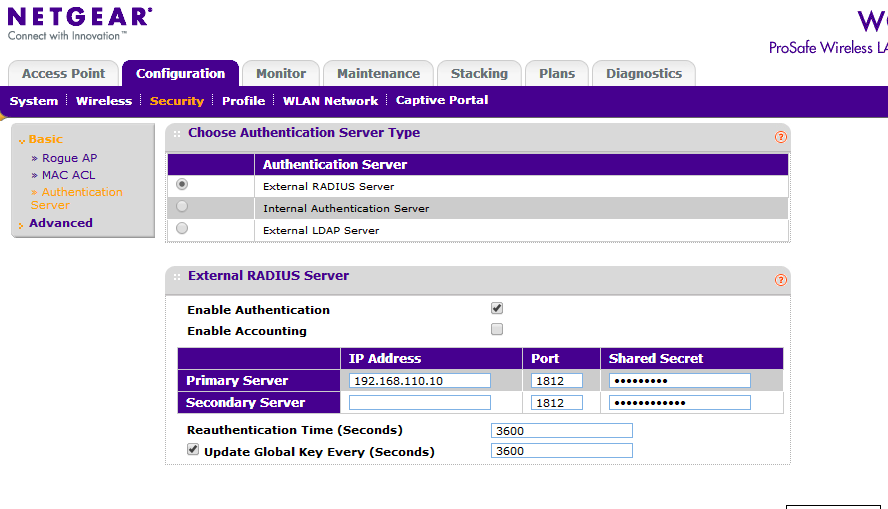
1. On the admin interface, go to Configuration > Security > Authentication Server.
2. Select External RADIUS Server.
3. Enter the IP address of the Windows 2012R2 server and the same shared secret entered in the NPS set-up above. Then click the Apply button.
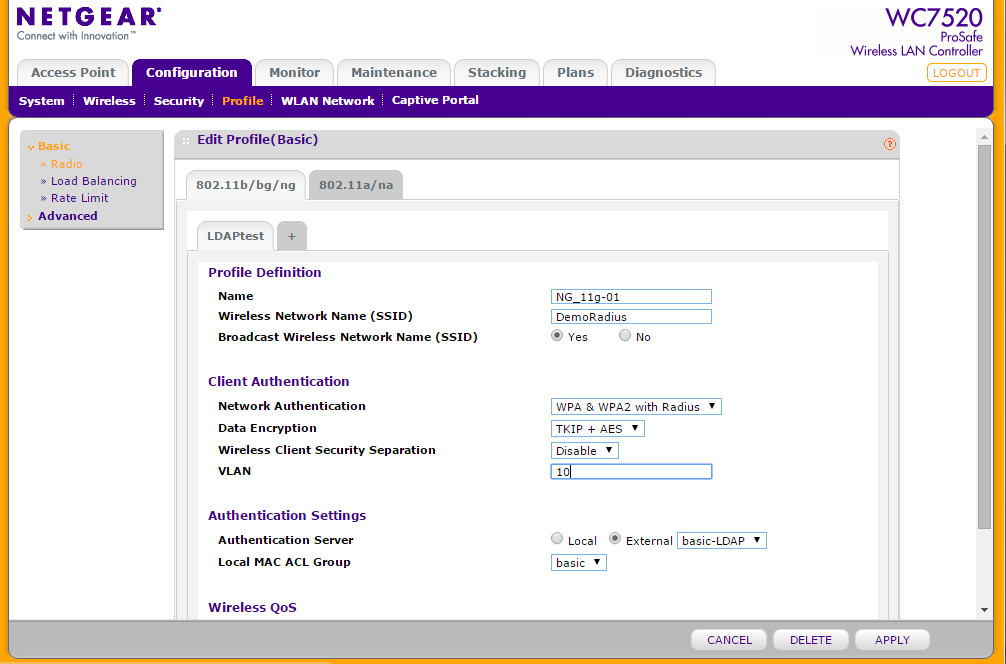
4. Next, go to Configuration > Pofile and add a profile with the desired SSID.
Make note of the SSID as it will be needed in the group policy settings later.
5. Set the Network Authentication to WPA & WPA2 with RADIUS and set Authentication Server to External / basic-Auth.
6. Configure other settings as needed and click the Apply button.
Configure the Group Policy for the Wireless Profiles
To configure the group policy:
1. On the 2012R2 server, open Group Policy Management.
2. Expand the tree on the left hand pane until you find Default Domain Policy.
3. Right-click on Default Domain Policy and click the Edit button.
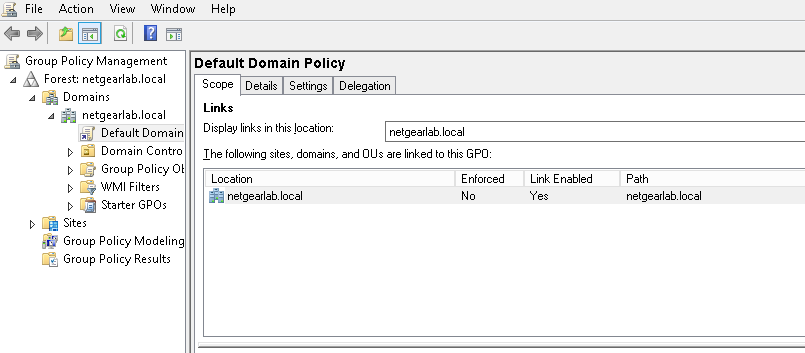
4. In the Default Domain Policy, go to Computer Configuration > Windows Settings > Security Settings > Wireless Network (IEEE 802.11) Policies.
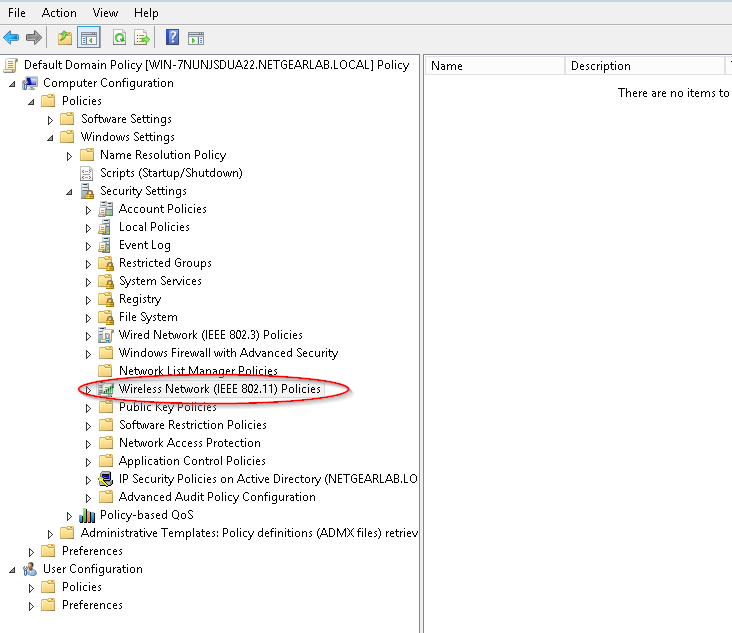
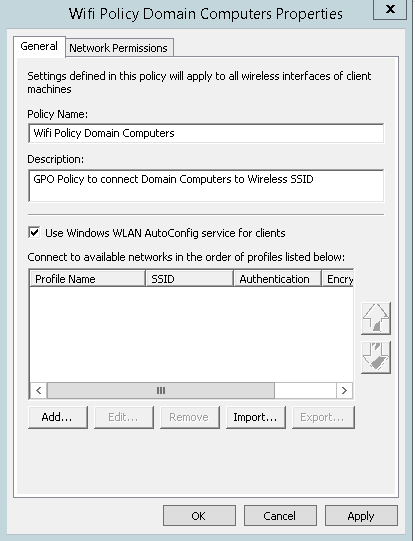
5. Right-click on Wireless Network (IEEE 802.11) Policies and select Create a new Wireless Network Policy for Windows Vista and Later Releases.
6. Give the policy a name and a description and then click the Add button.
7. Select Infrastructure as the network type.
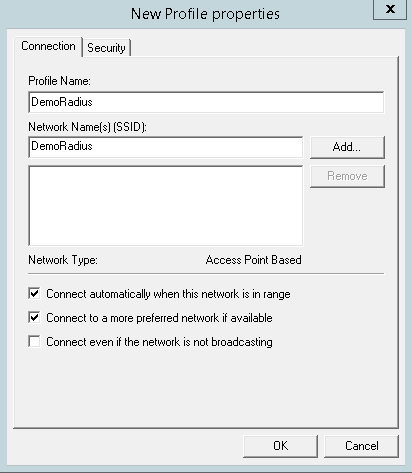
8. In the Profile Name and Network Name(s) SSID) fields, enter the SSID that was configured in the WC7520 above.
In this example, the SSID is DemoRadius.
9. When finished, click the Add button.
10. Next, click the Security tab.
11. Next to the Microsoft: Protected EAP (PEAP) selection, click the Properties button.
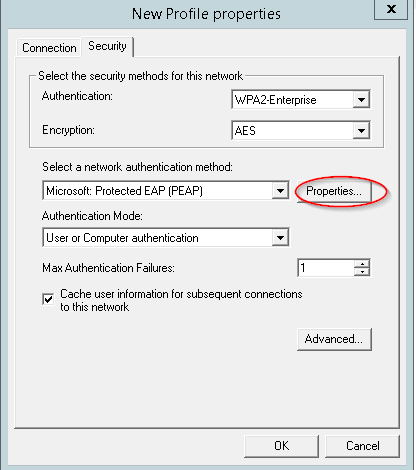
12. In the Protected EAP Properties window, select Verify the server's identity by validating the certificate and select the certificates from the list with the same name as the Windows server.
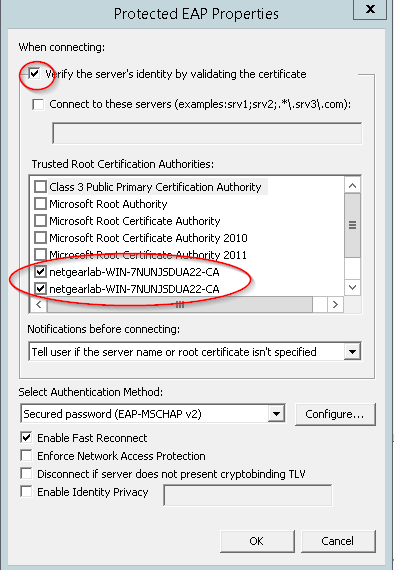
13. Click the OK button. Click the OK button again and then click the Apply button.
The group policy for the wireless profile is now configured.
To receive the group policy from the domain, the client computer first needs to be put on a wired connection because the client computer must be joined to the domain. After logging the computer in to the domain, search for the SSID that was configured above and click connect. The client connects to the wireless network.