

In the case of a failed disk, the system provides email alerts and status messages about the need to replace a disk. Your storage system supports hot-swap bays, so you do not need to power down your system when replacing a disk.
Use only supported disks in your ReadyNAS storage system. If you use non-supported disks, NETGEAR Technical Support will not provide assistance. For a list of supported disks, see the NETGEAR Hardware Compatibility List at http://www.readynas.com/hard_disk_hcl.
To replace a disk, follow these steps:
- Press the disk tray pull release latch.
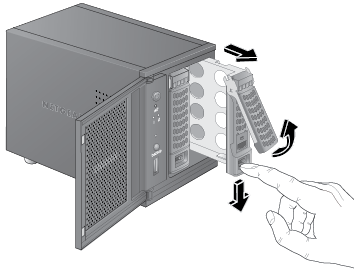
The disk tray handle pops out. - Pull out the disk tray and replace the disk.
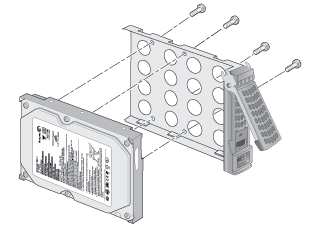
Make sure that the hard disk connectors face the interior of the disk bay. - Slide the disk tray back into the system and press the handle to secure the disk.
The volume automatically synchronizes with the new disk in the background. This might take several hours, depending on the disk size. You can continue to use your storage system, although access is slower until the volume synchronization finishes. You are notified by email when the process is complete.
Last Updated:07/07/2025
|
Article ID: 20883